1.35.0 - Rapid Platform

08/02/2024
Features
1. Hide View selection panel from a Lookup / Multi-lookup in Explorer
This feature relates to Lookup / Multi-Lookup column types and Table Views.
Lookups / Multi-Lookups are special types of columns. Not only they link tables with each other, at the user level (in Explorer), they provide the ability to:
- View all data of linked fields
- Select any data from linked fields
This is made possible by the ability to select / change Views while selecting a Lookup / Multi-Lookup value.
This can be a double edged sword.
For example - a Projects Item has a field - "Client". Client is a Lookup on "Contacts" Table which stores the information of all contacts for the organisation.
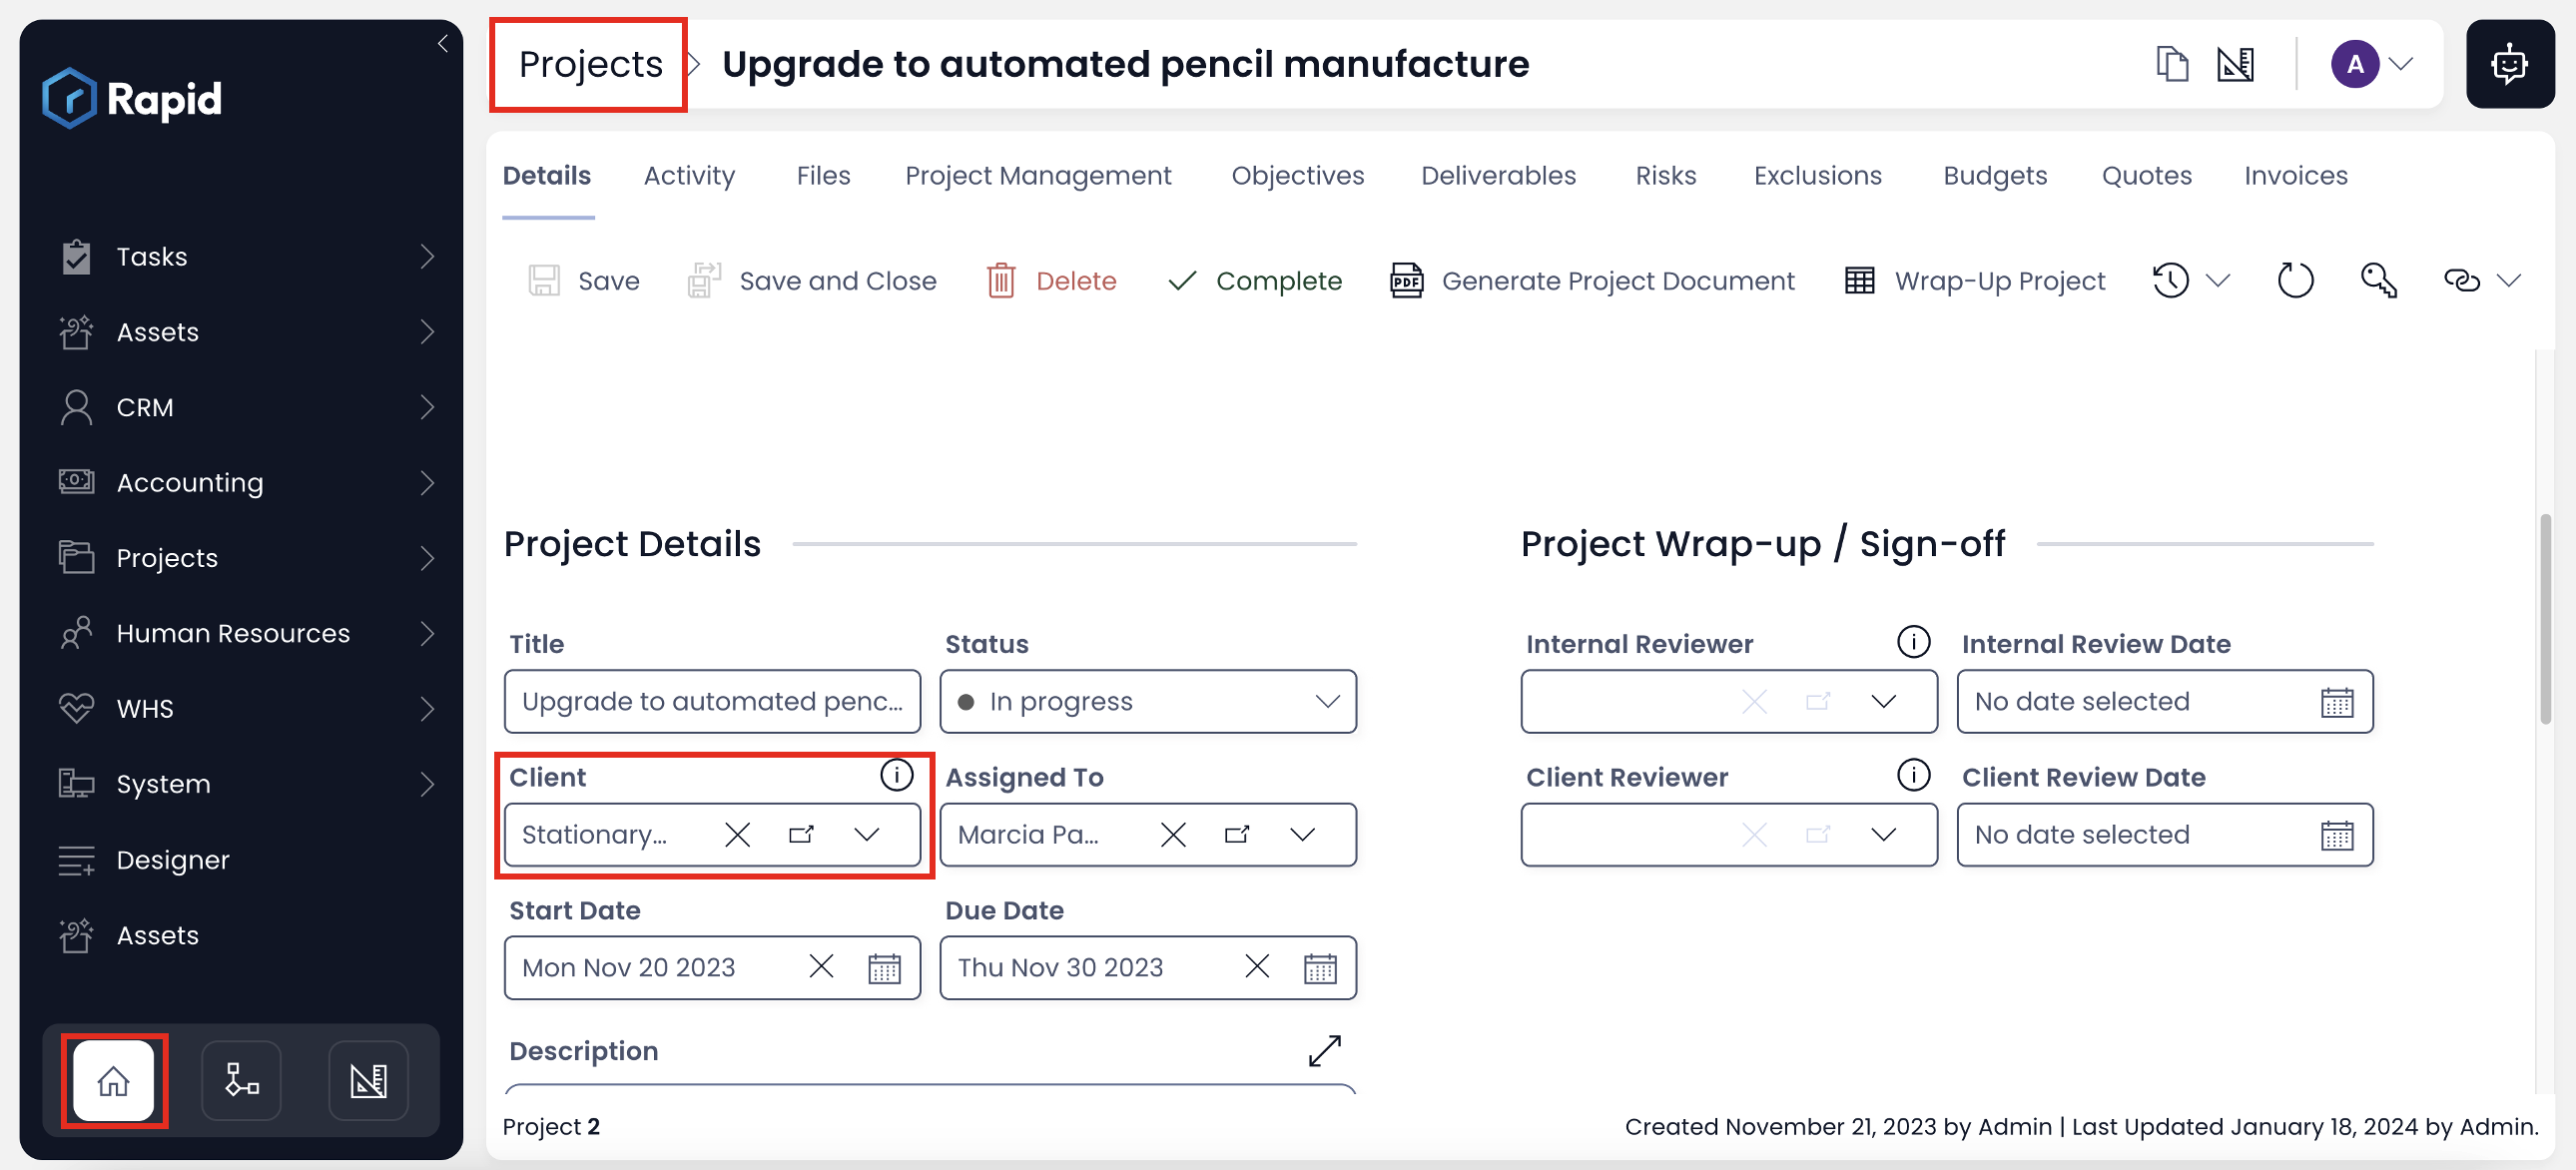
Clicking on the Lookup - Client field, the list of Contacts open in a dropdown. The right side provides the ability to change the view.
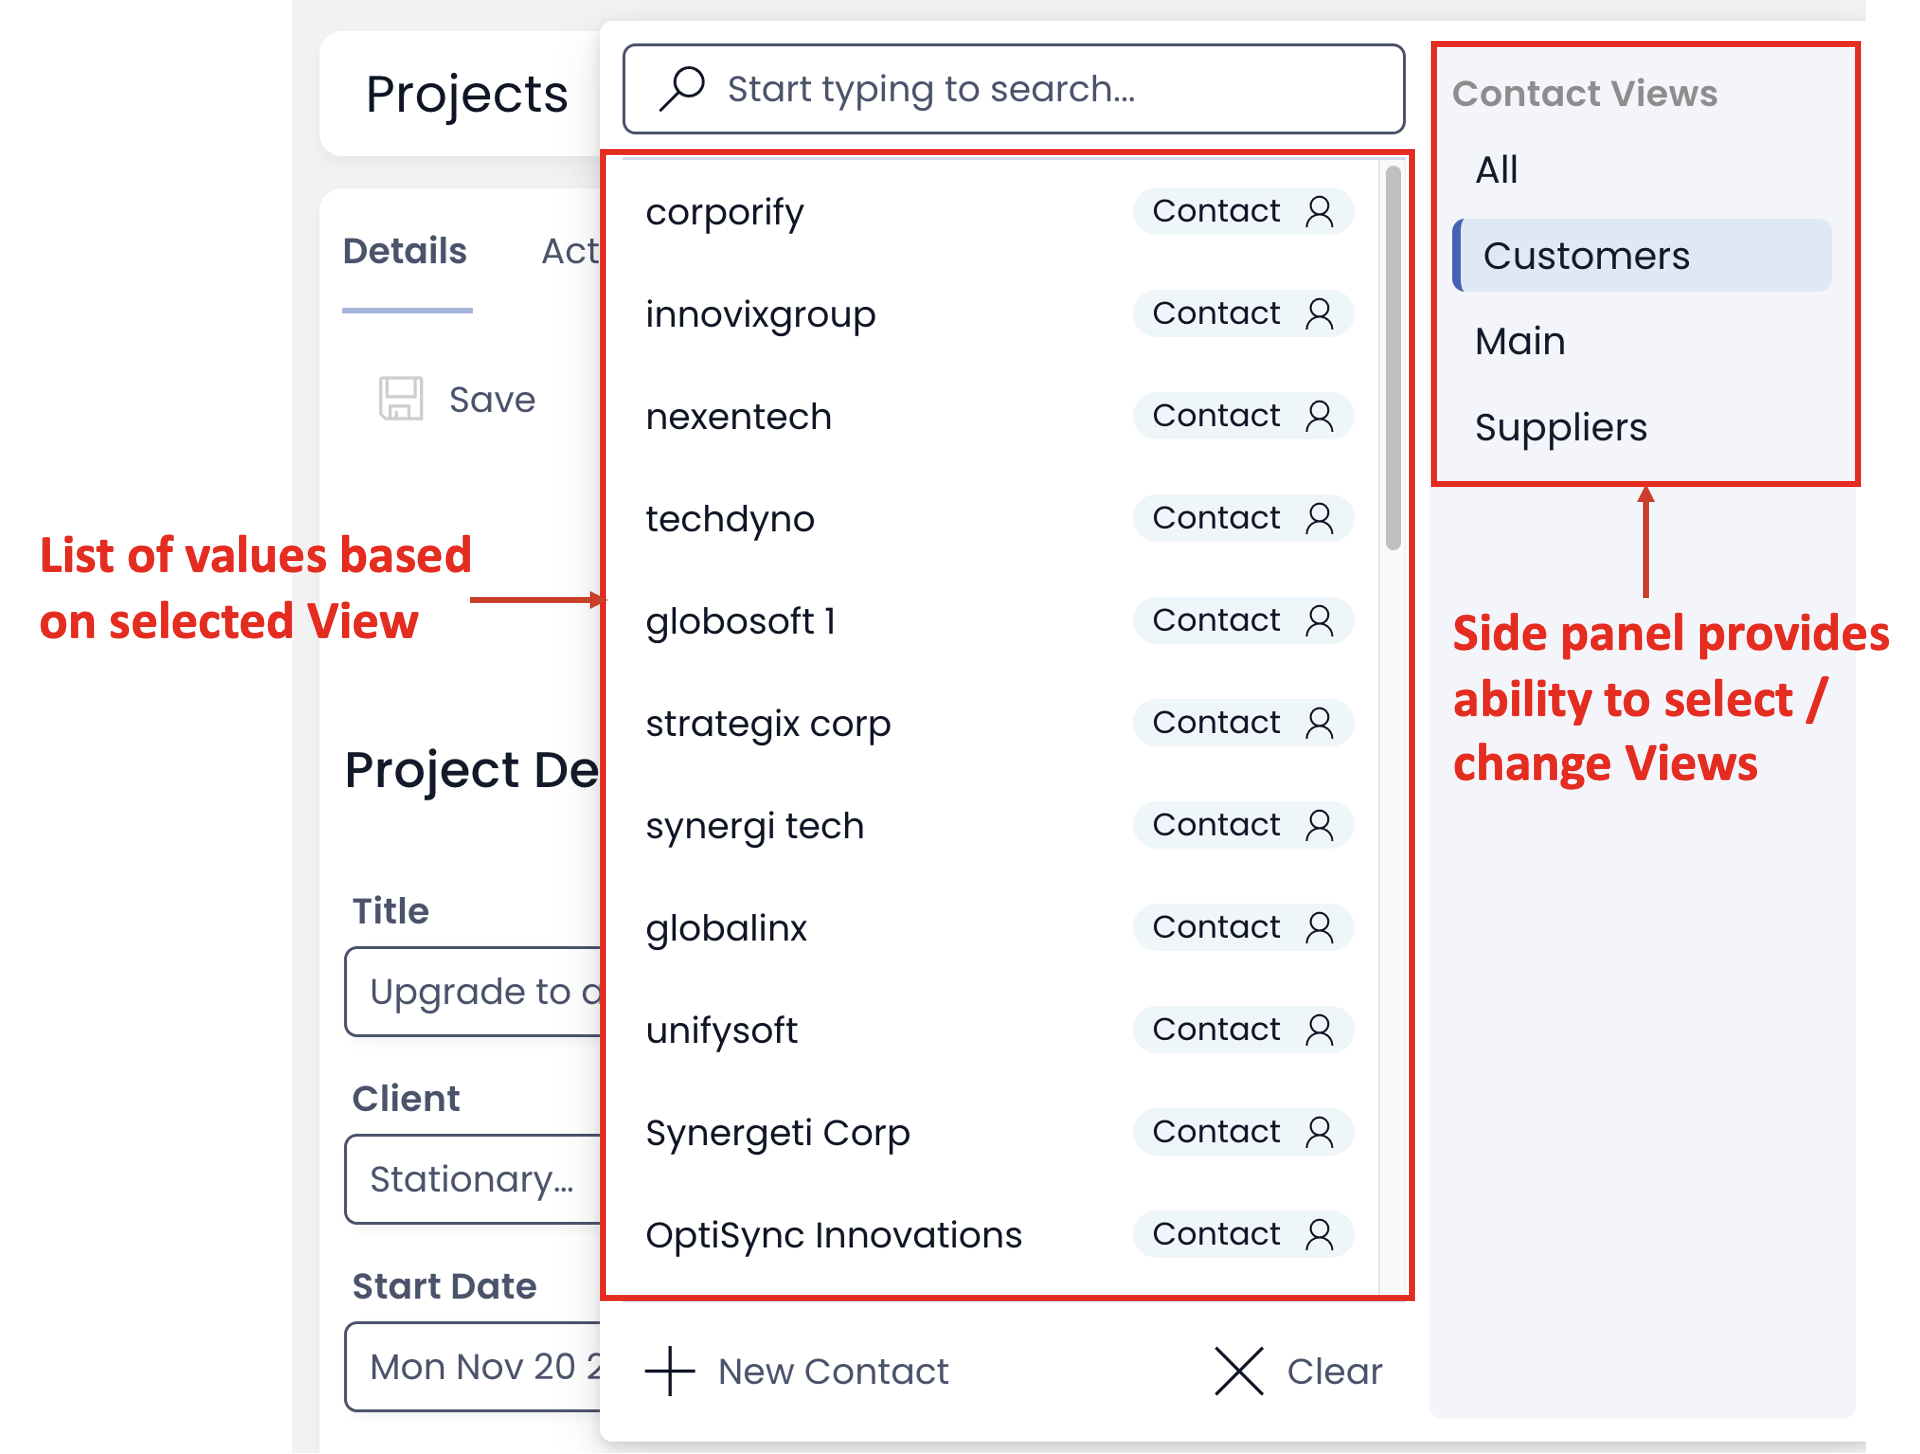
Although the field was meant to select a customer, a User can also view information on Suppliers / All contacts of the organisation. This can be a potential threat to confidentiality.
This new feature provides you with the ability to hide the View selection panel.
If the feature is set to hide the View selection panel, the user will only see results as per the default View set / Item Filter configured in Designer.
The user (in Explorer) would not be able to change the View and cannot access information from other Views.
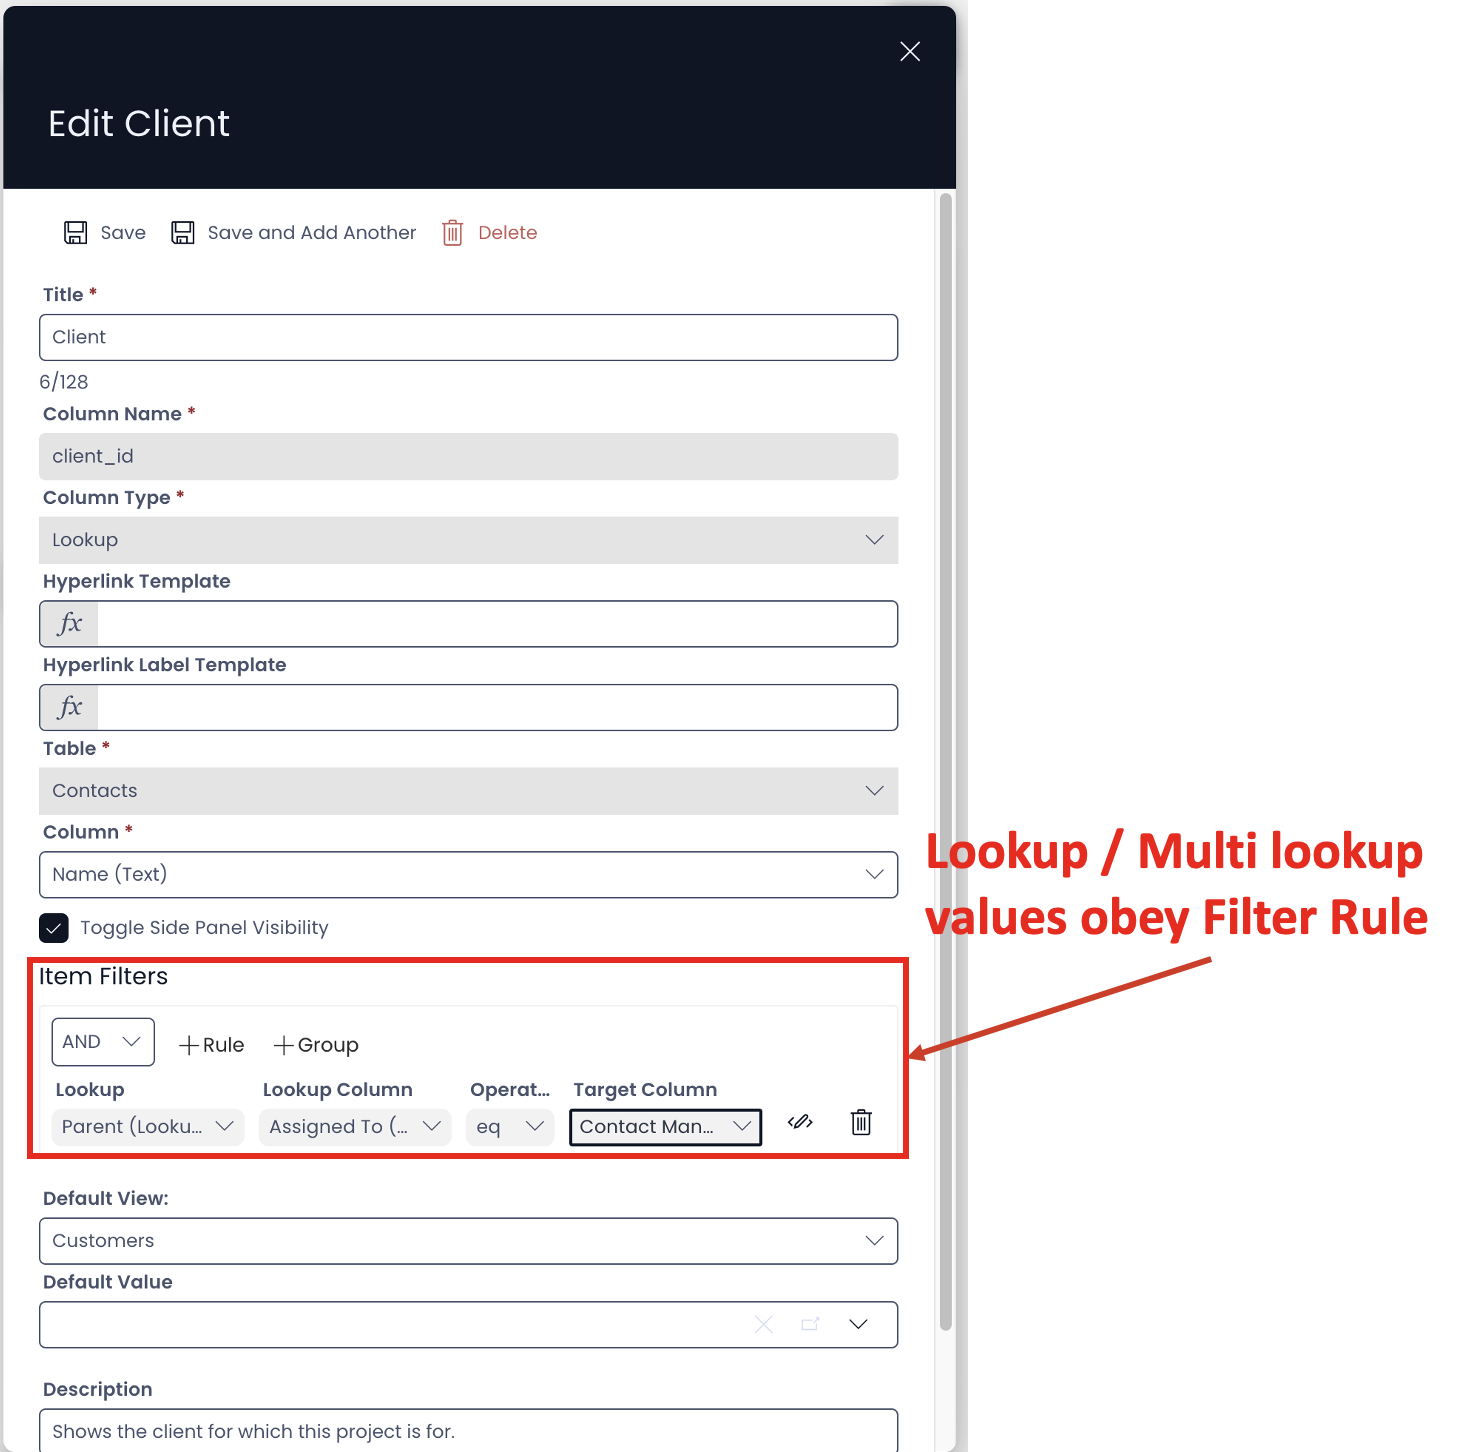
How to hide/show Views in Lookup / Multi-Lookup
Please consider the following steps:
- In Designer, go to your desired Table (where the subject Lookup / Multi-Lookup field is present)
- Go to Columns Tab
- Select the subject Lookup / Multi-Lookup field.
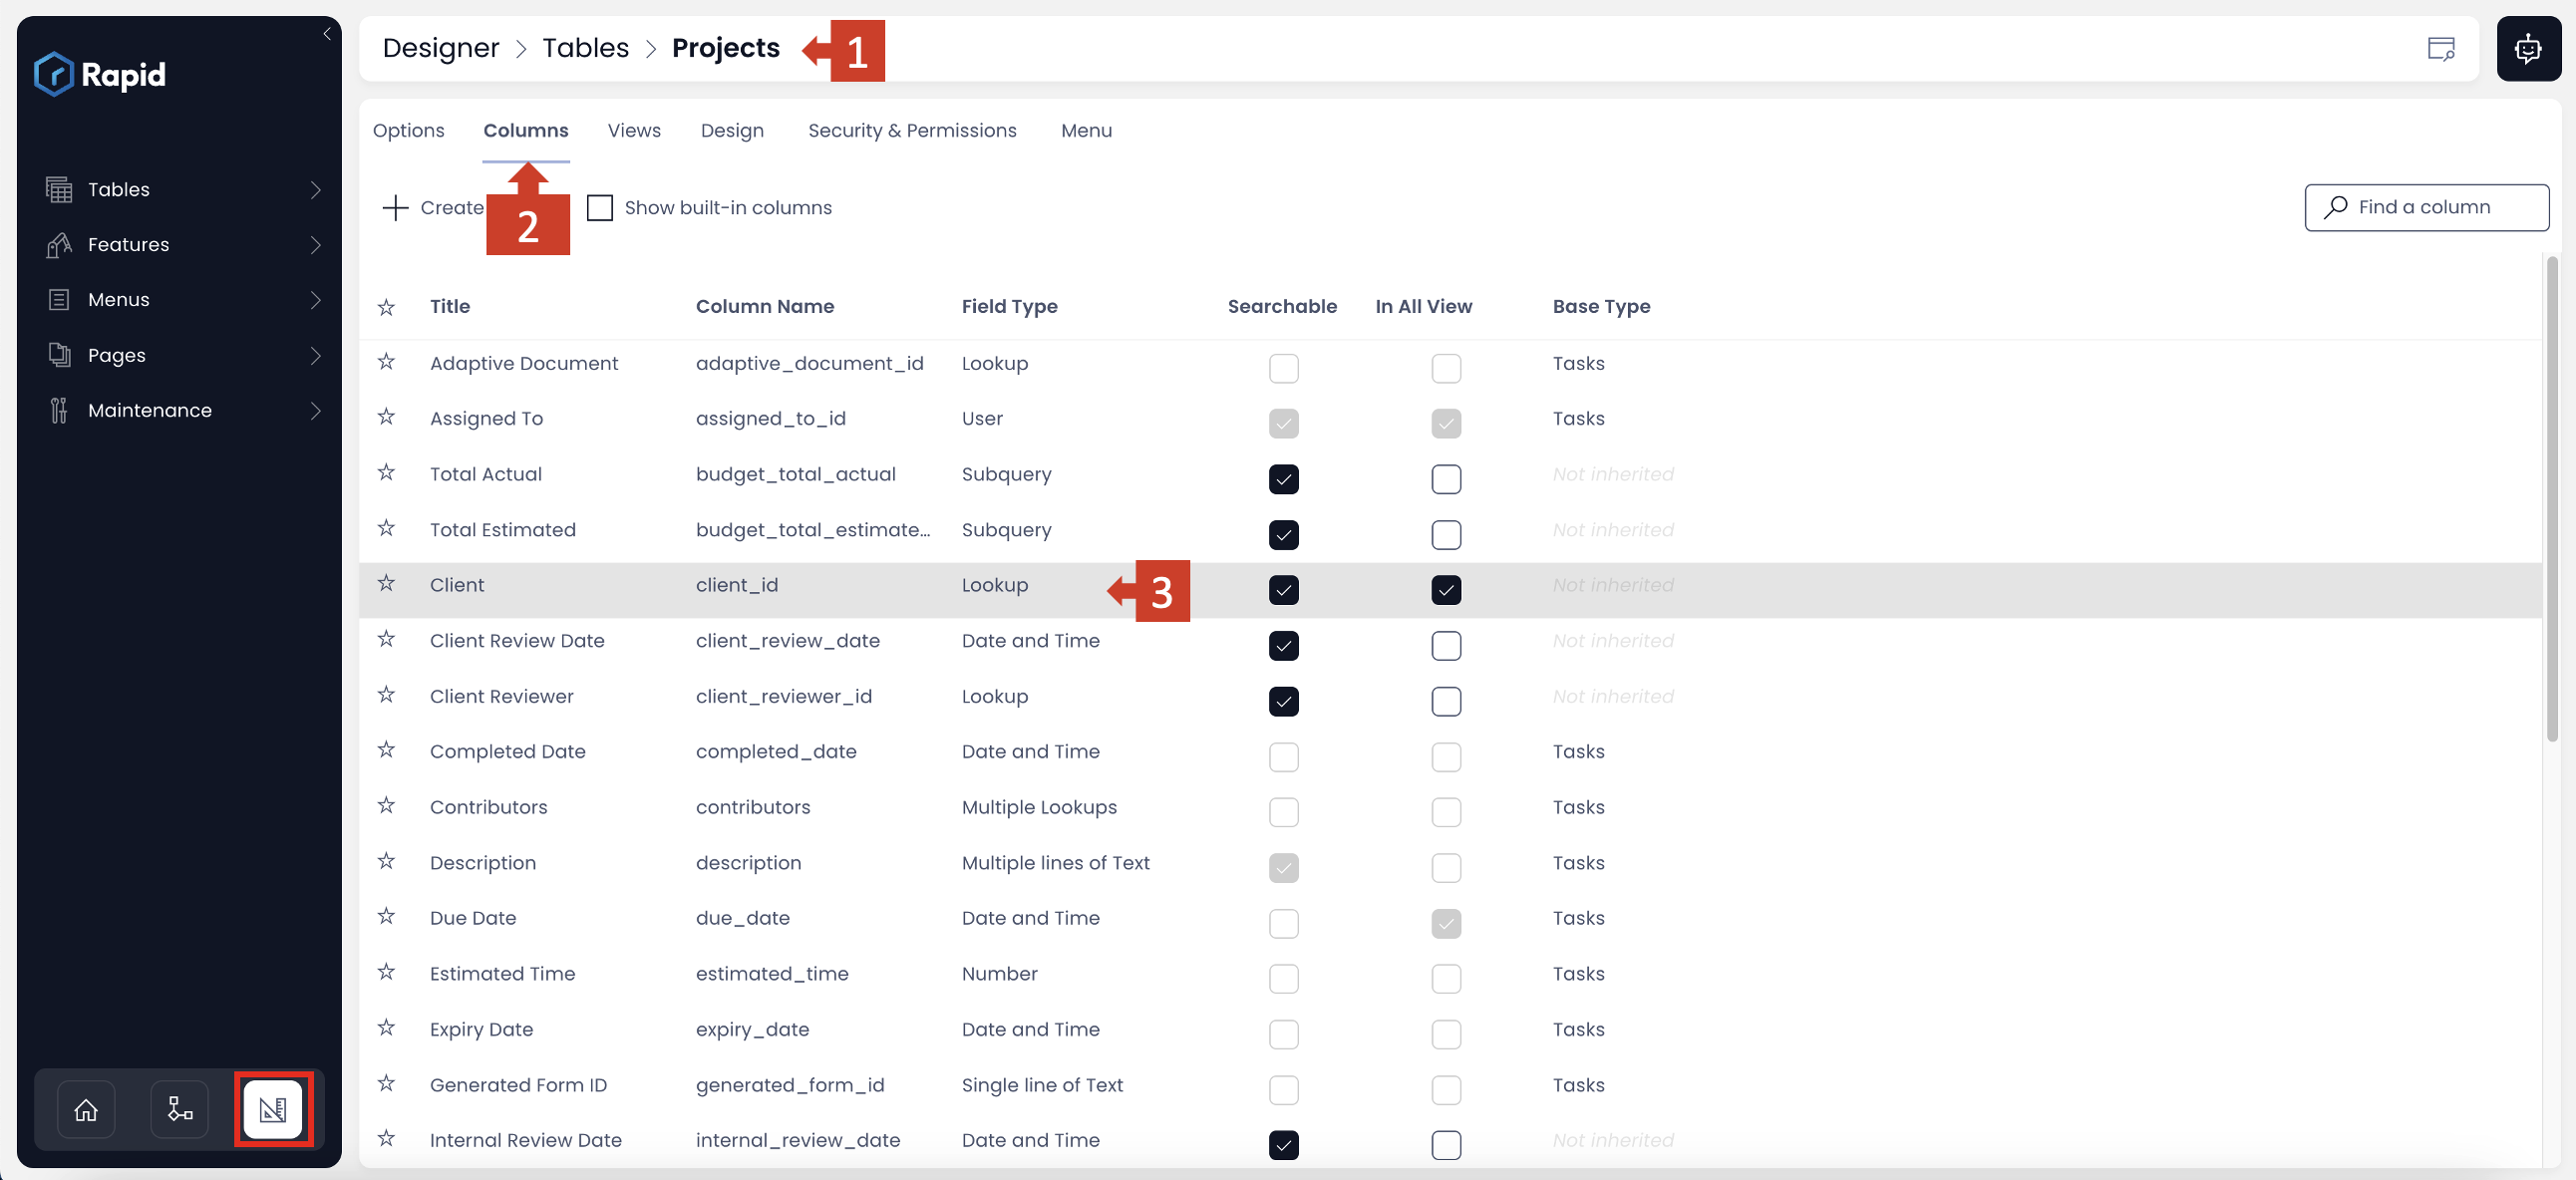
- Notice a new checkbox - "Toggle Side Panel Visibility"
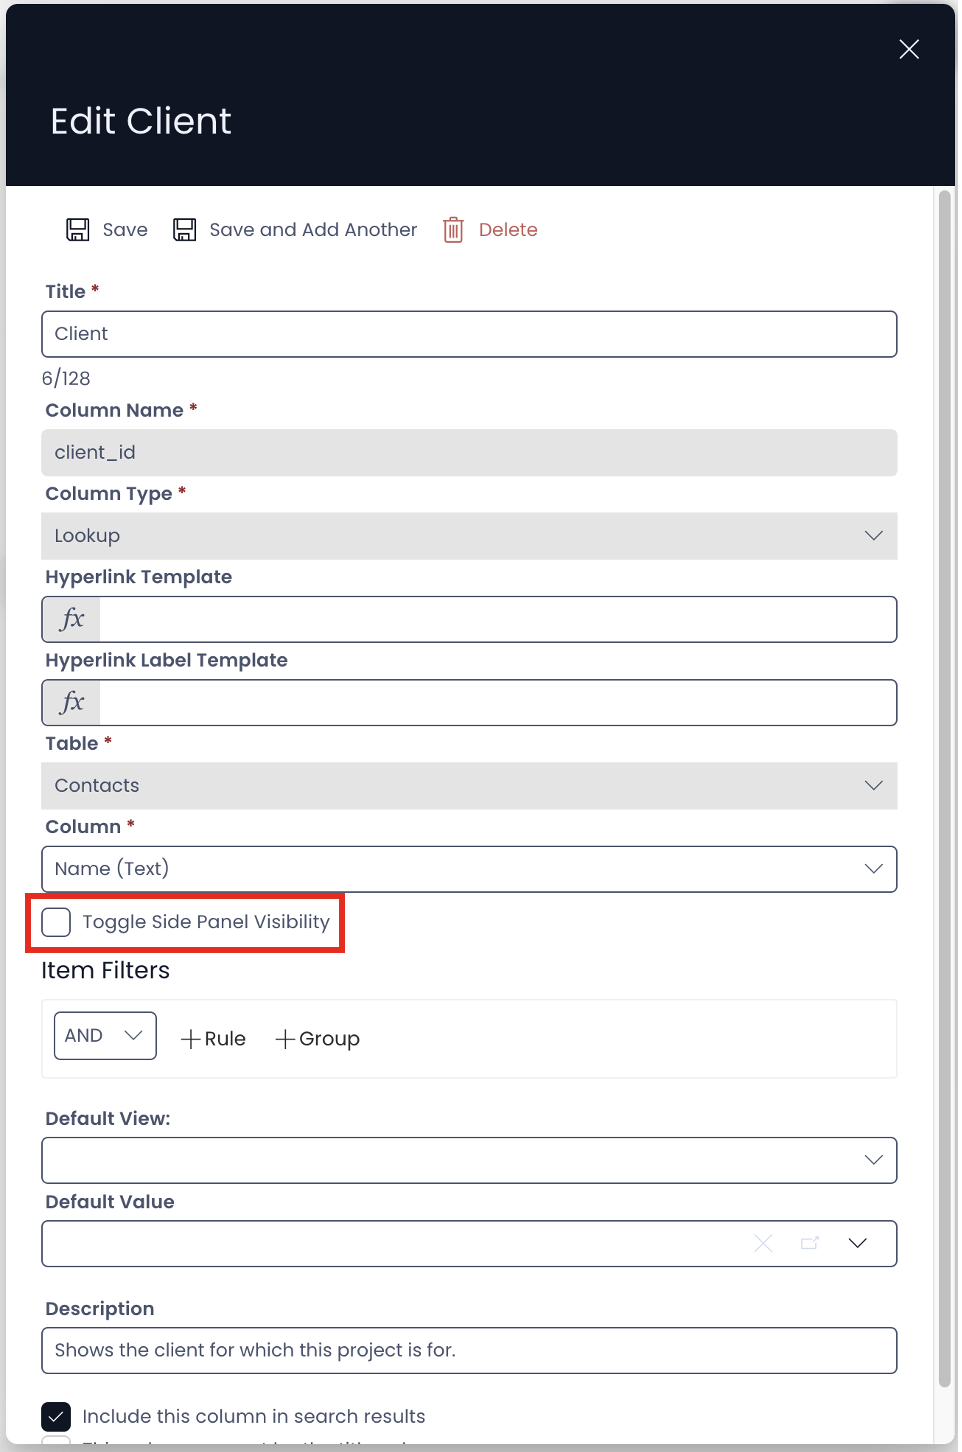
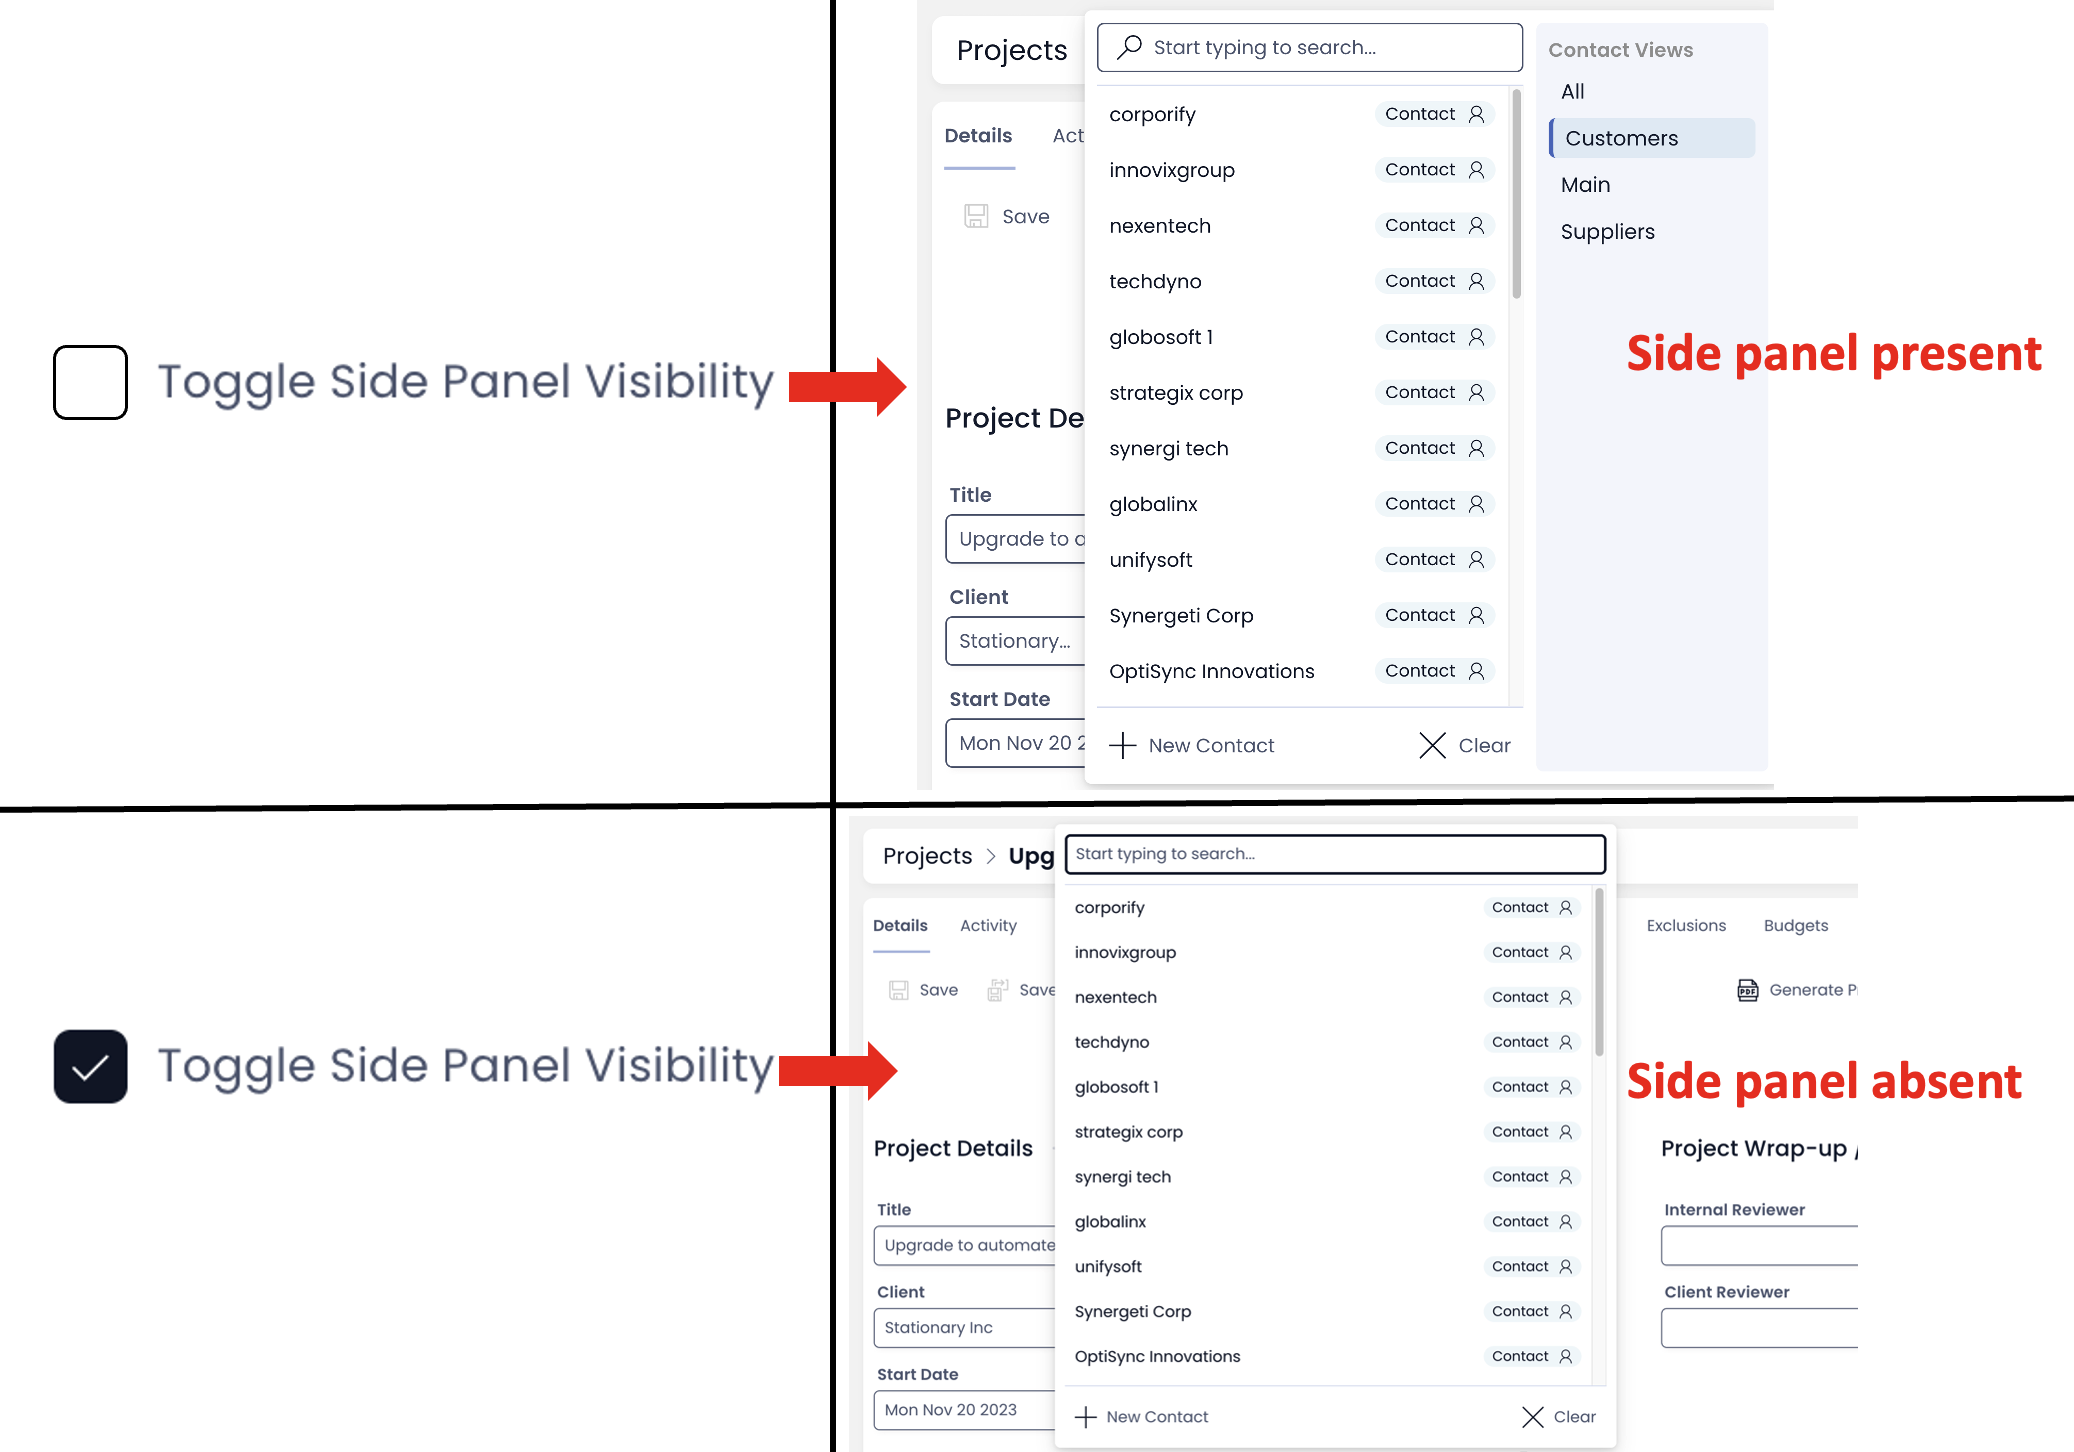
If this field is:
a) Checked - it means the Side Panel to select / change Views will be absent b) Unchecked - it means the Side Panel to select / change Views will be present
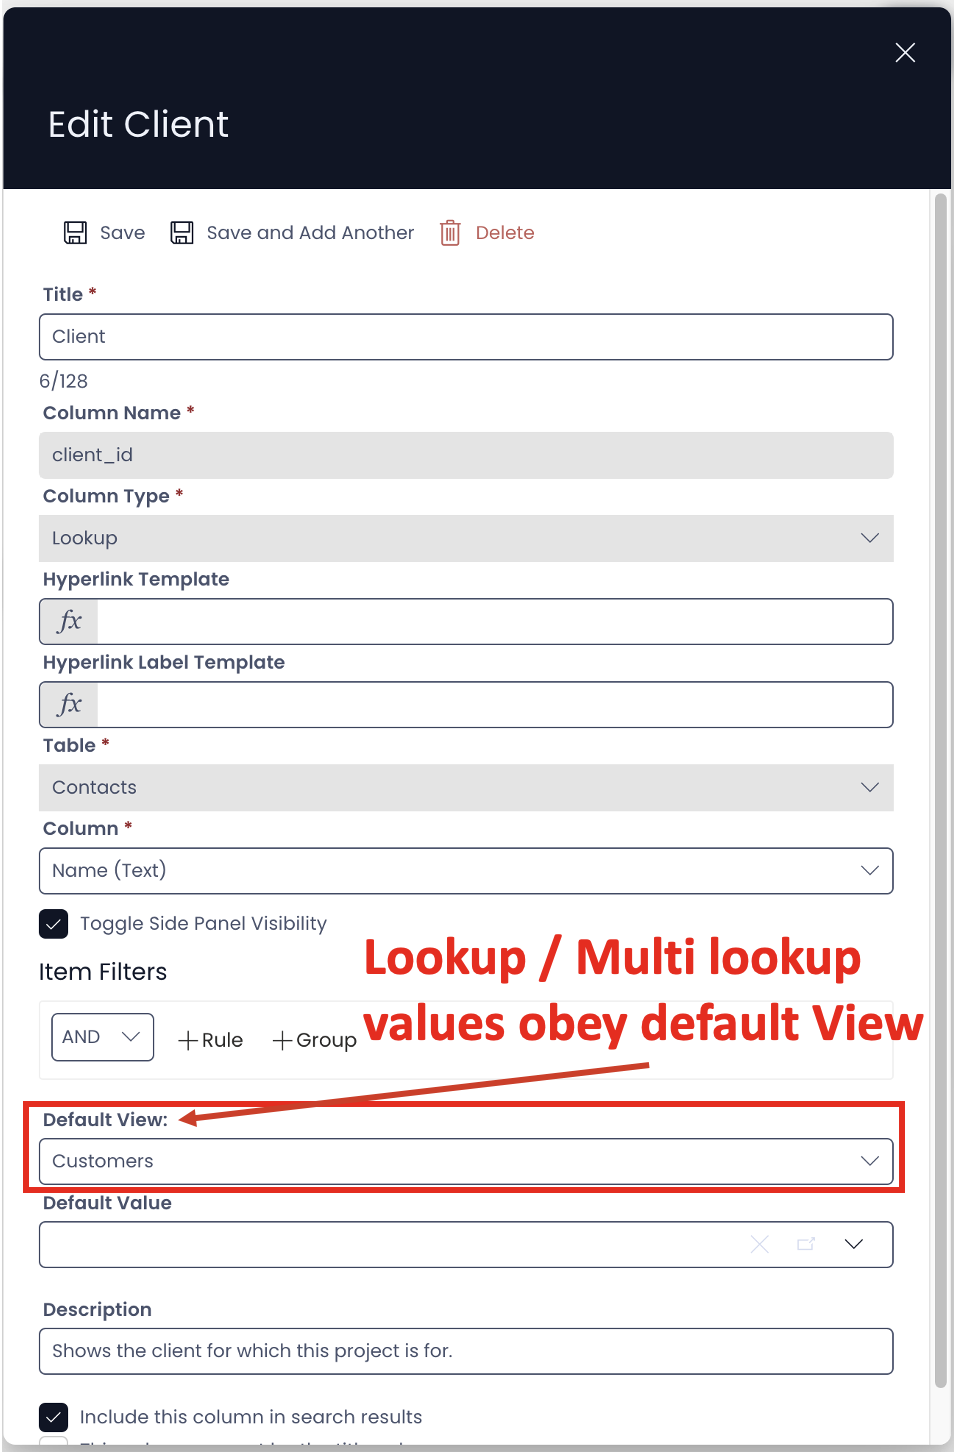
- If you have set the default view and checked the "Toggle Side Panel Visibility" then the Lookup / Multi-lookup will show only the values as per the set default View.
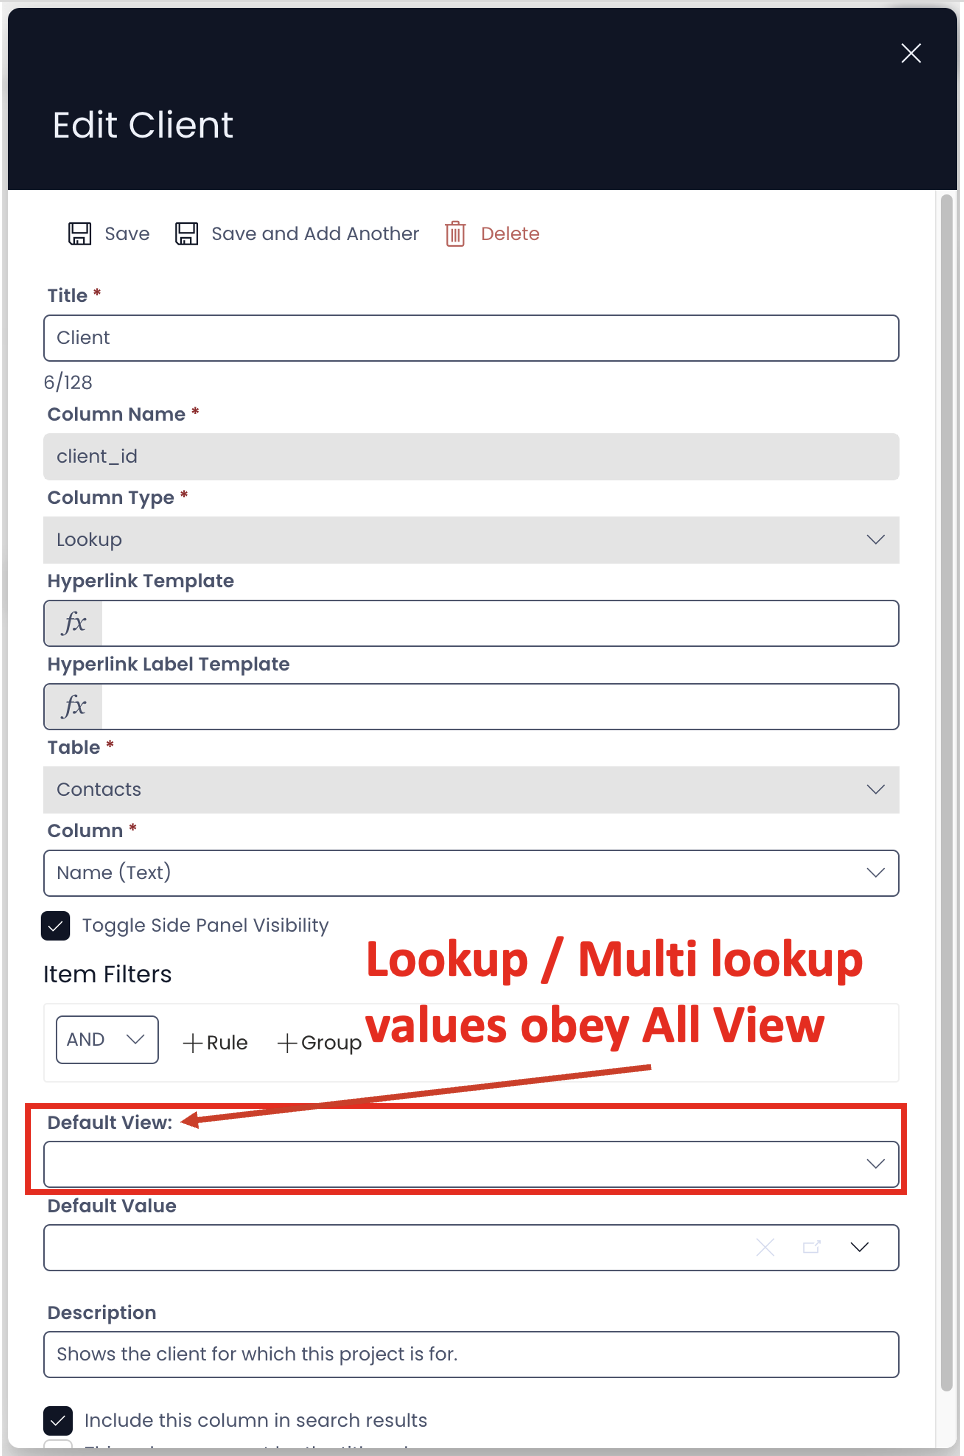
- If no default View is mentioned on the system will take the "All" View as default and Lookup / Multi-lookup will show all values.
- If an Item Filter is set then the set rule will take precedence over the default View and the values in the Lookup / Multi-Lookup will be appear accordingly.
- The checkbox - Toggle Side Panel Visibility can be set while creating a Column as well.
2. The Rapid Signup Experience
This release is significant as it unveils the Rapid sign-up Experience. Users can now buy Rapid from Microsoft store. The whole sign-up experience covers the spectrum from purchasing the Rapid product from Microsoft and installing it.
Below are a sequence of steps to showcase the journey through sign-up.
-
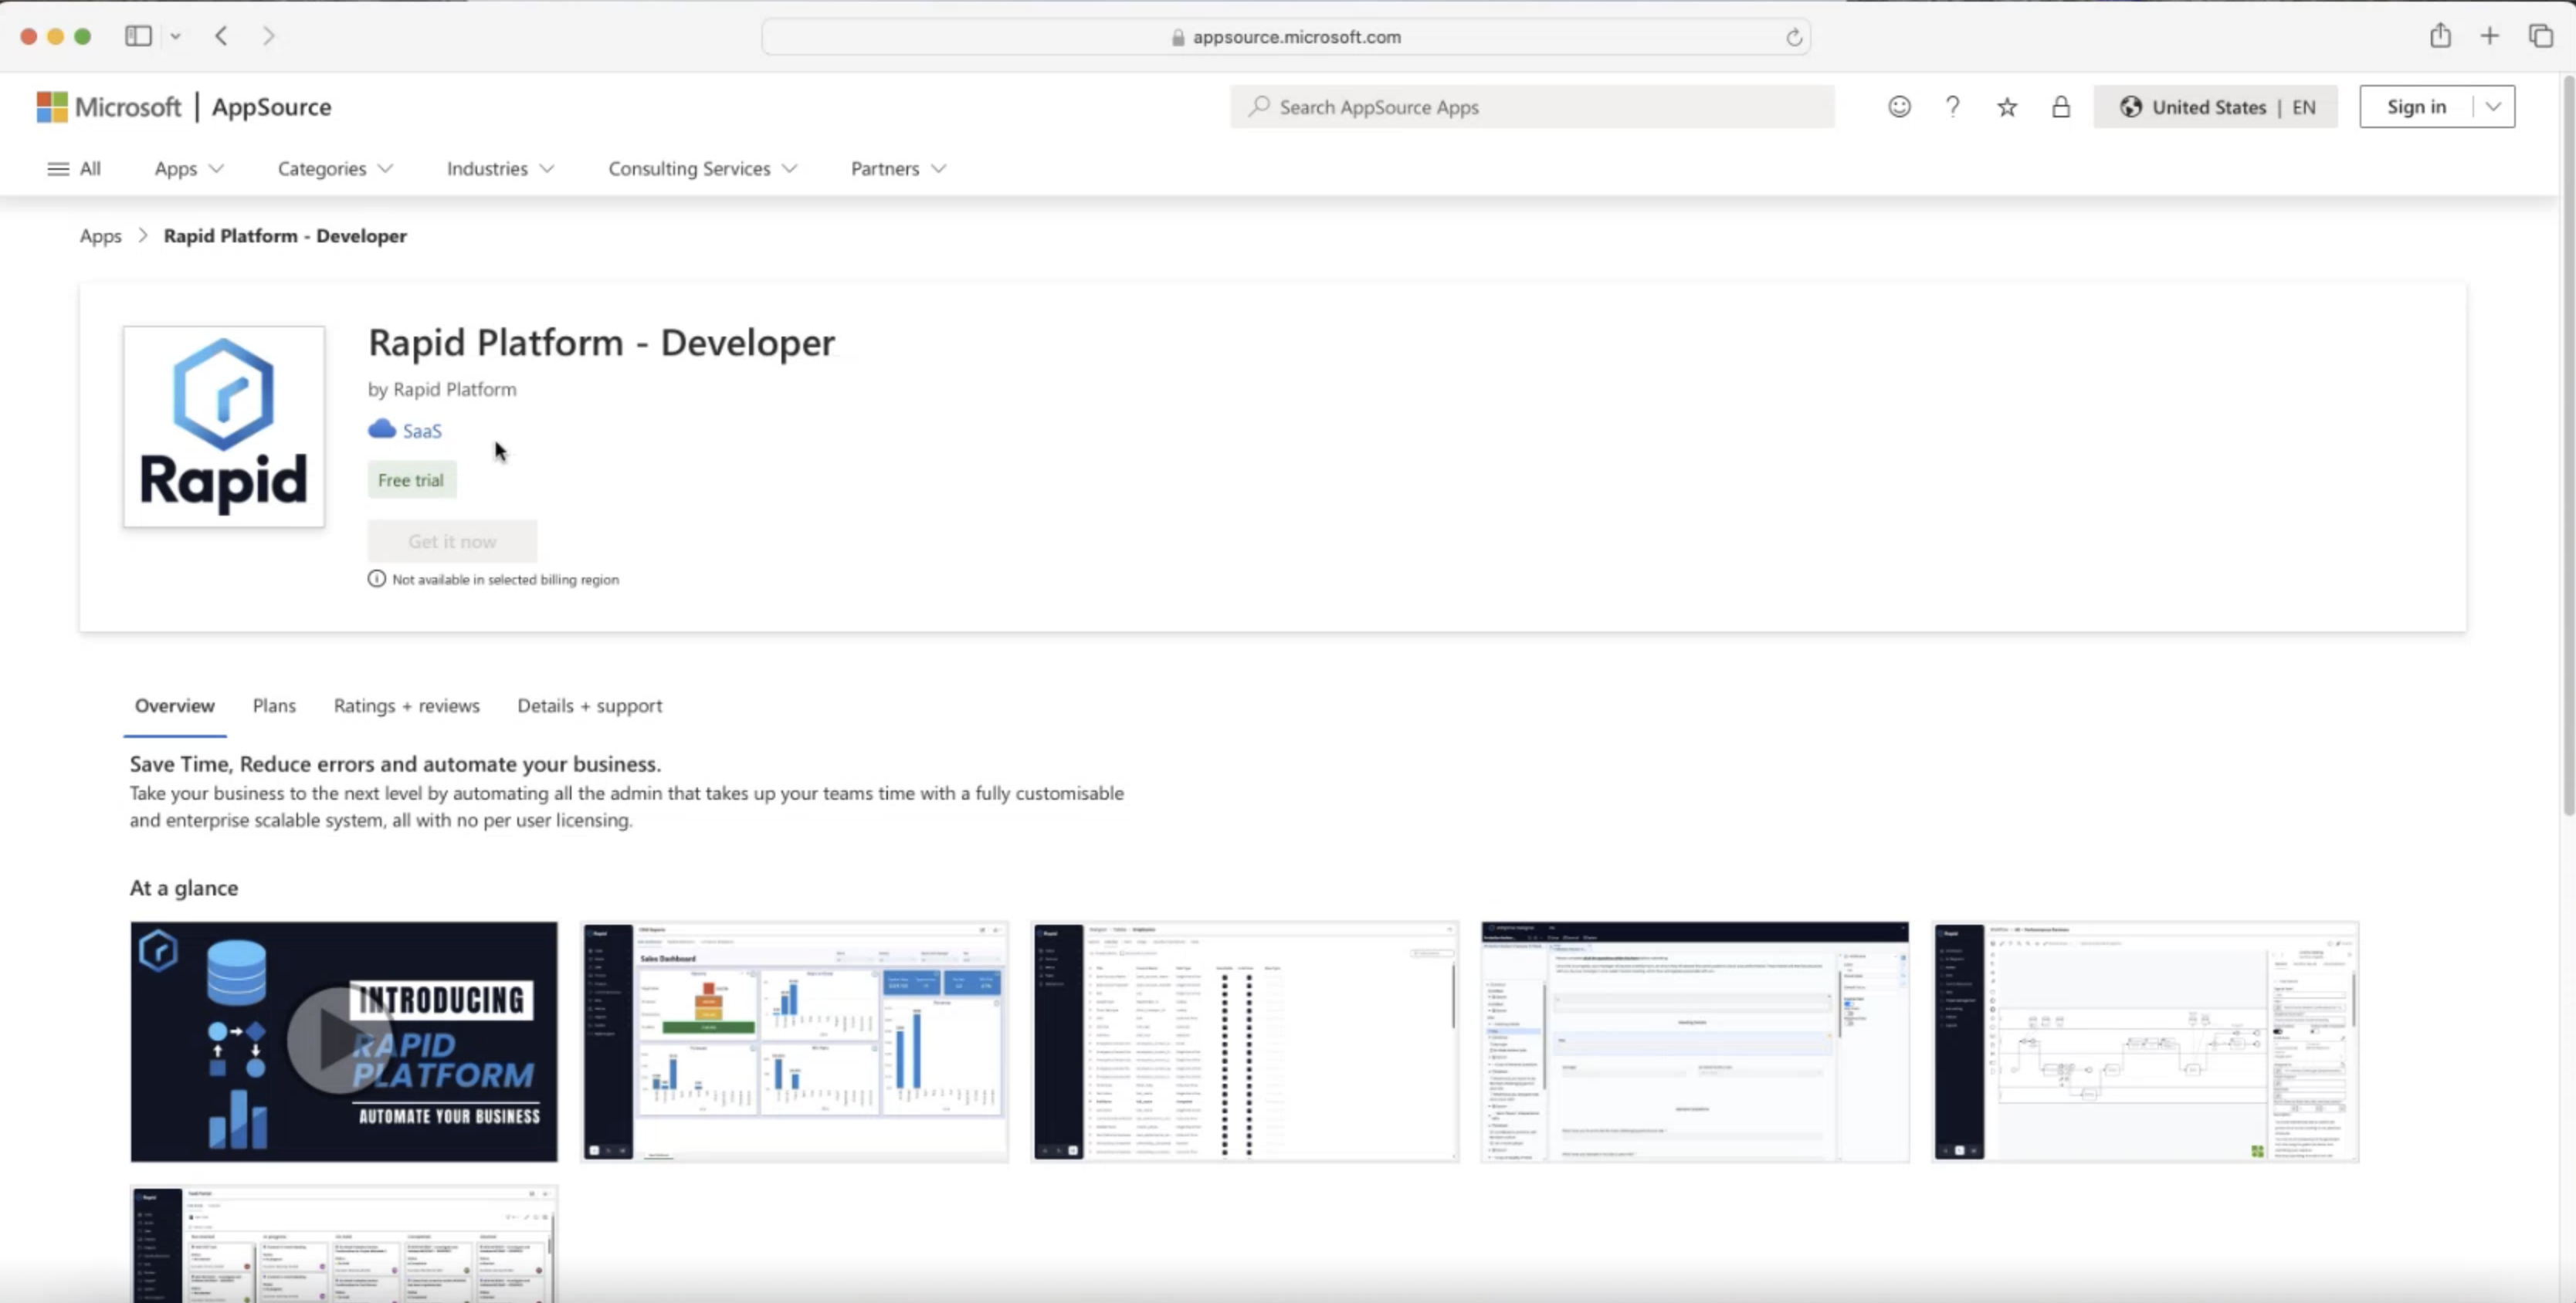
Goto https://appsource.microsoft.com/en-us/product/web-apps/rapidplatform.rapid_developer. This is the Microsoft AppSource page for Rapid Platform - Developer product.
-
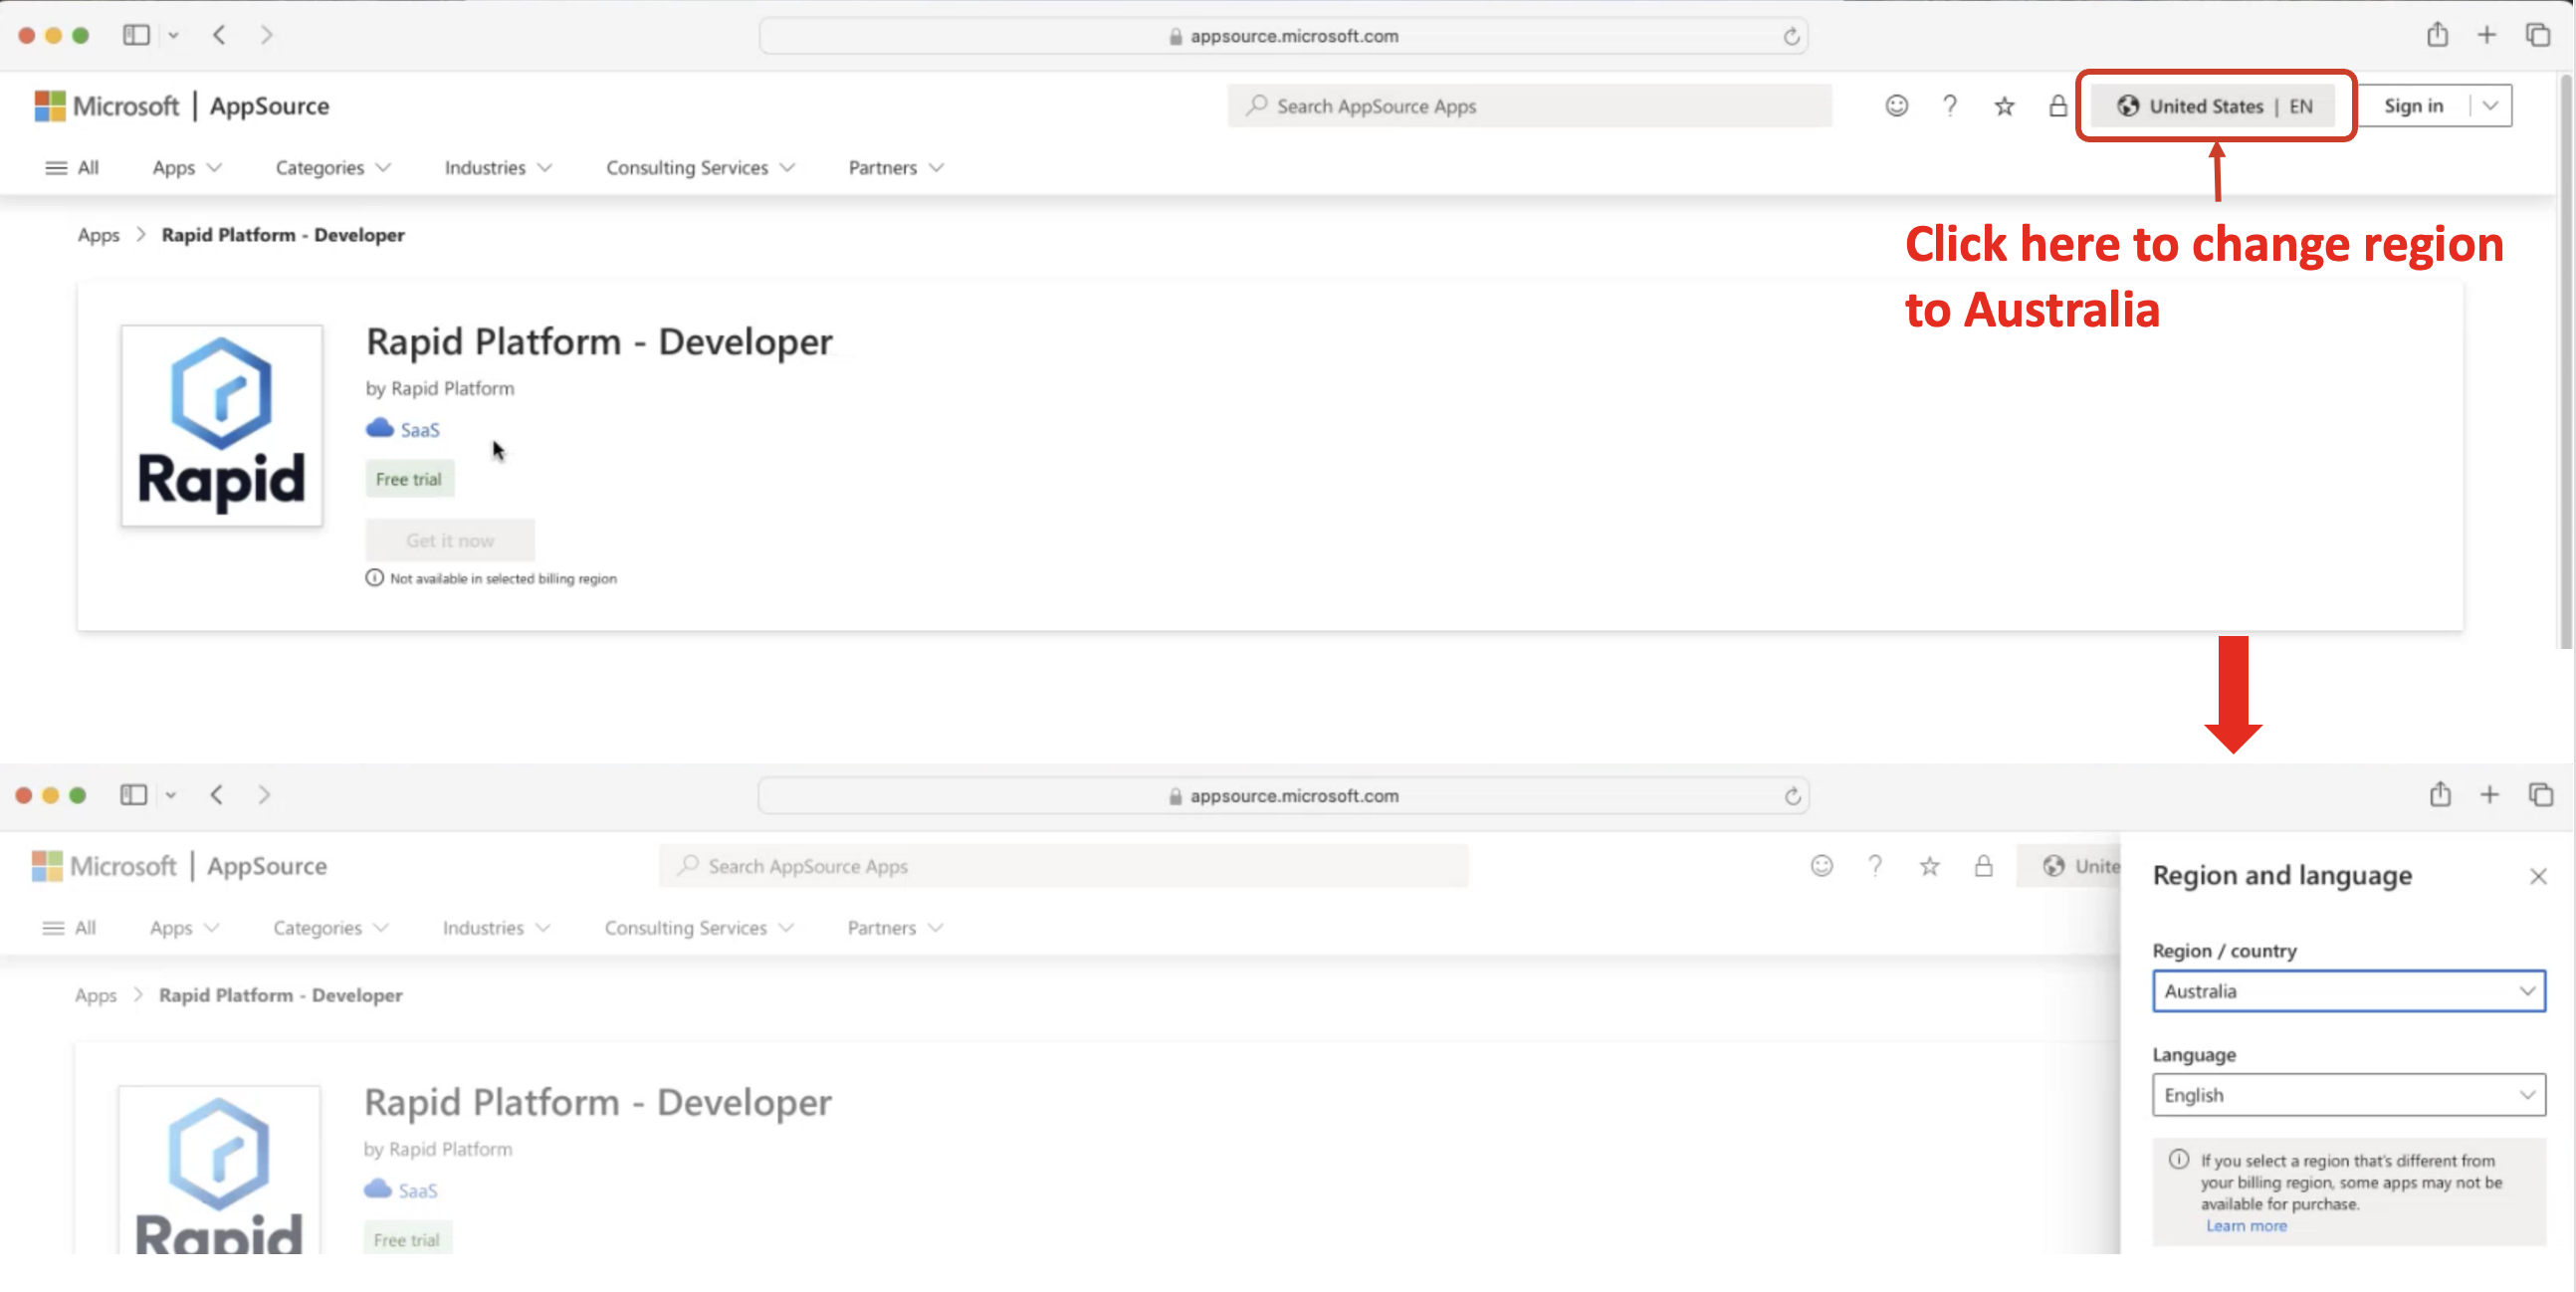
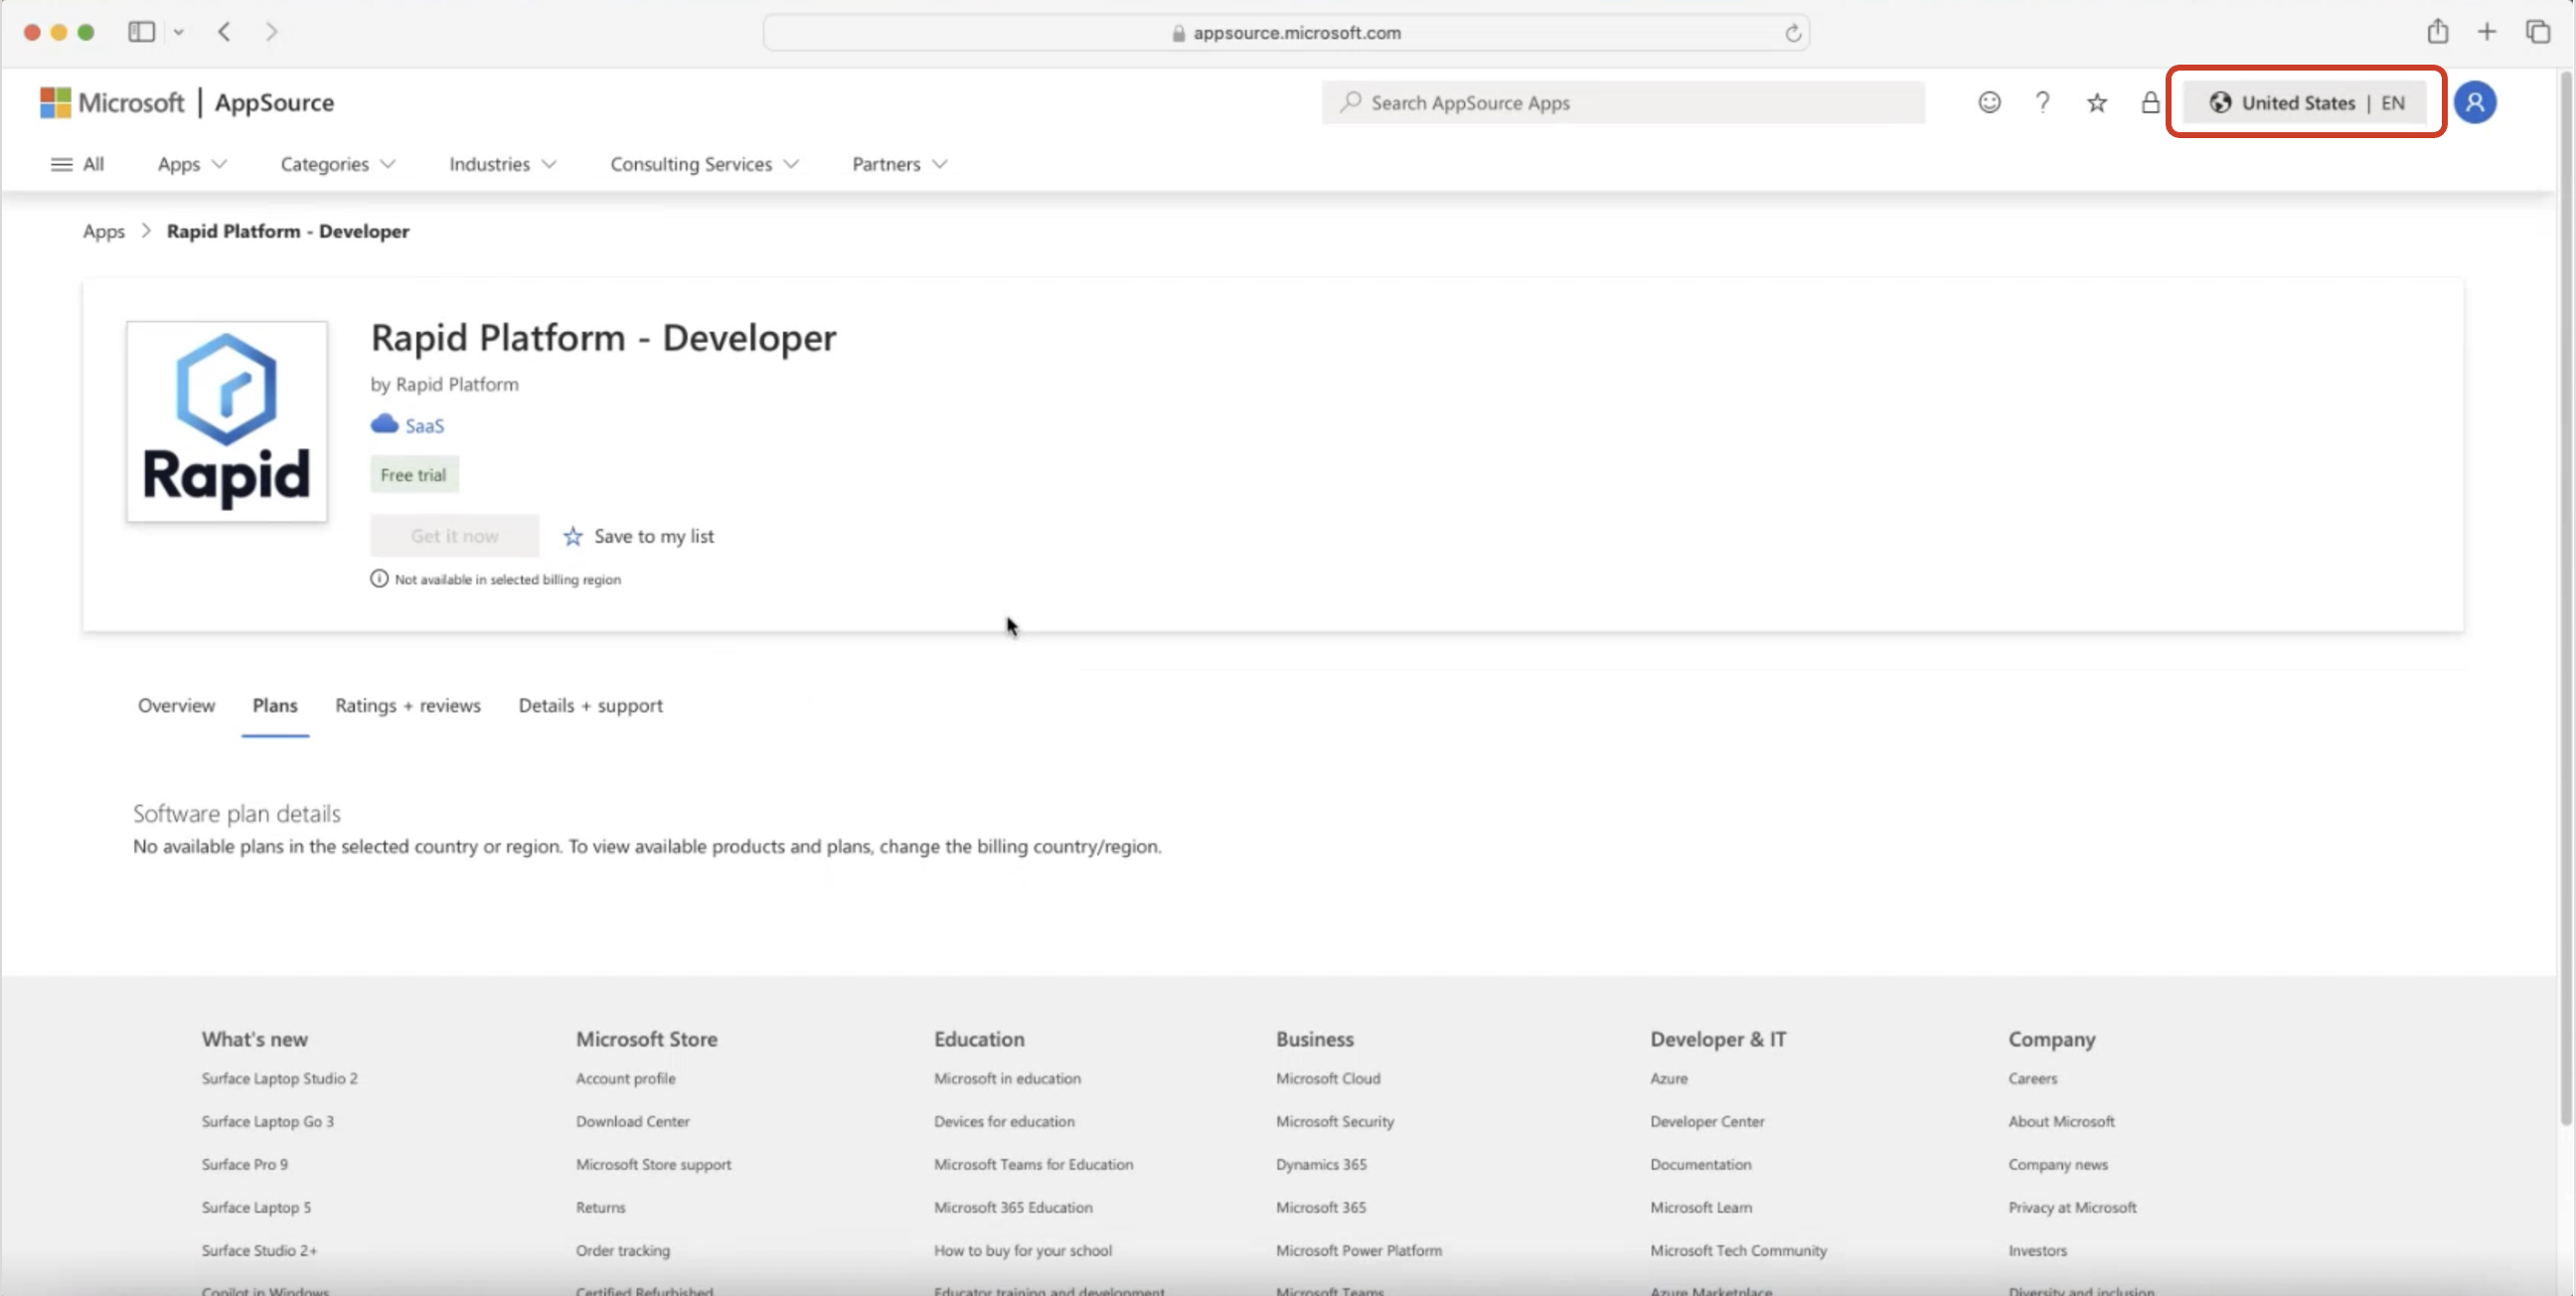
It is important to ascertain that your region is selected as Australia. Rapid Platform currently available for Australia region only.
-
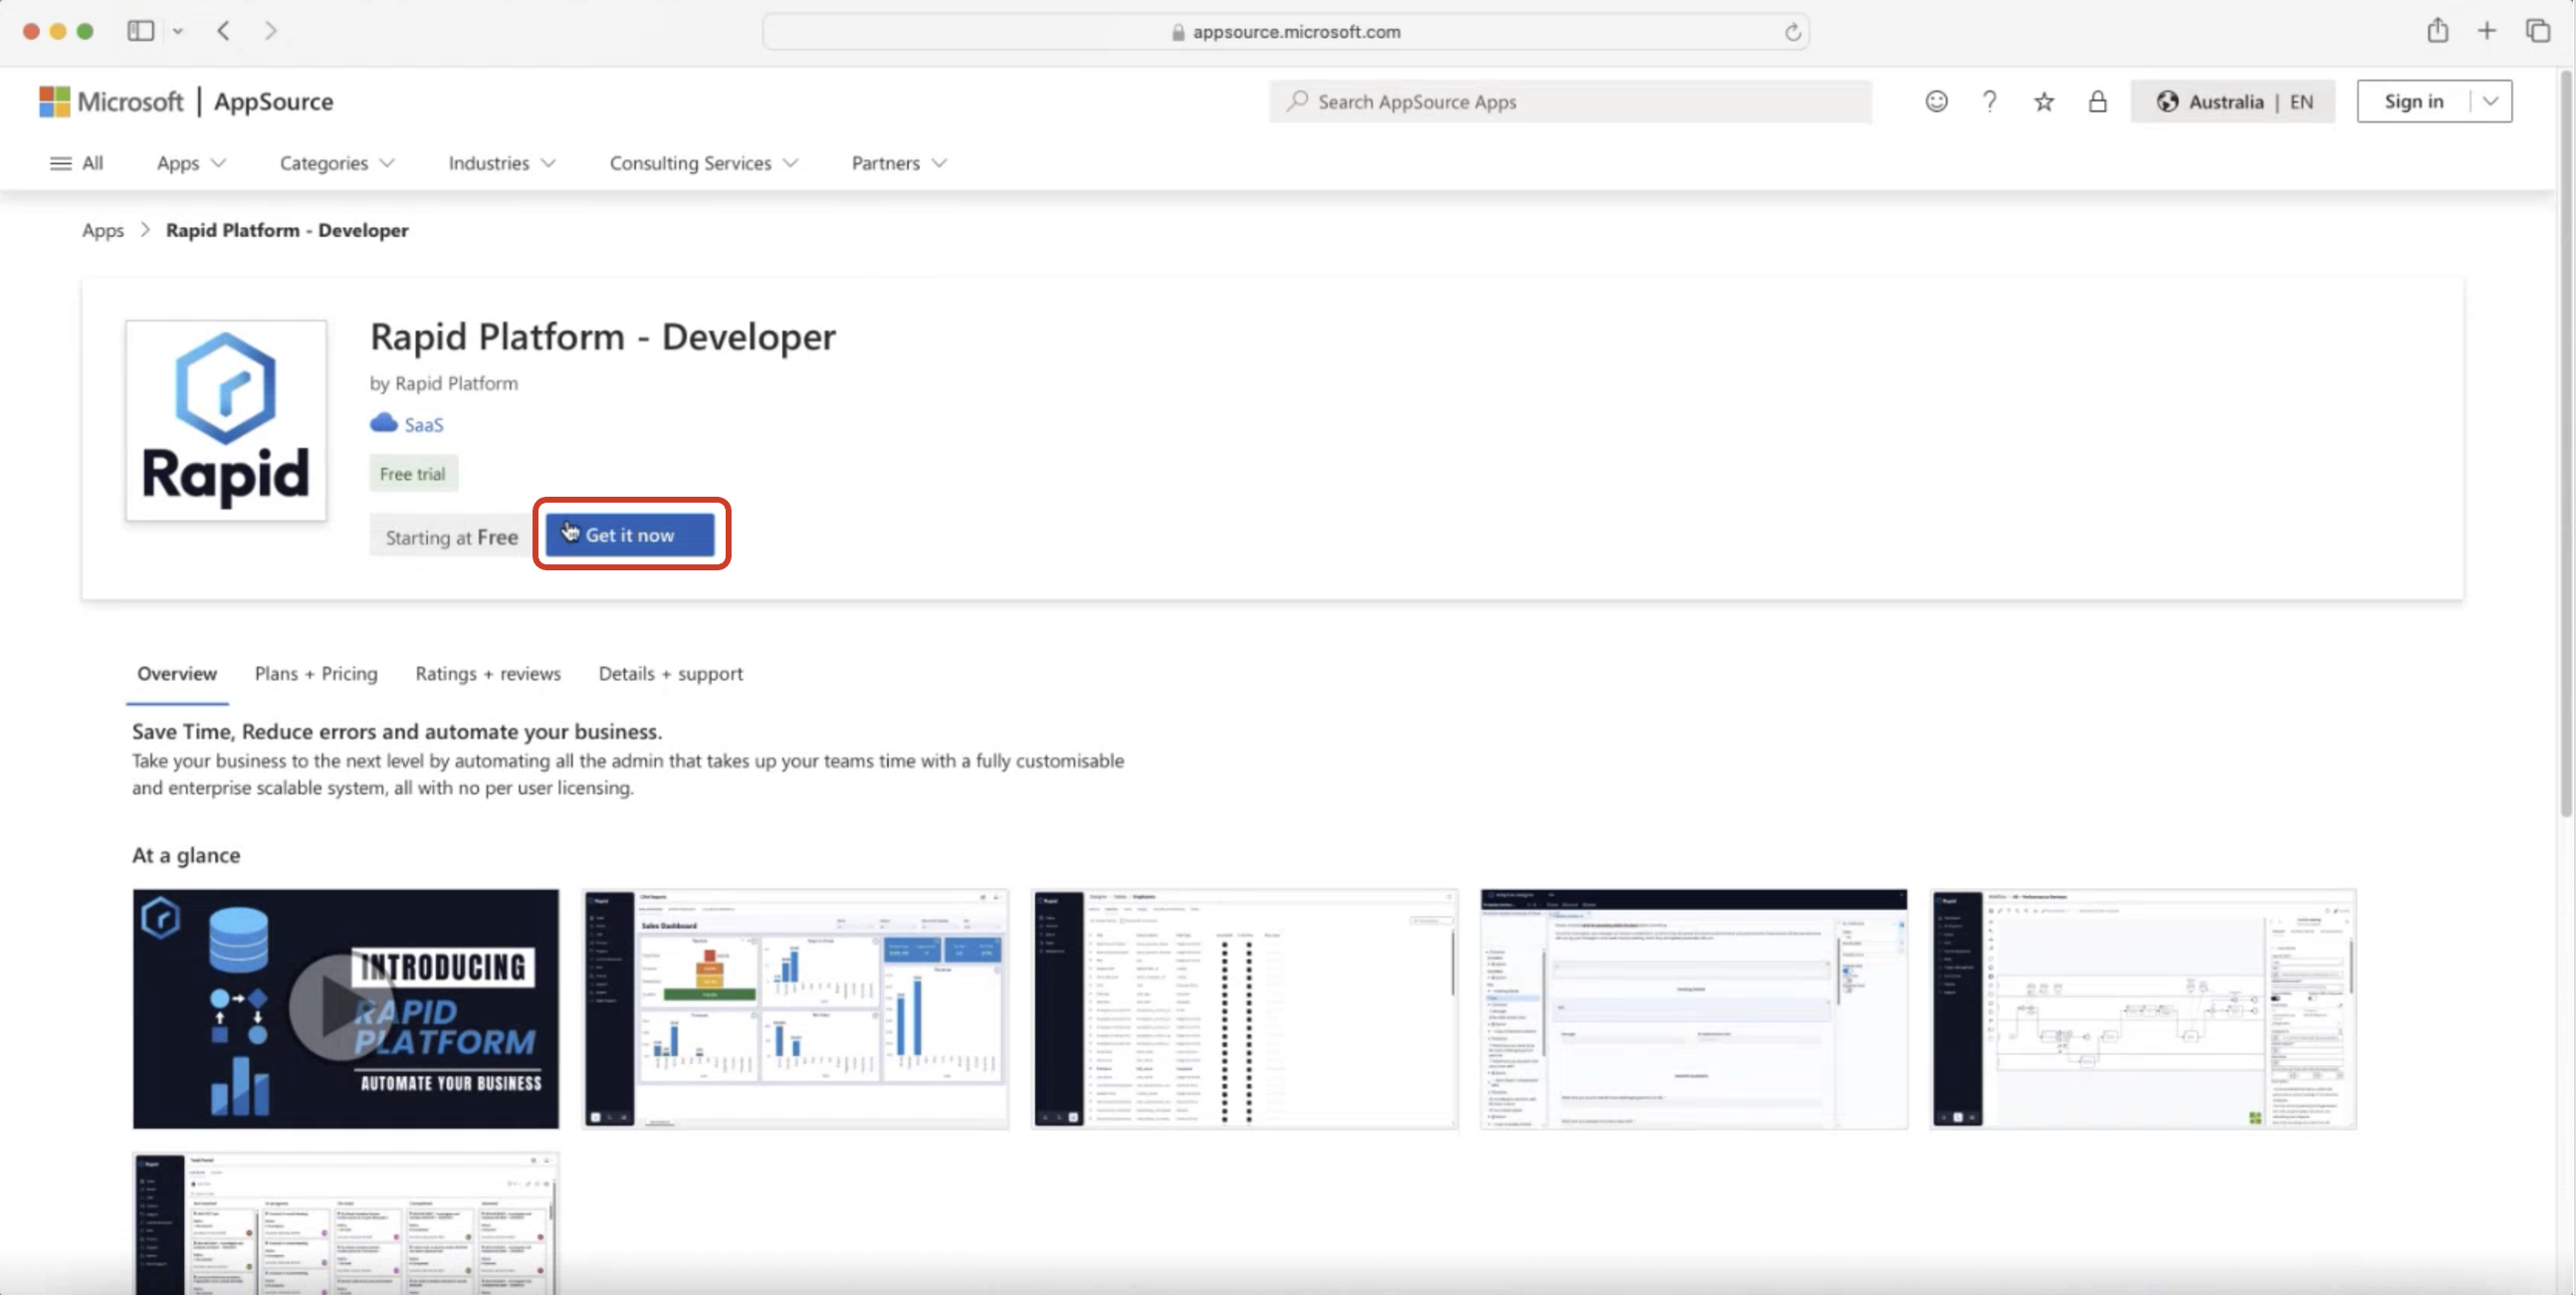
Click "Get it now" button. There is another option - "Starting at Free". It will also initiate the same process.
-
Sign-in with your email account.
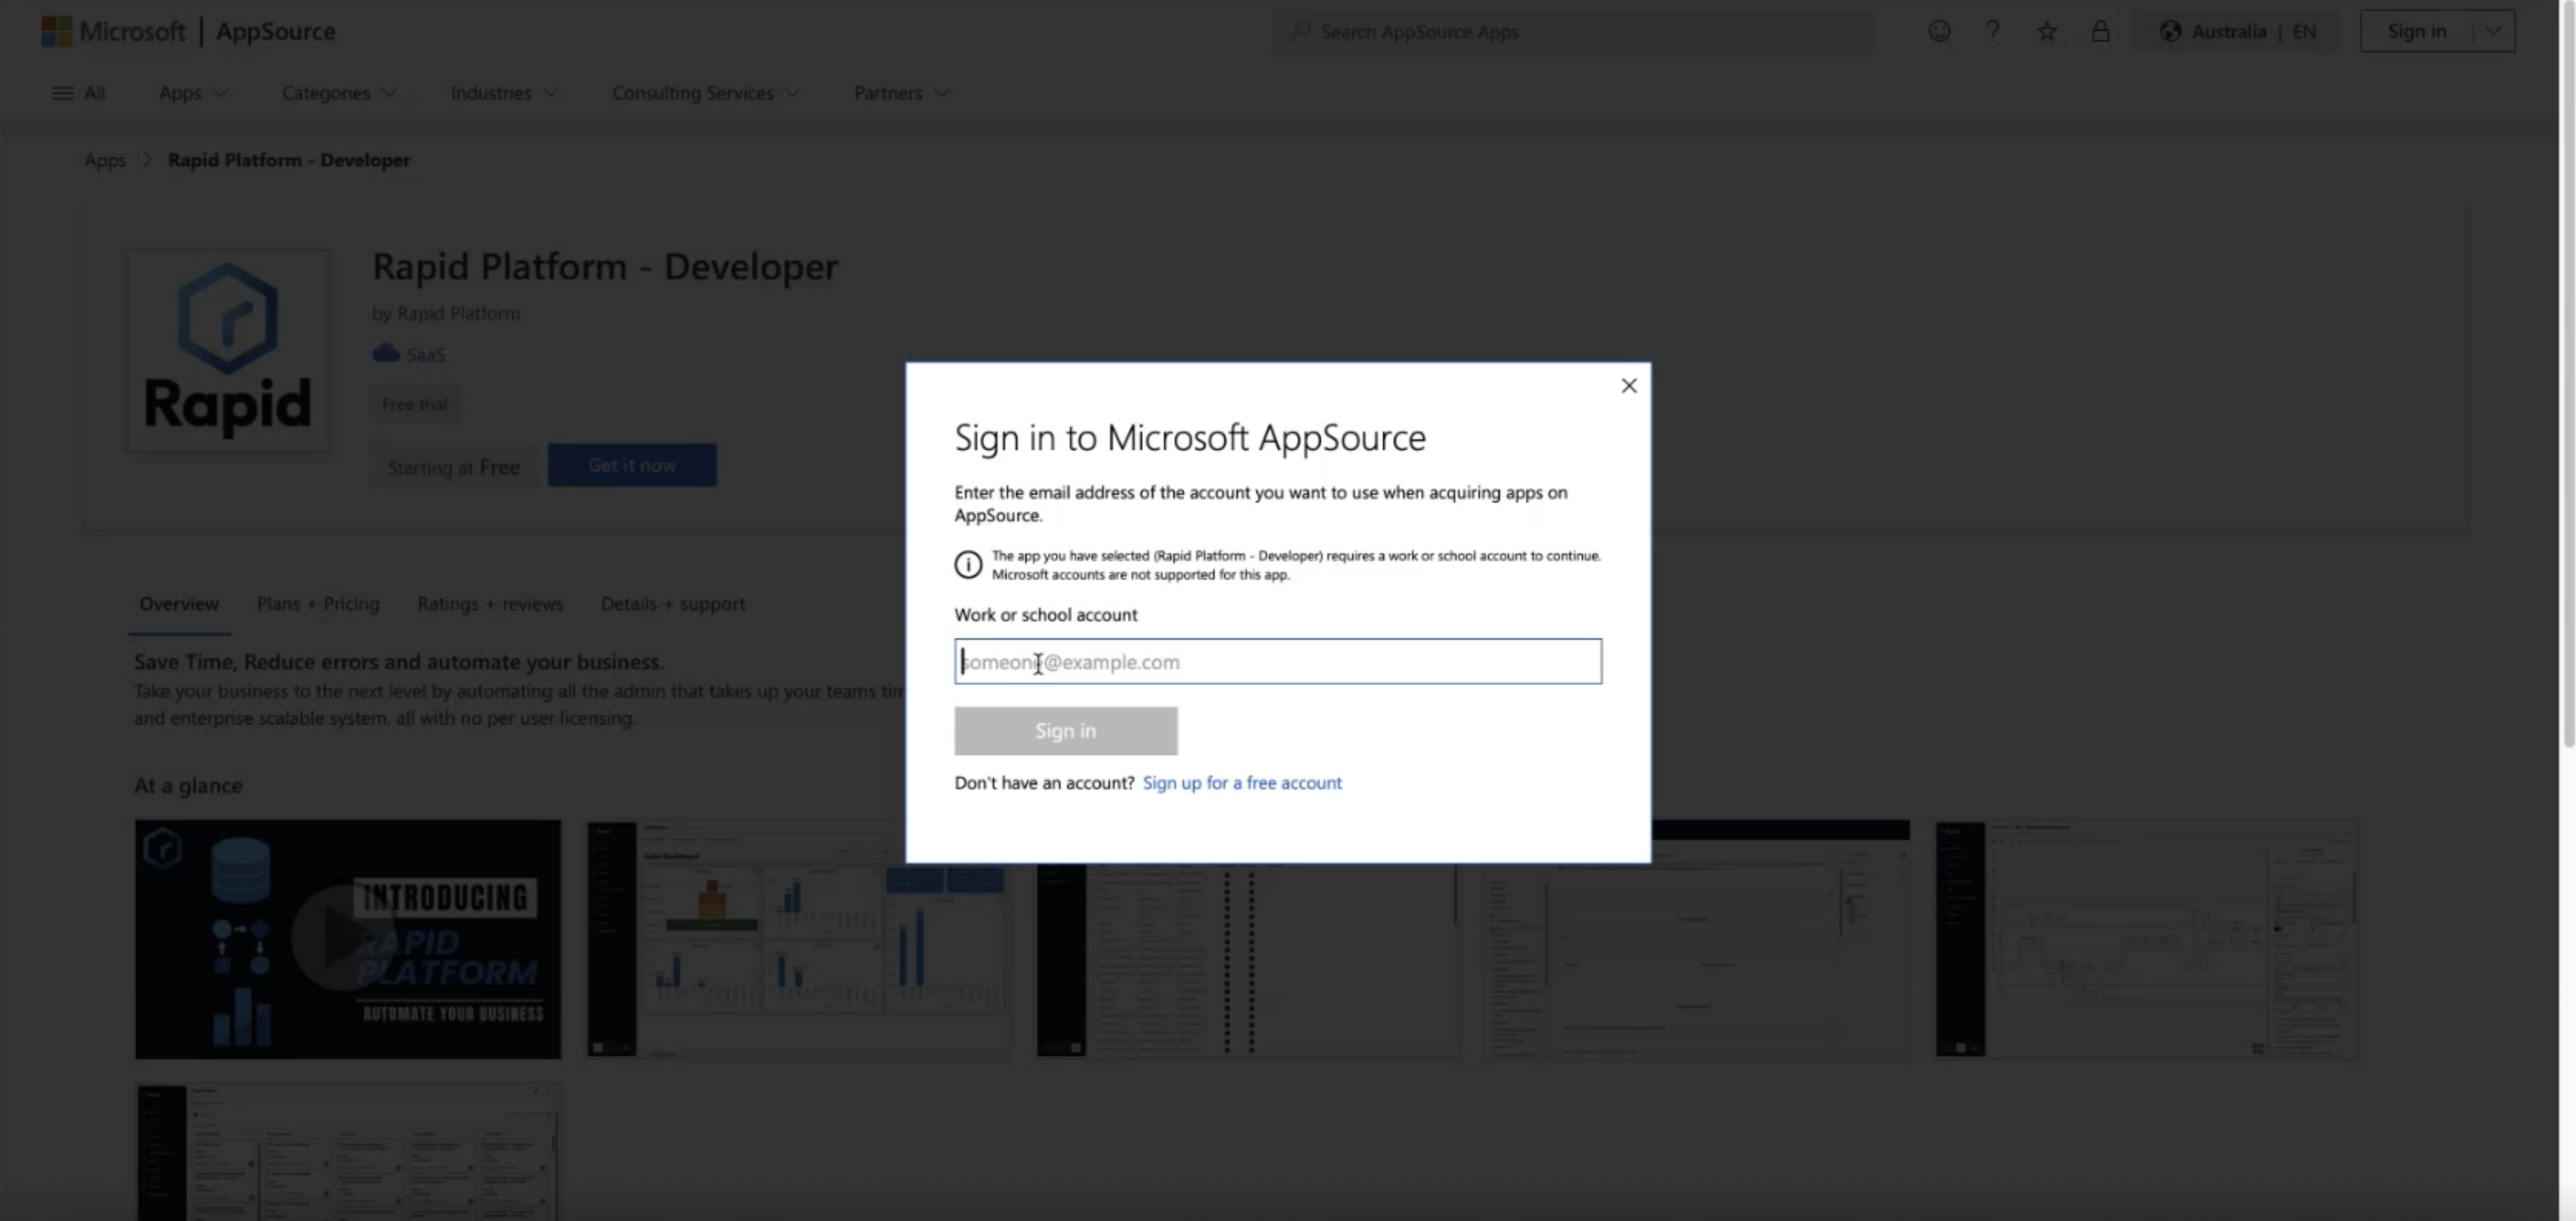
It is possible that post sign-in your country has changed, you need to select the region as Australia again.
-
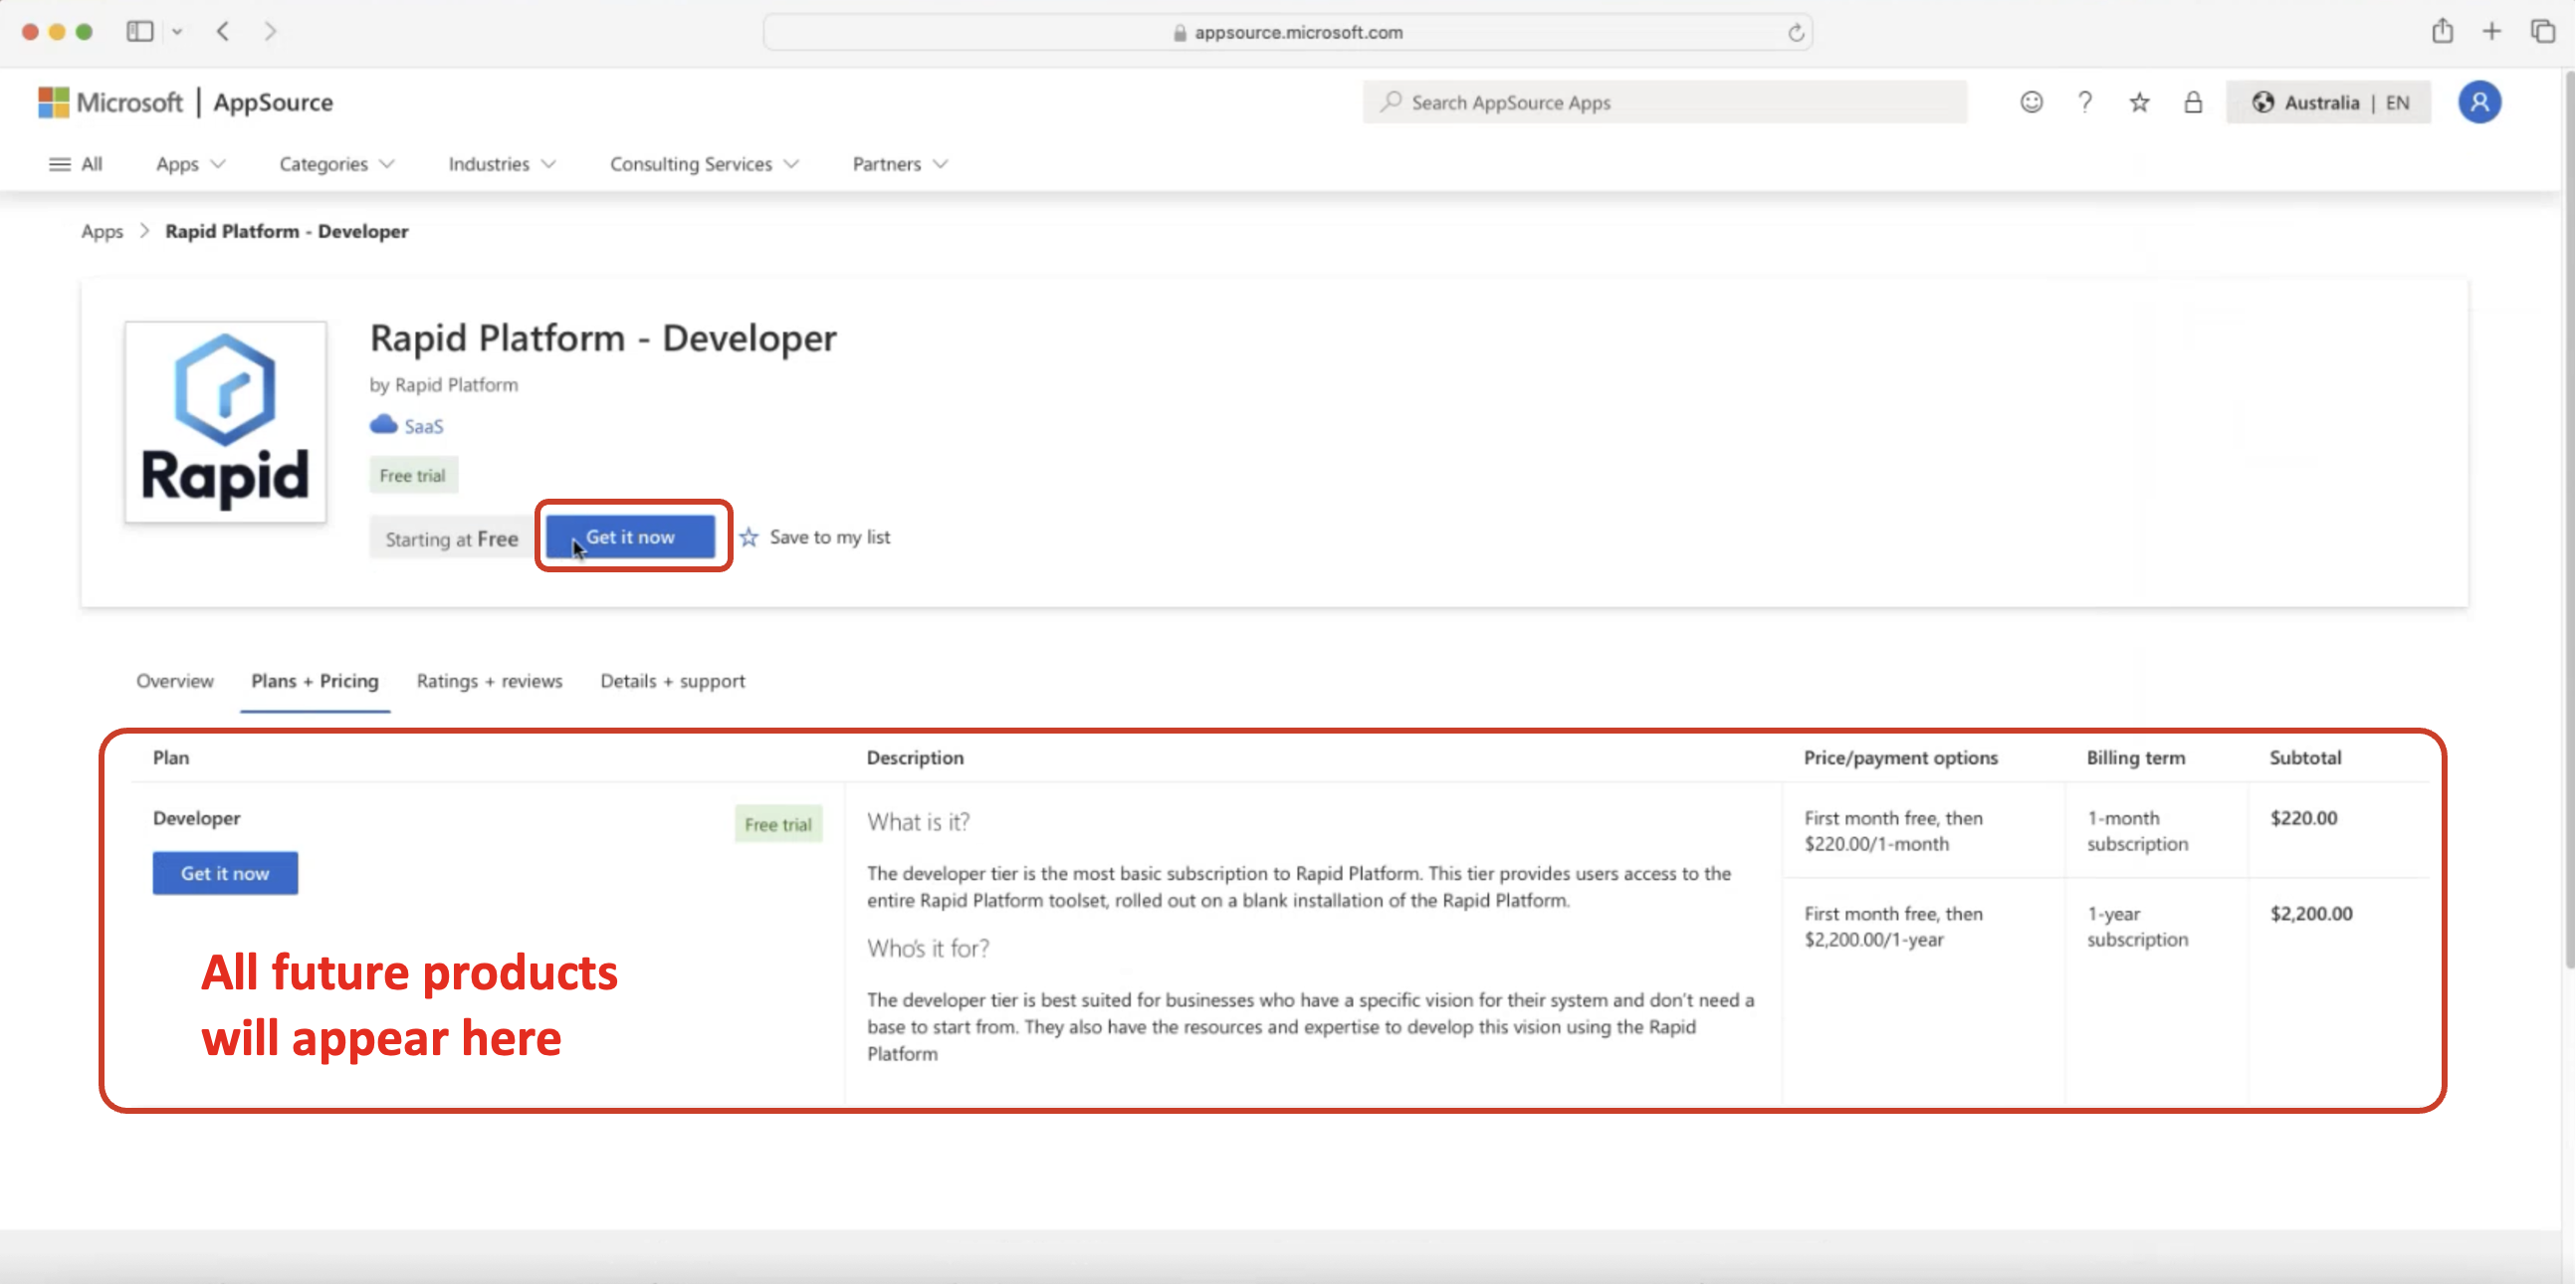
Post Sign-in, you will see the Rapid Platform Page. Presently it shows only Developer Product, but this is where all future products will appear for selection. Click "Get it now".
-
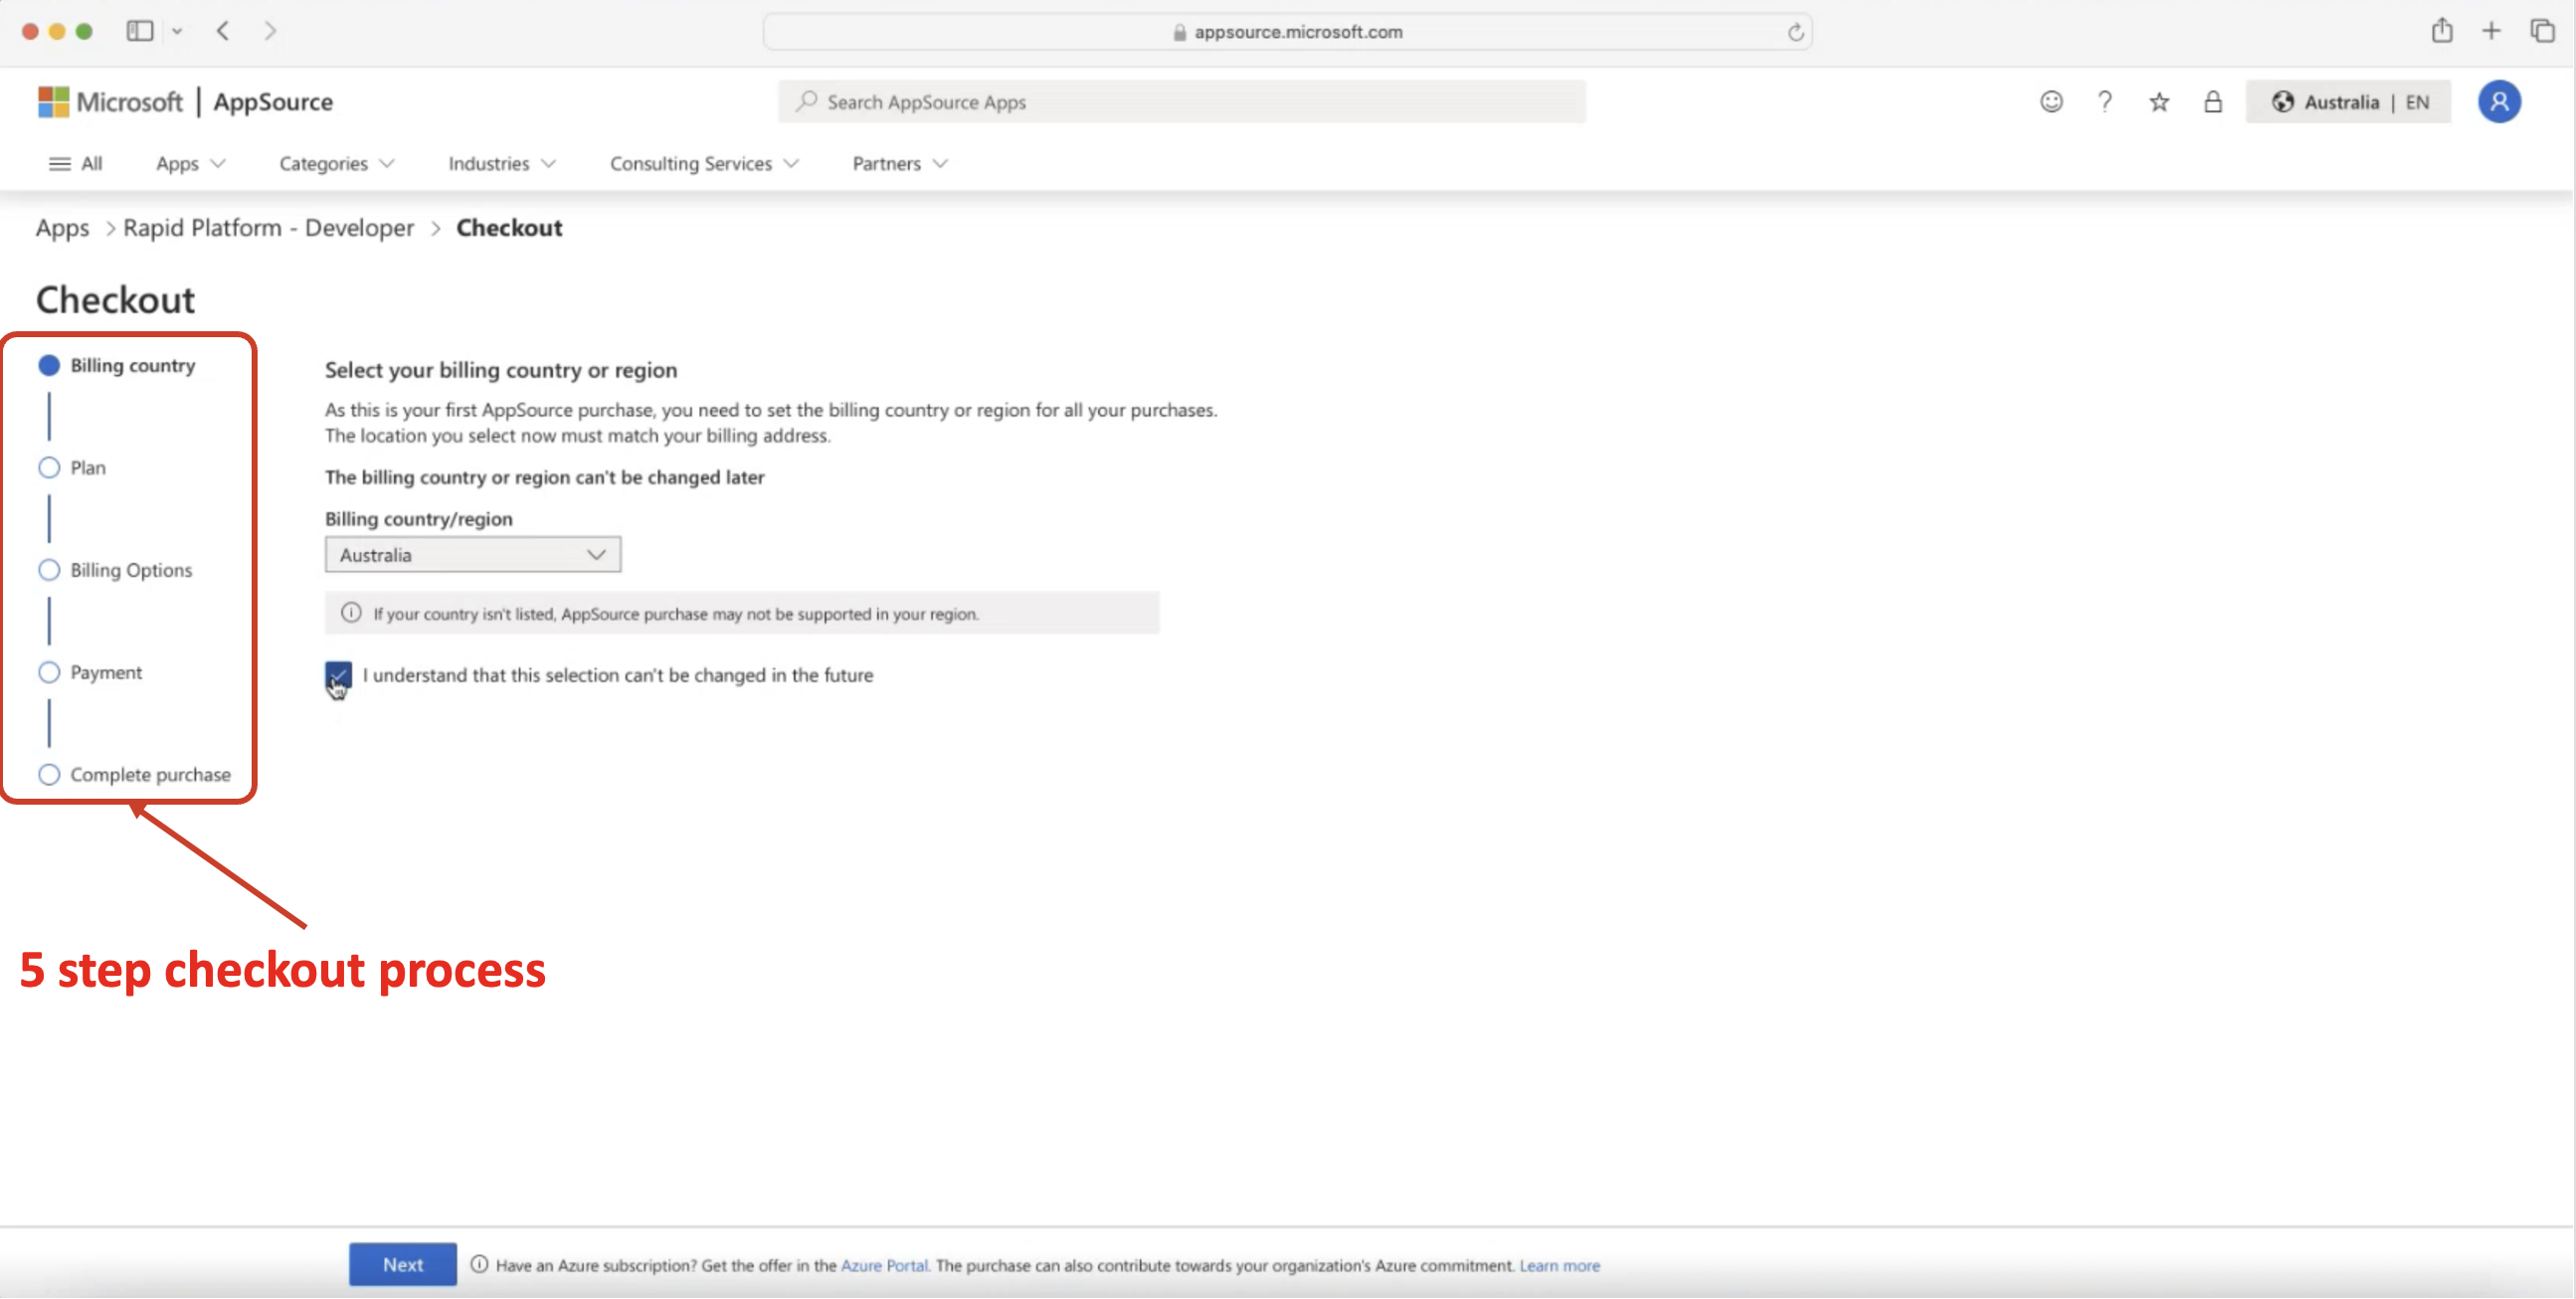
Next you will get the Checkout Page. This is the five step process where you will asked to confirm your country, plan, billing terms (annual / monthly, recurring On / Off), your billing address, credit card details etc.
-
After filling out all the details, and successfully placing the order, the last step is to configure SaaS account.
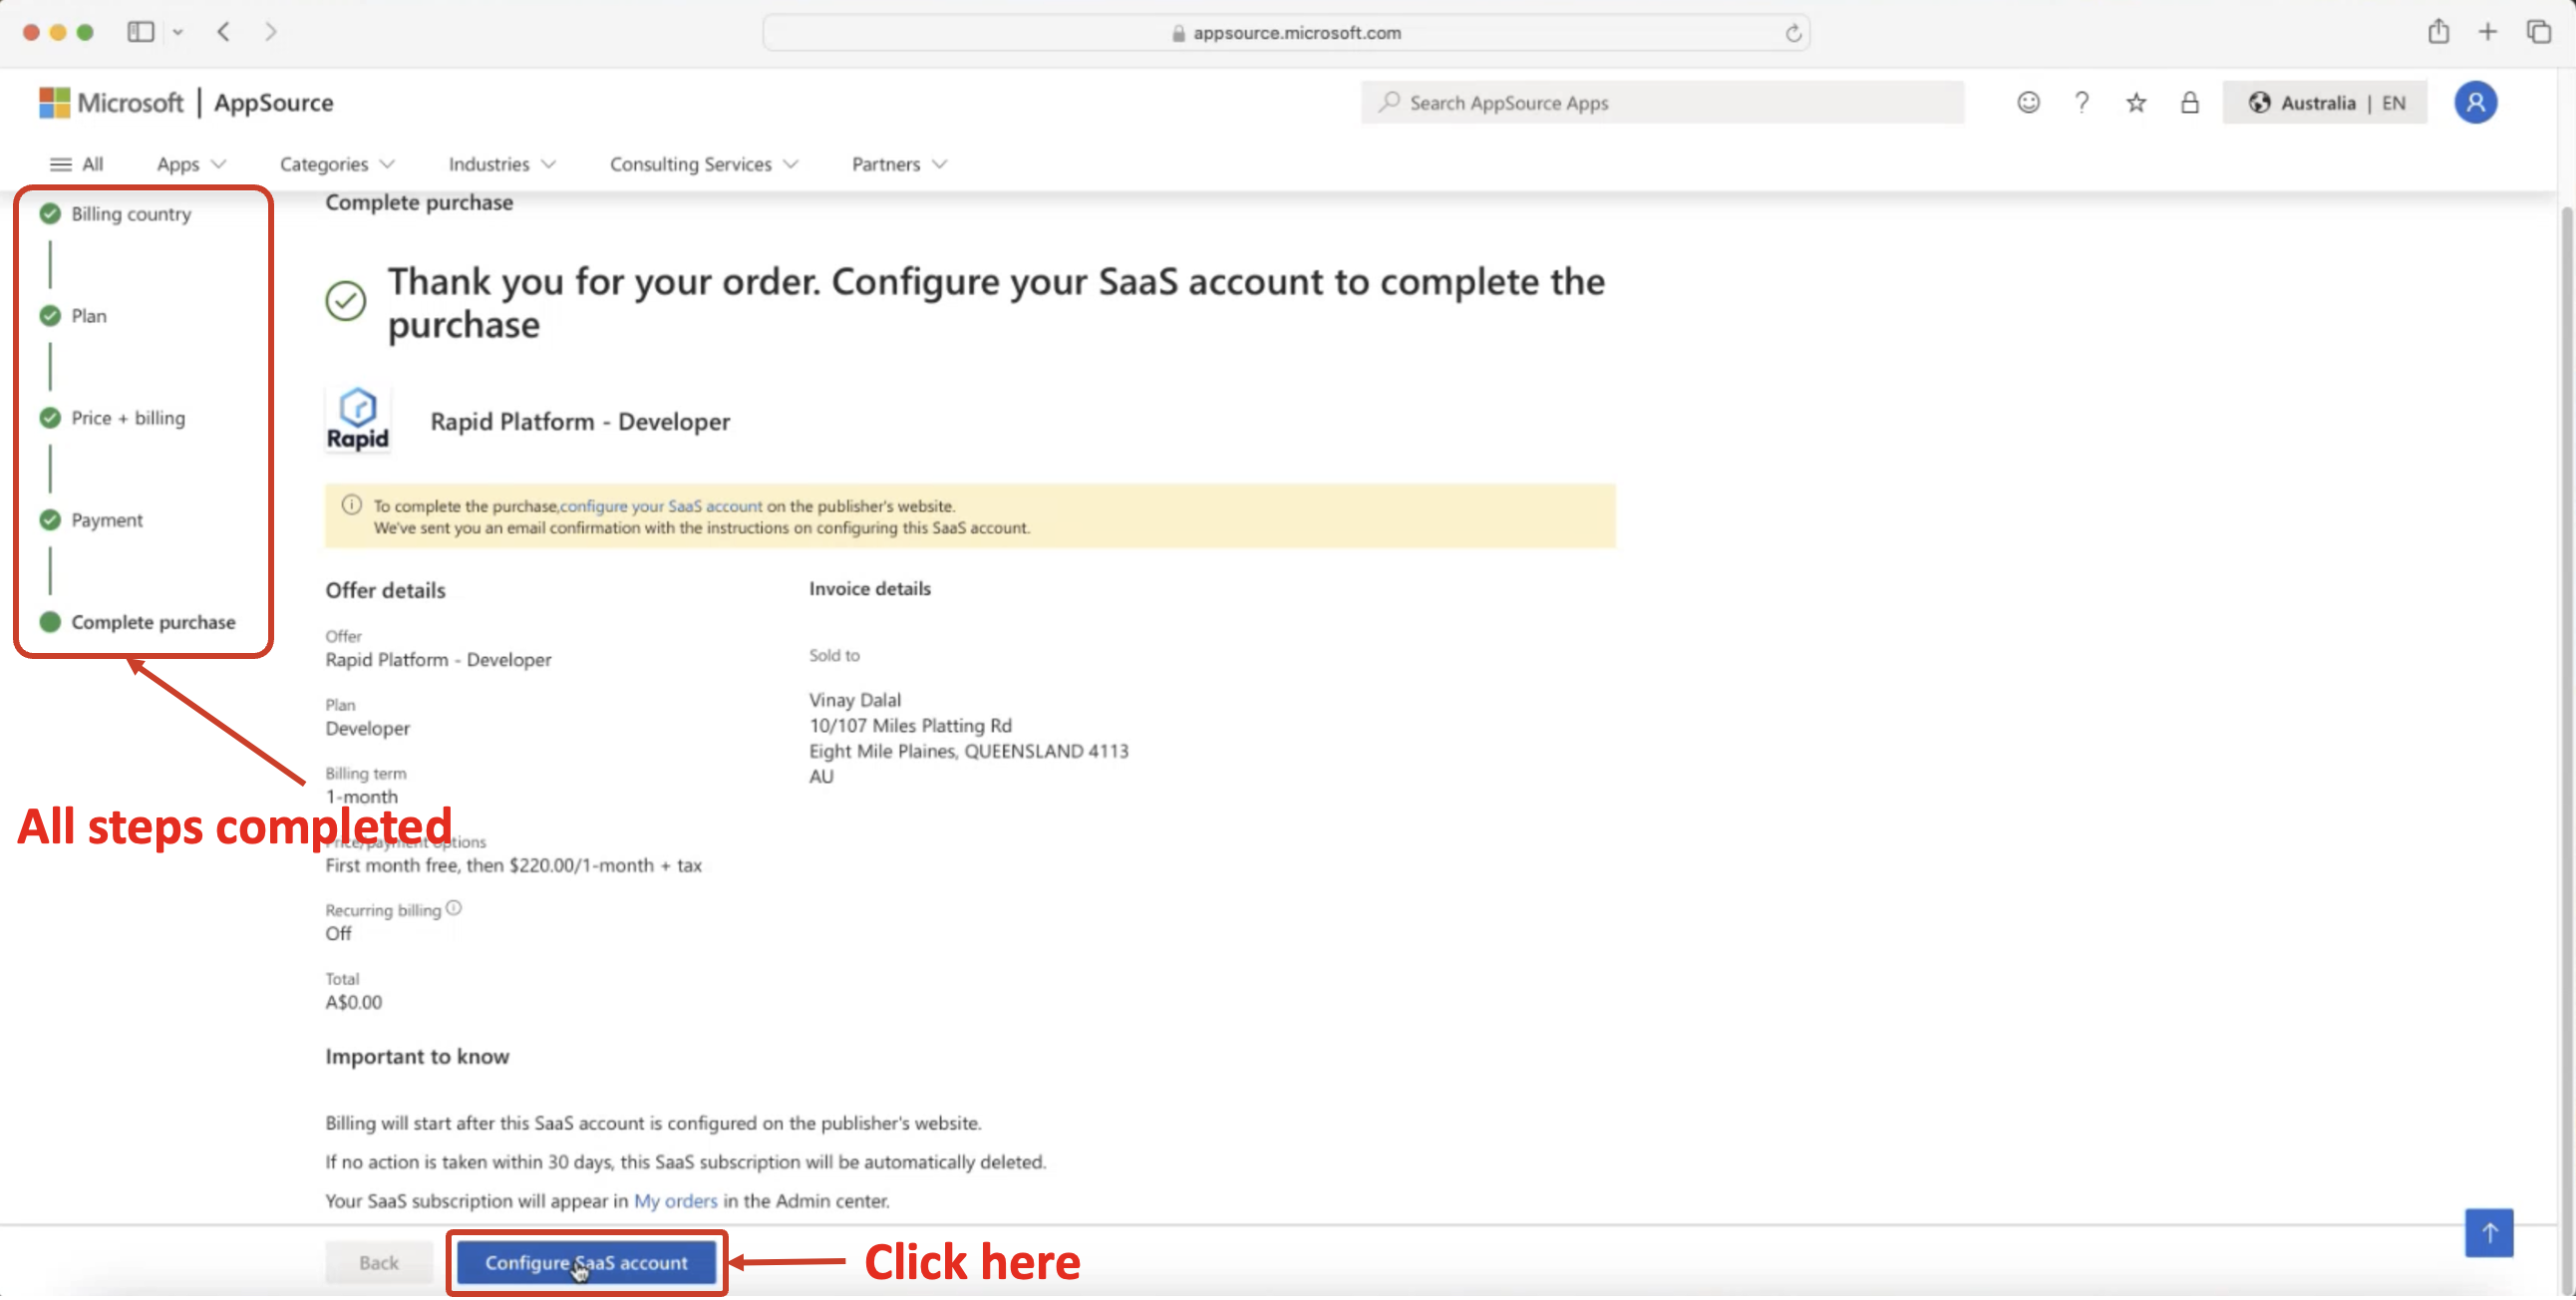
You will now leave Microsoft AppSource and enter Rapid Platform Sign-up Experience.
- You will be navigated to Rapid Sign-up Page. The Saas account configuration process is initiated. Welcome Rapid screen appears. You need to provide a unique account name and click Next.
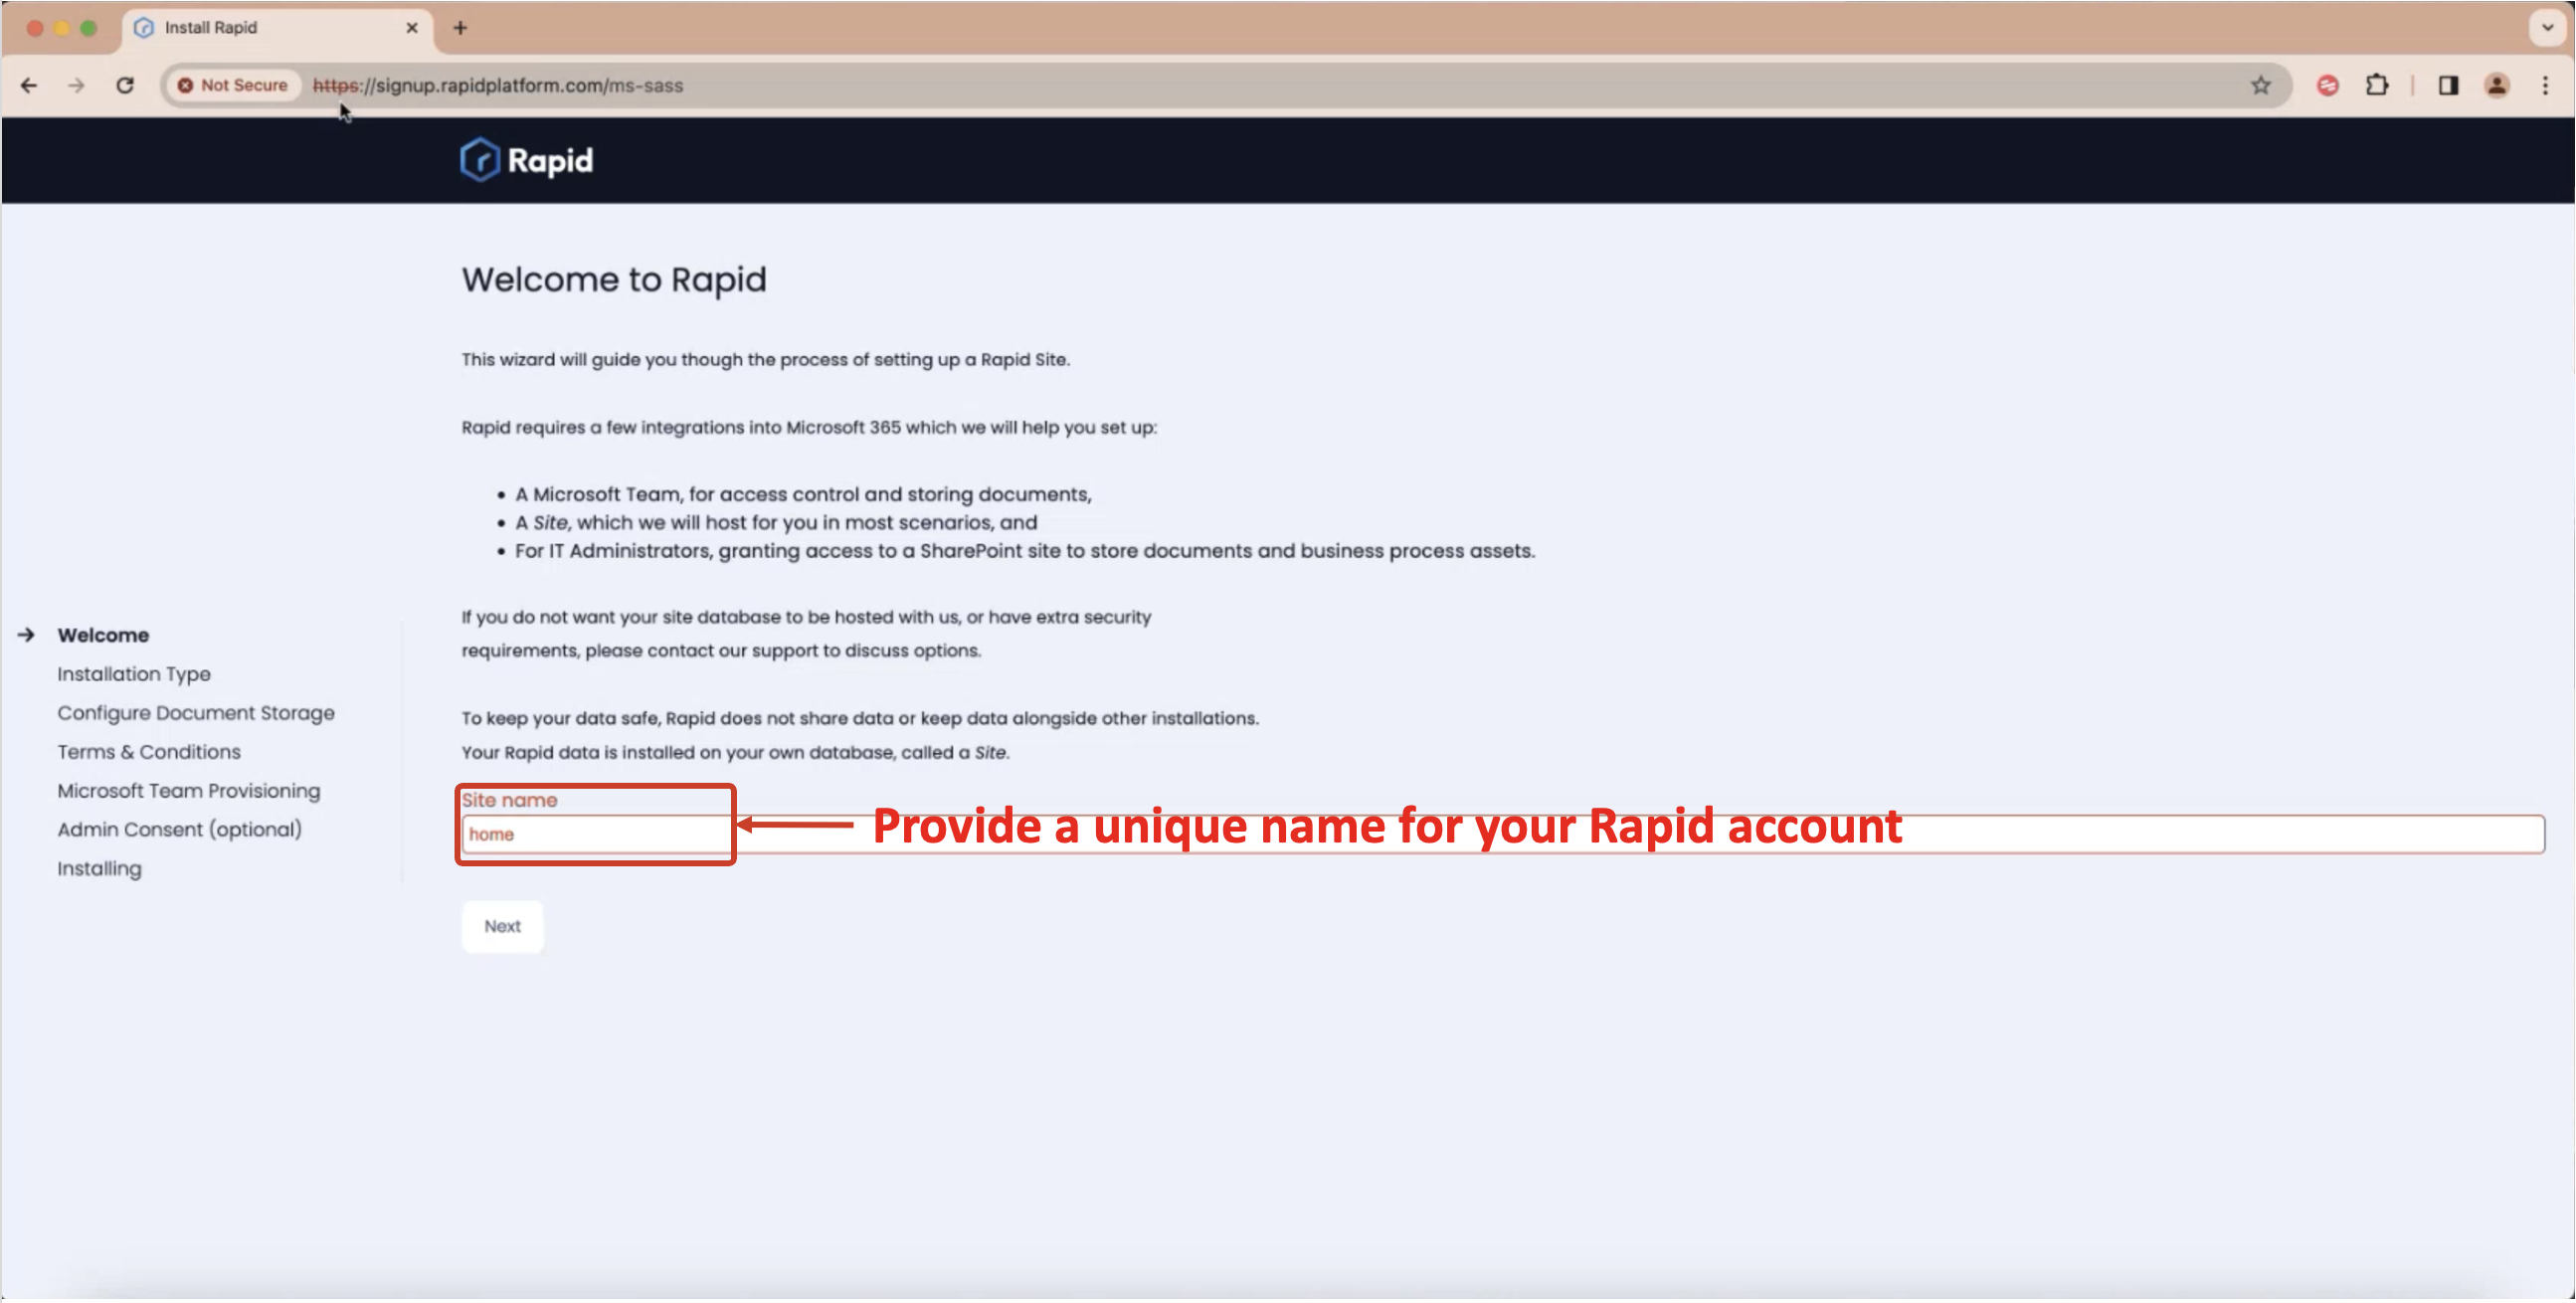
If another account exists with your entered name, the system will prompt you to enter a unique account name.
-
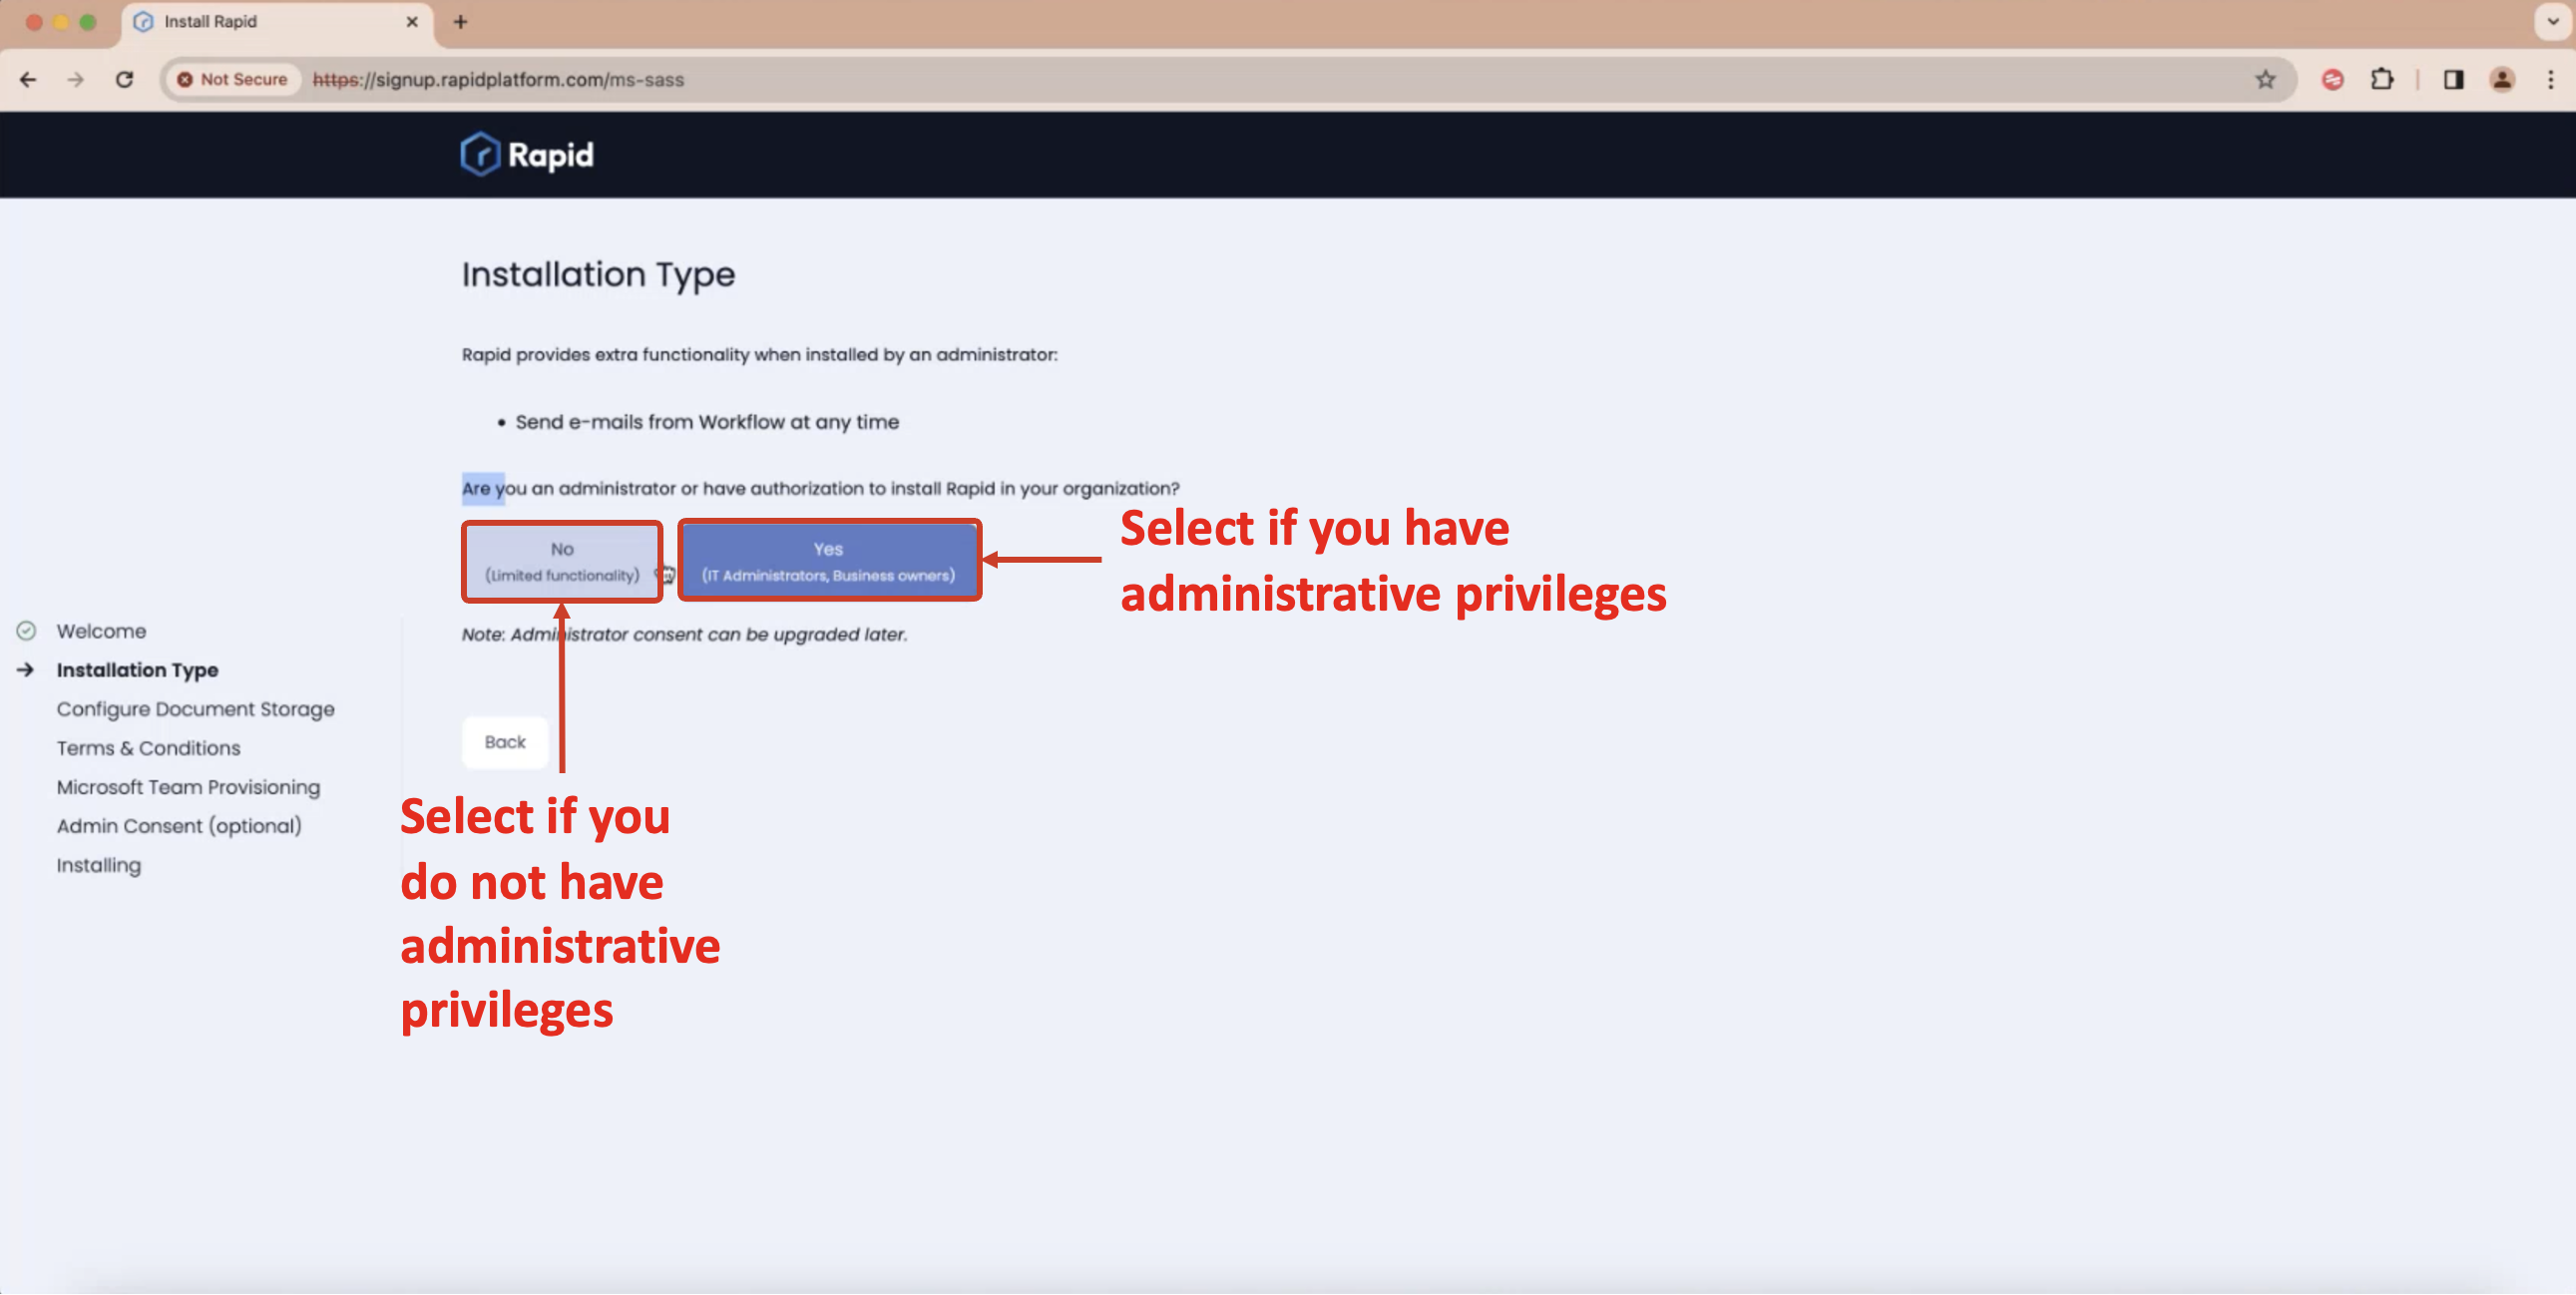
Next, you need to select the type of installation. If you have administrator privileges, you can select Yes. Else, for all other user types, you should select No (Limited functionality).
-
As the next step, you need to provide options for configuring the SharePoint Document Storage for your account. You have two options: a) Provide a Team Name b) Use a custom MS365 storage and document library from your existing Groups and Document Libraries.
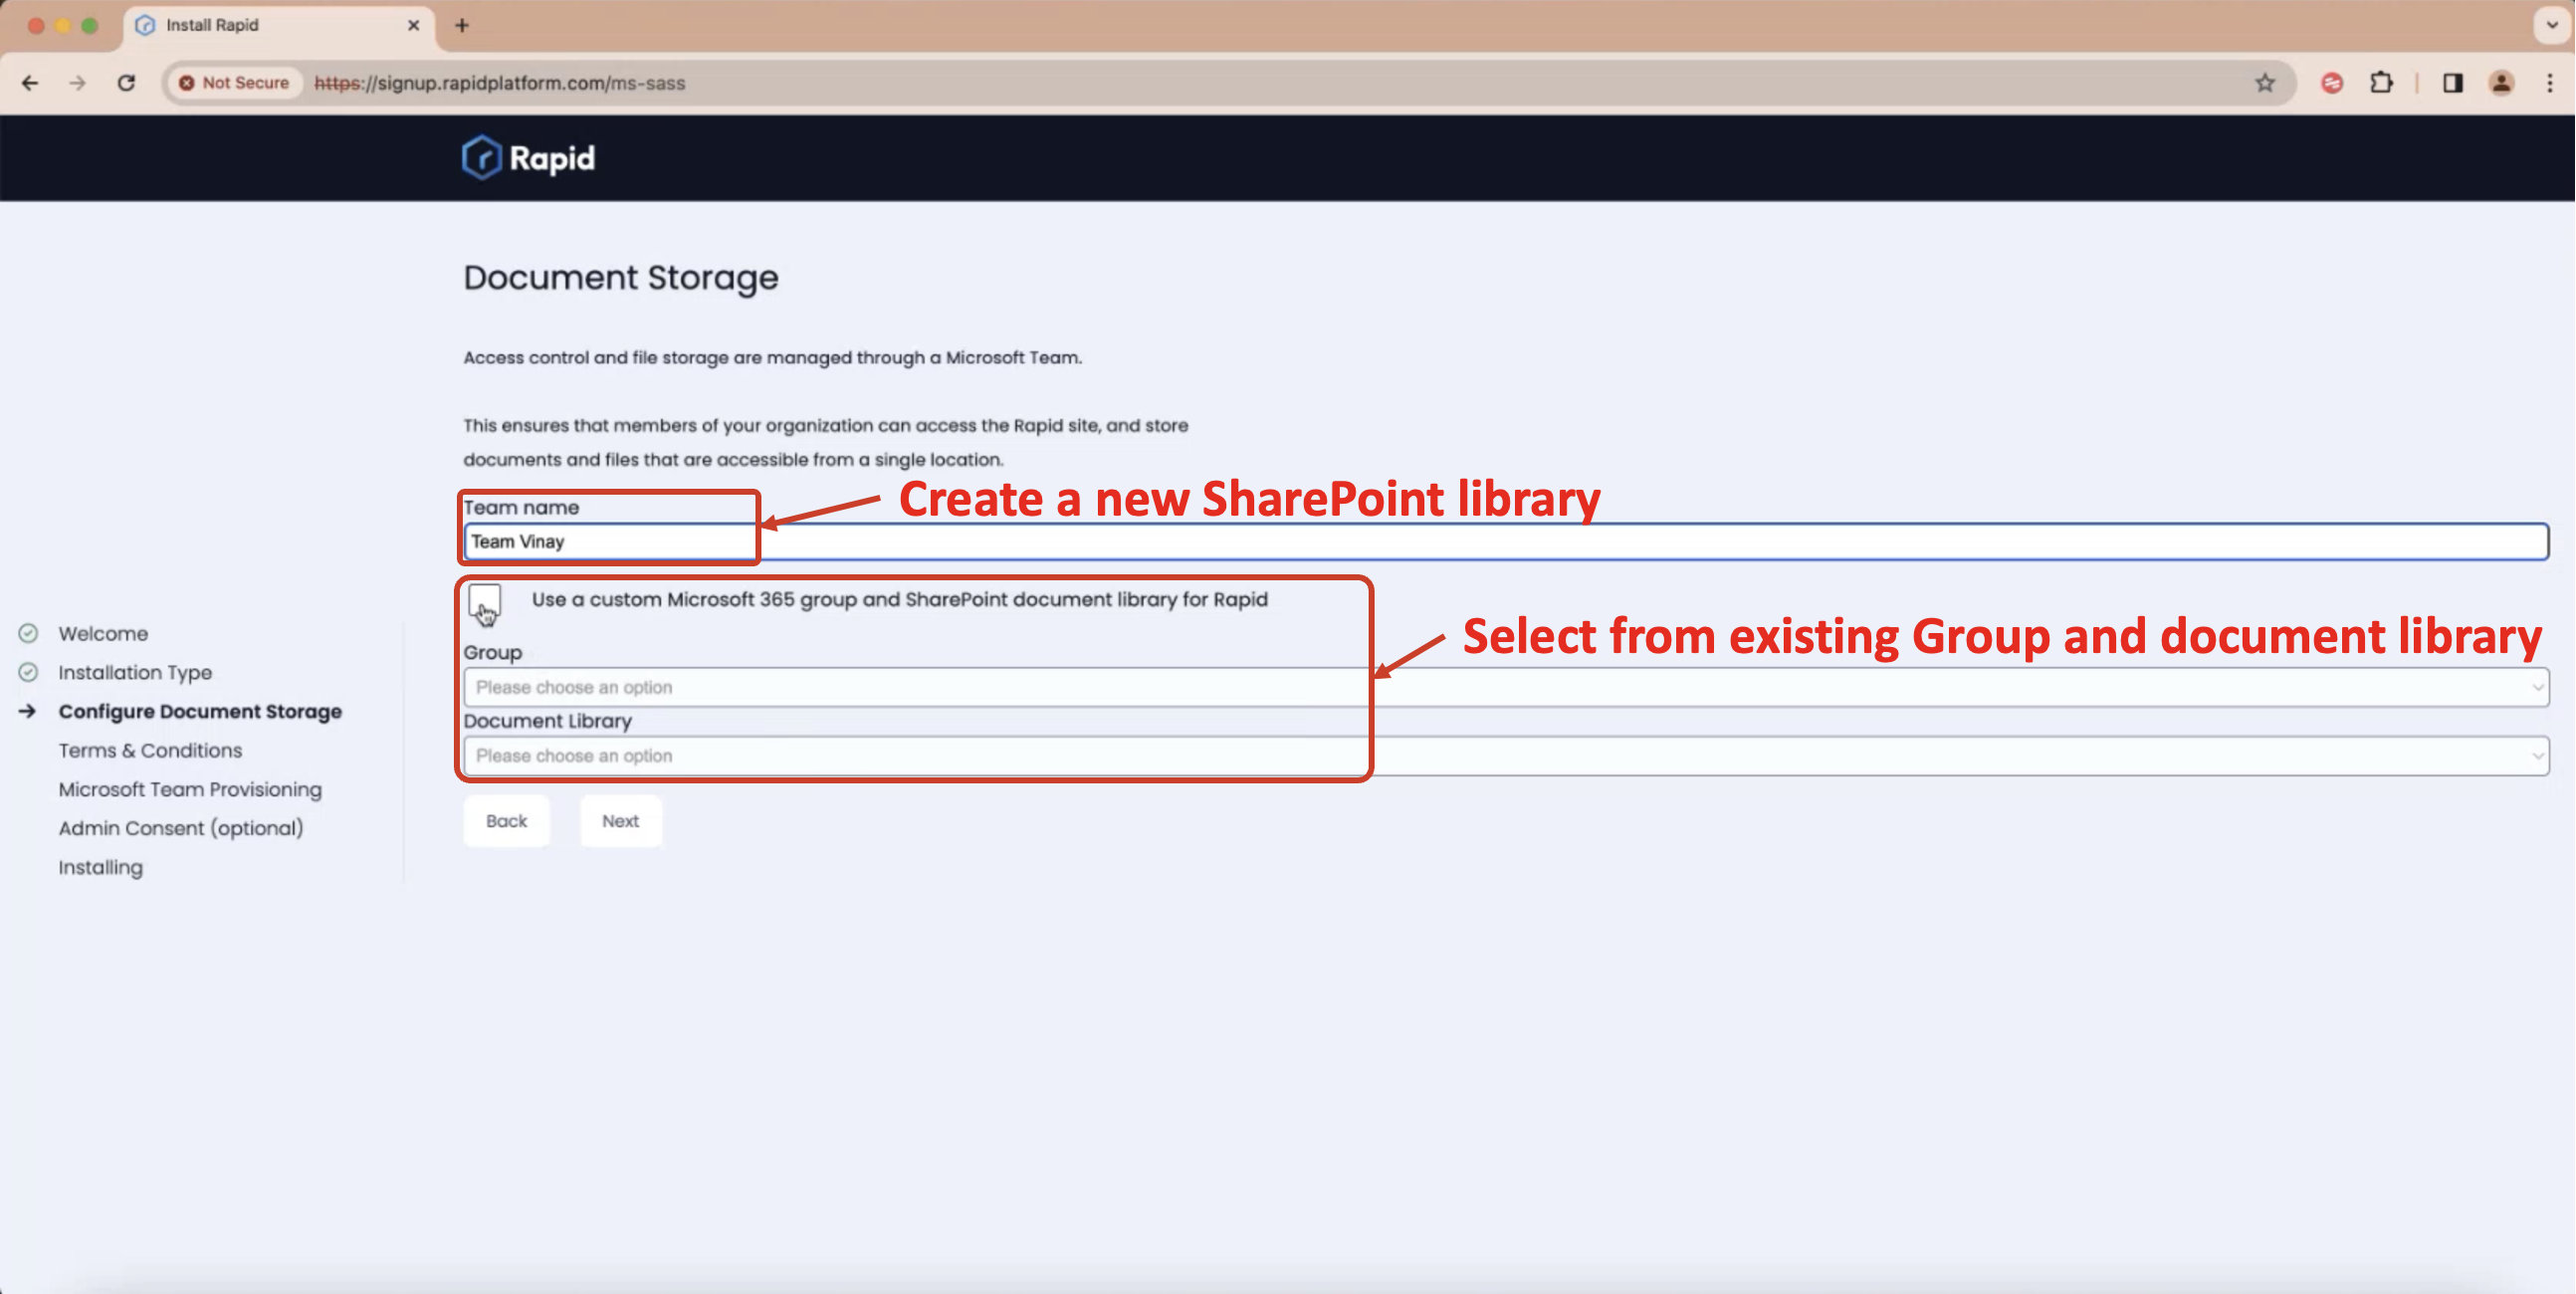
You can select either a) or b) as an option. If you Check the box to "Use a custom Microsoft 365 group ...", then the field to enter Team Name will be disabled. Further you can select your desired Group and Document Storage Library from Dropdowns.
If this option is unchecked, then the dropdowns to Group and Document Library are disabled, and Team Name text field becomes active.
-
Carefully read through all the Terms and Conditions of account creation and usage, click the checkbox and press "Next".
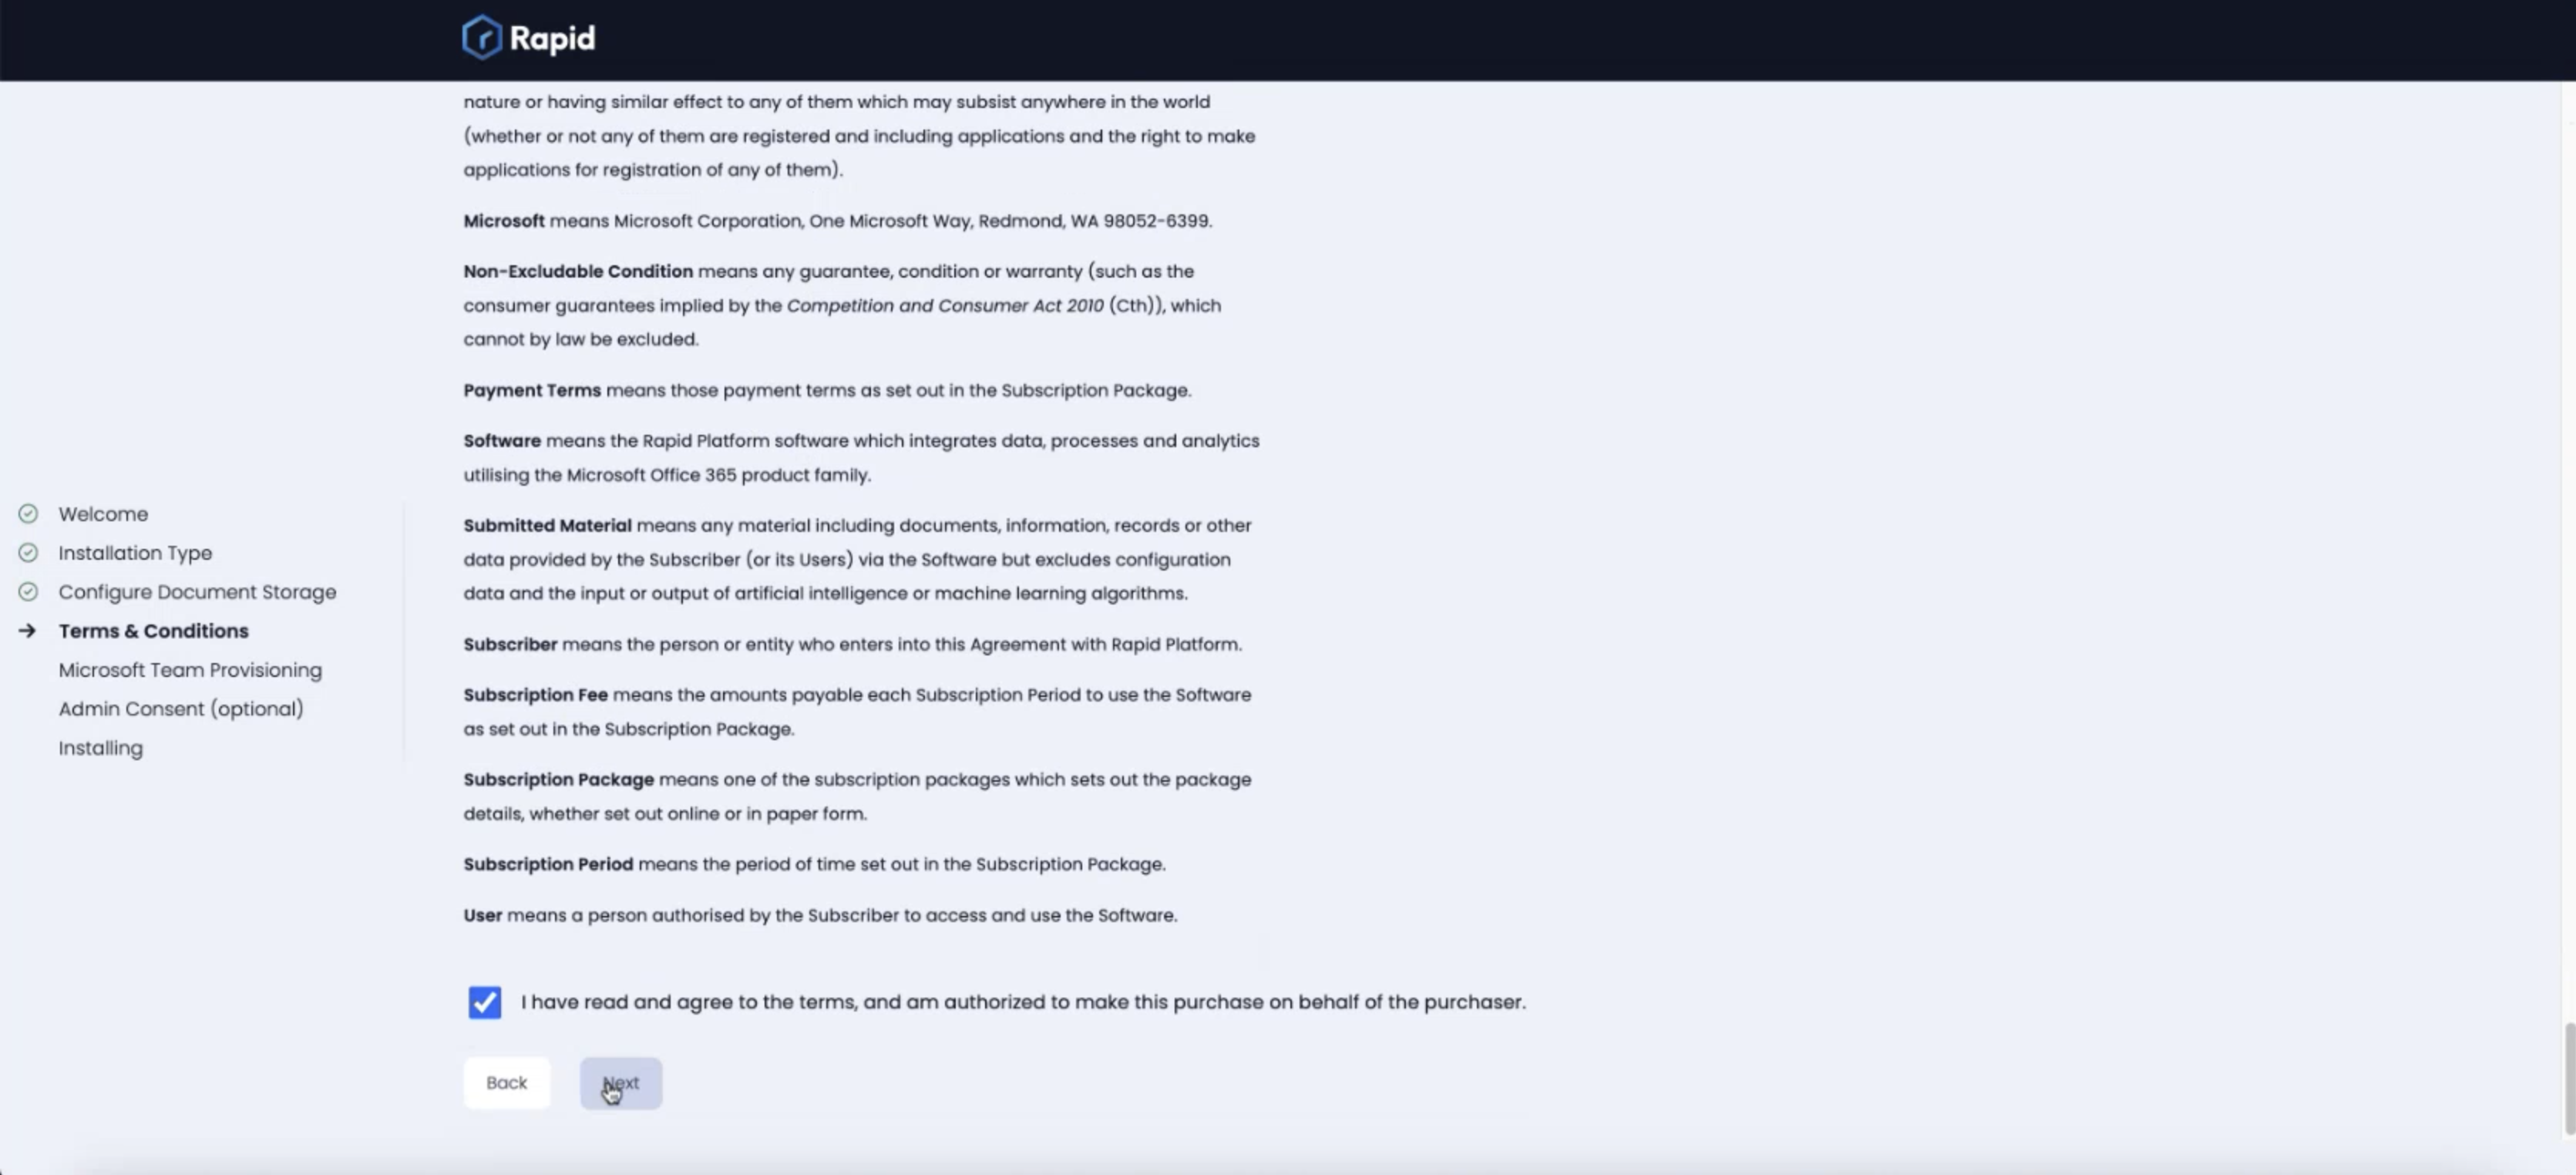
-
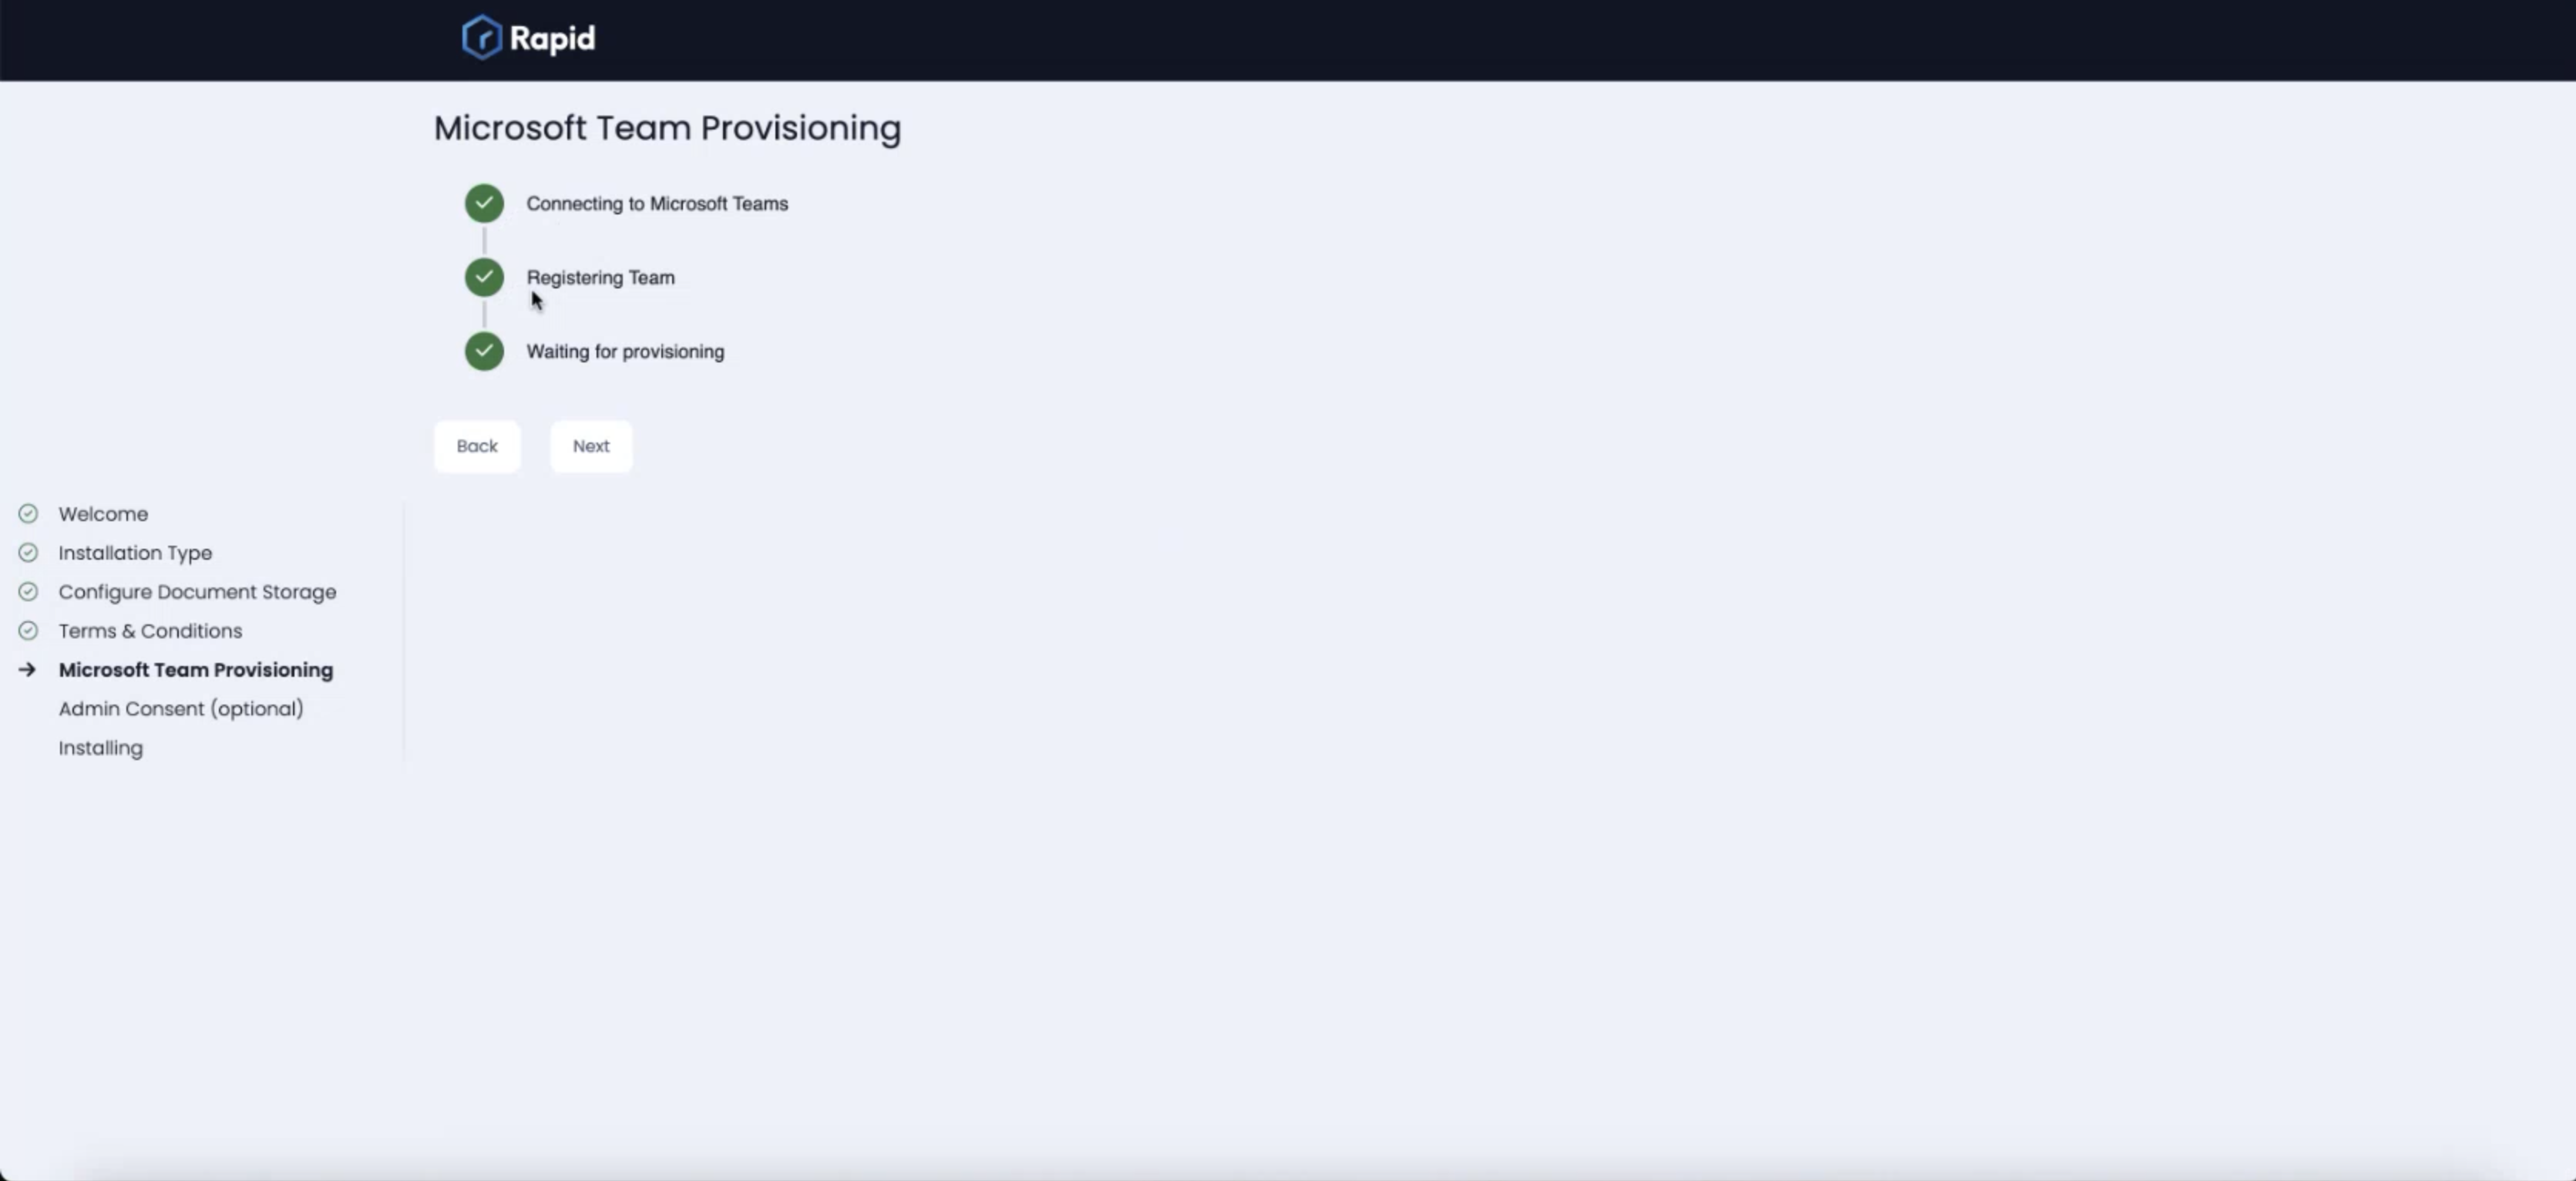
Thats it! The system will do all the Provisioning of your subject Rapid account (based on details provided) with reference to Microsoft applications. Just click "Next" when all the three icons appear green.
-
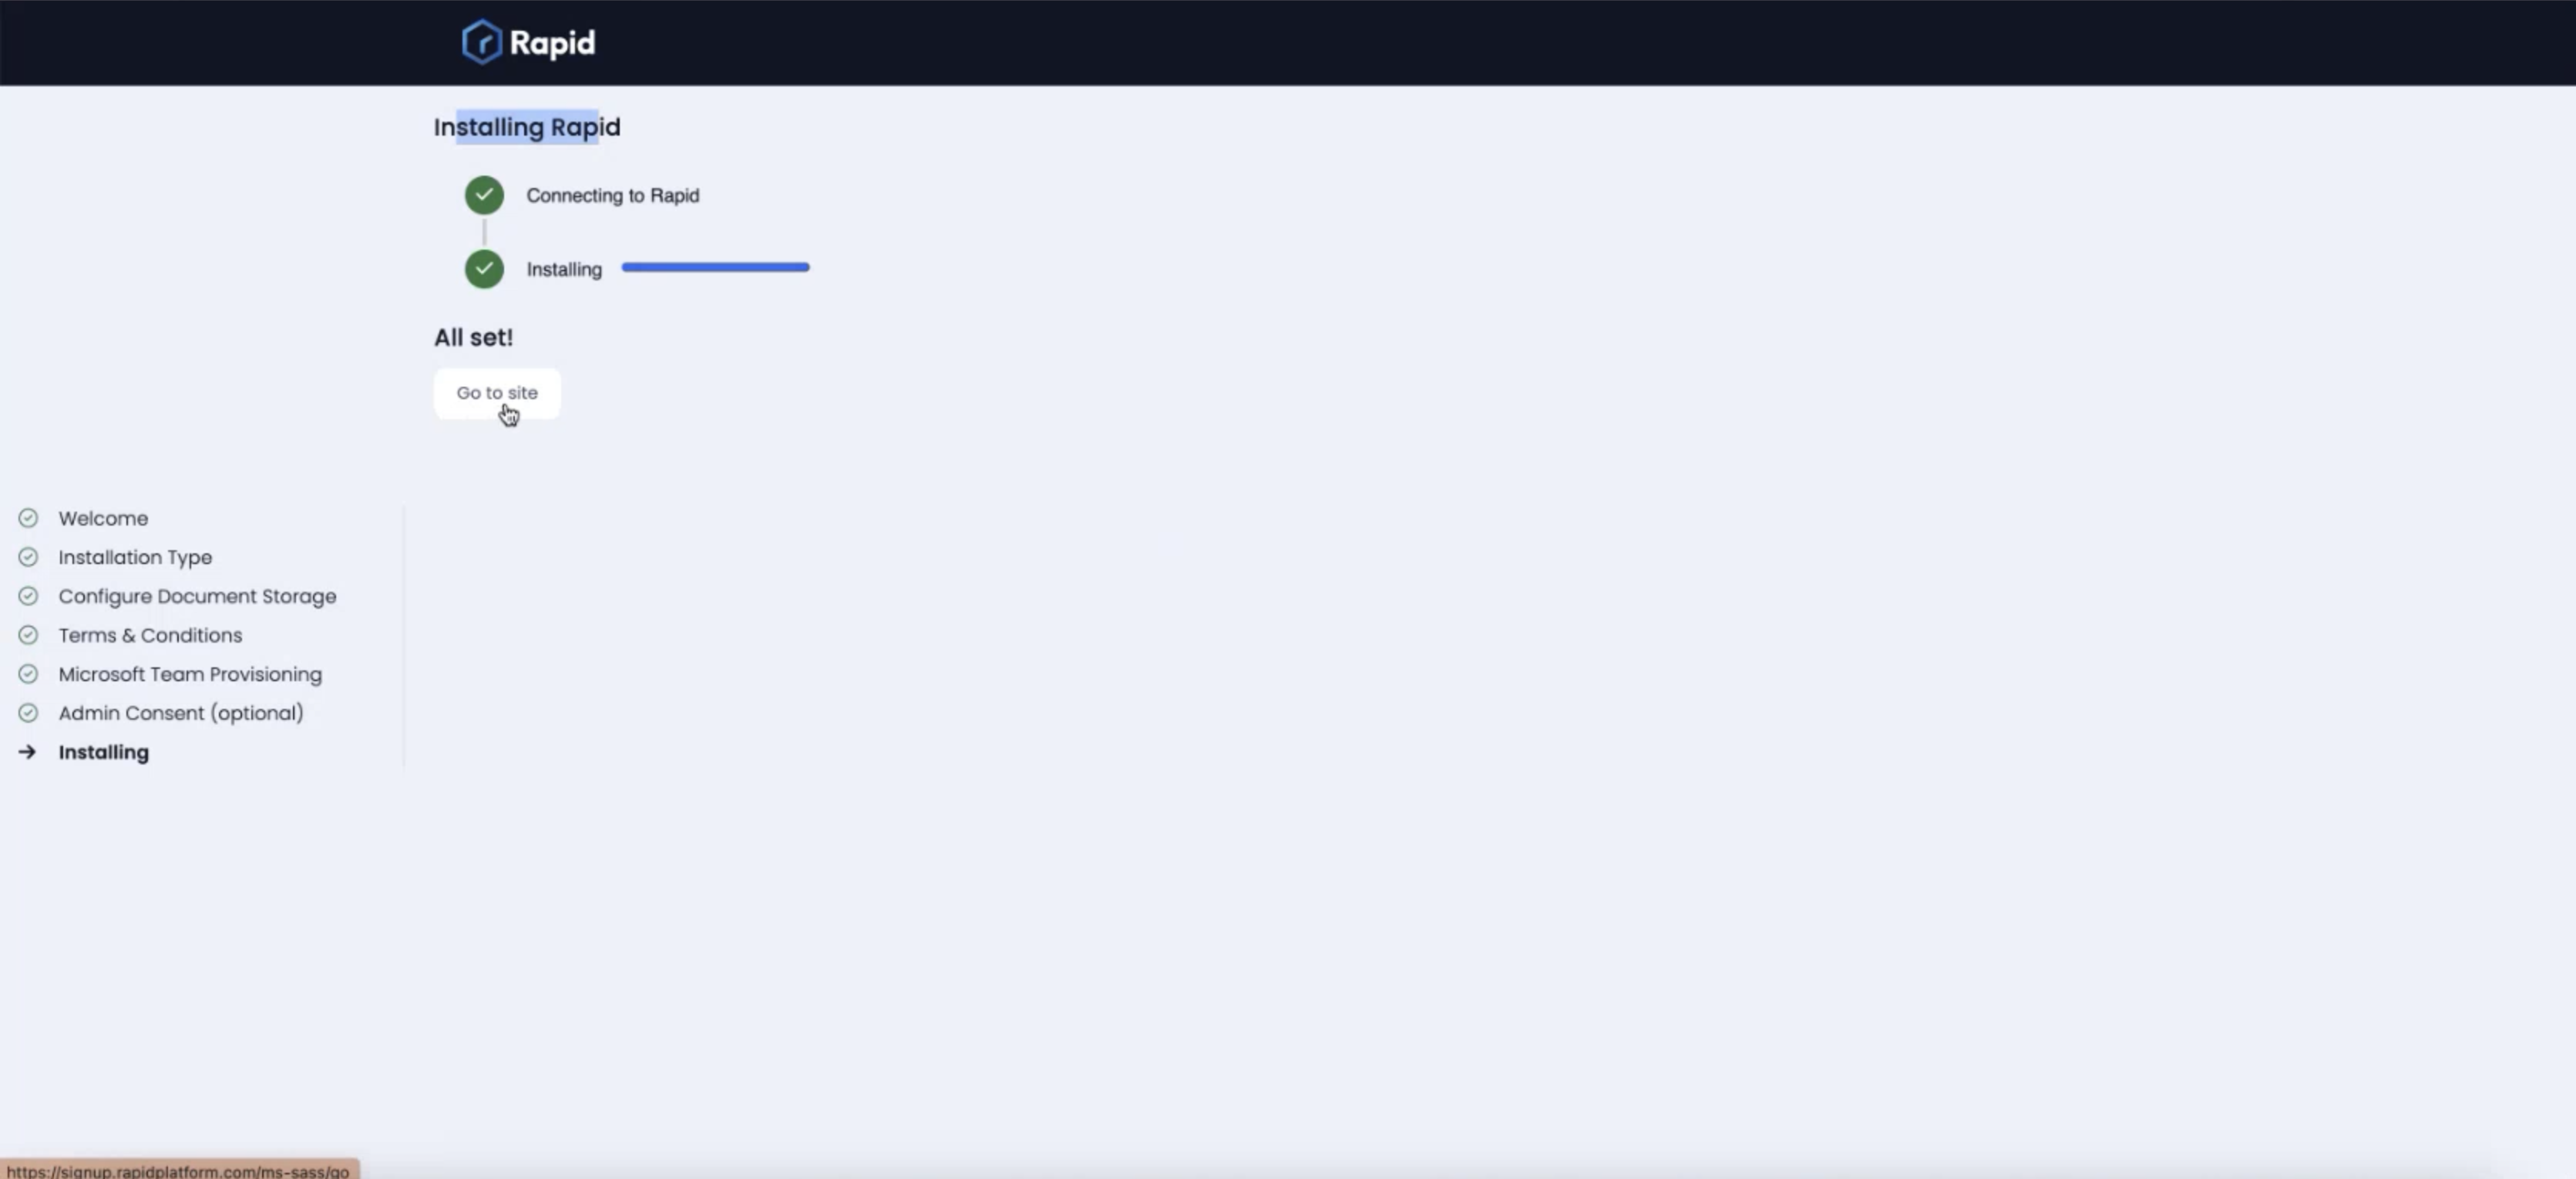
Finally the system will install your Rapid Site. Click "Go to site" when the Installing bar completes.
-
You will be navigated to Sign-in Page of your New Rapid Site. Login with your MS365 login credentials.
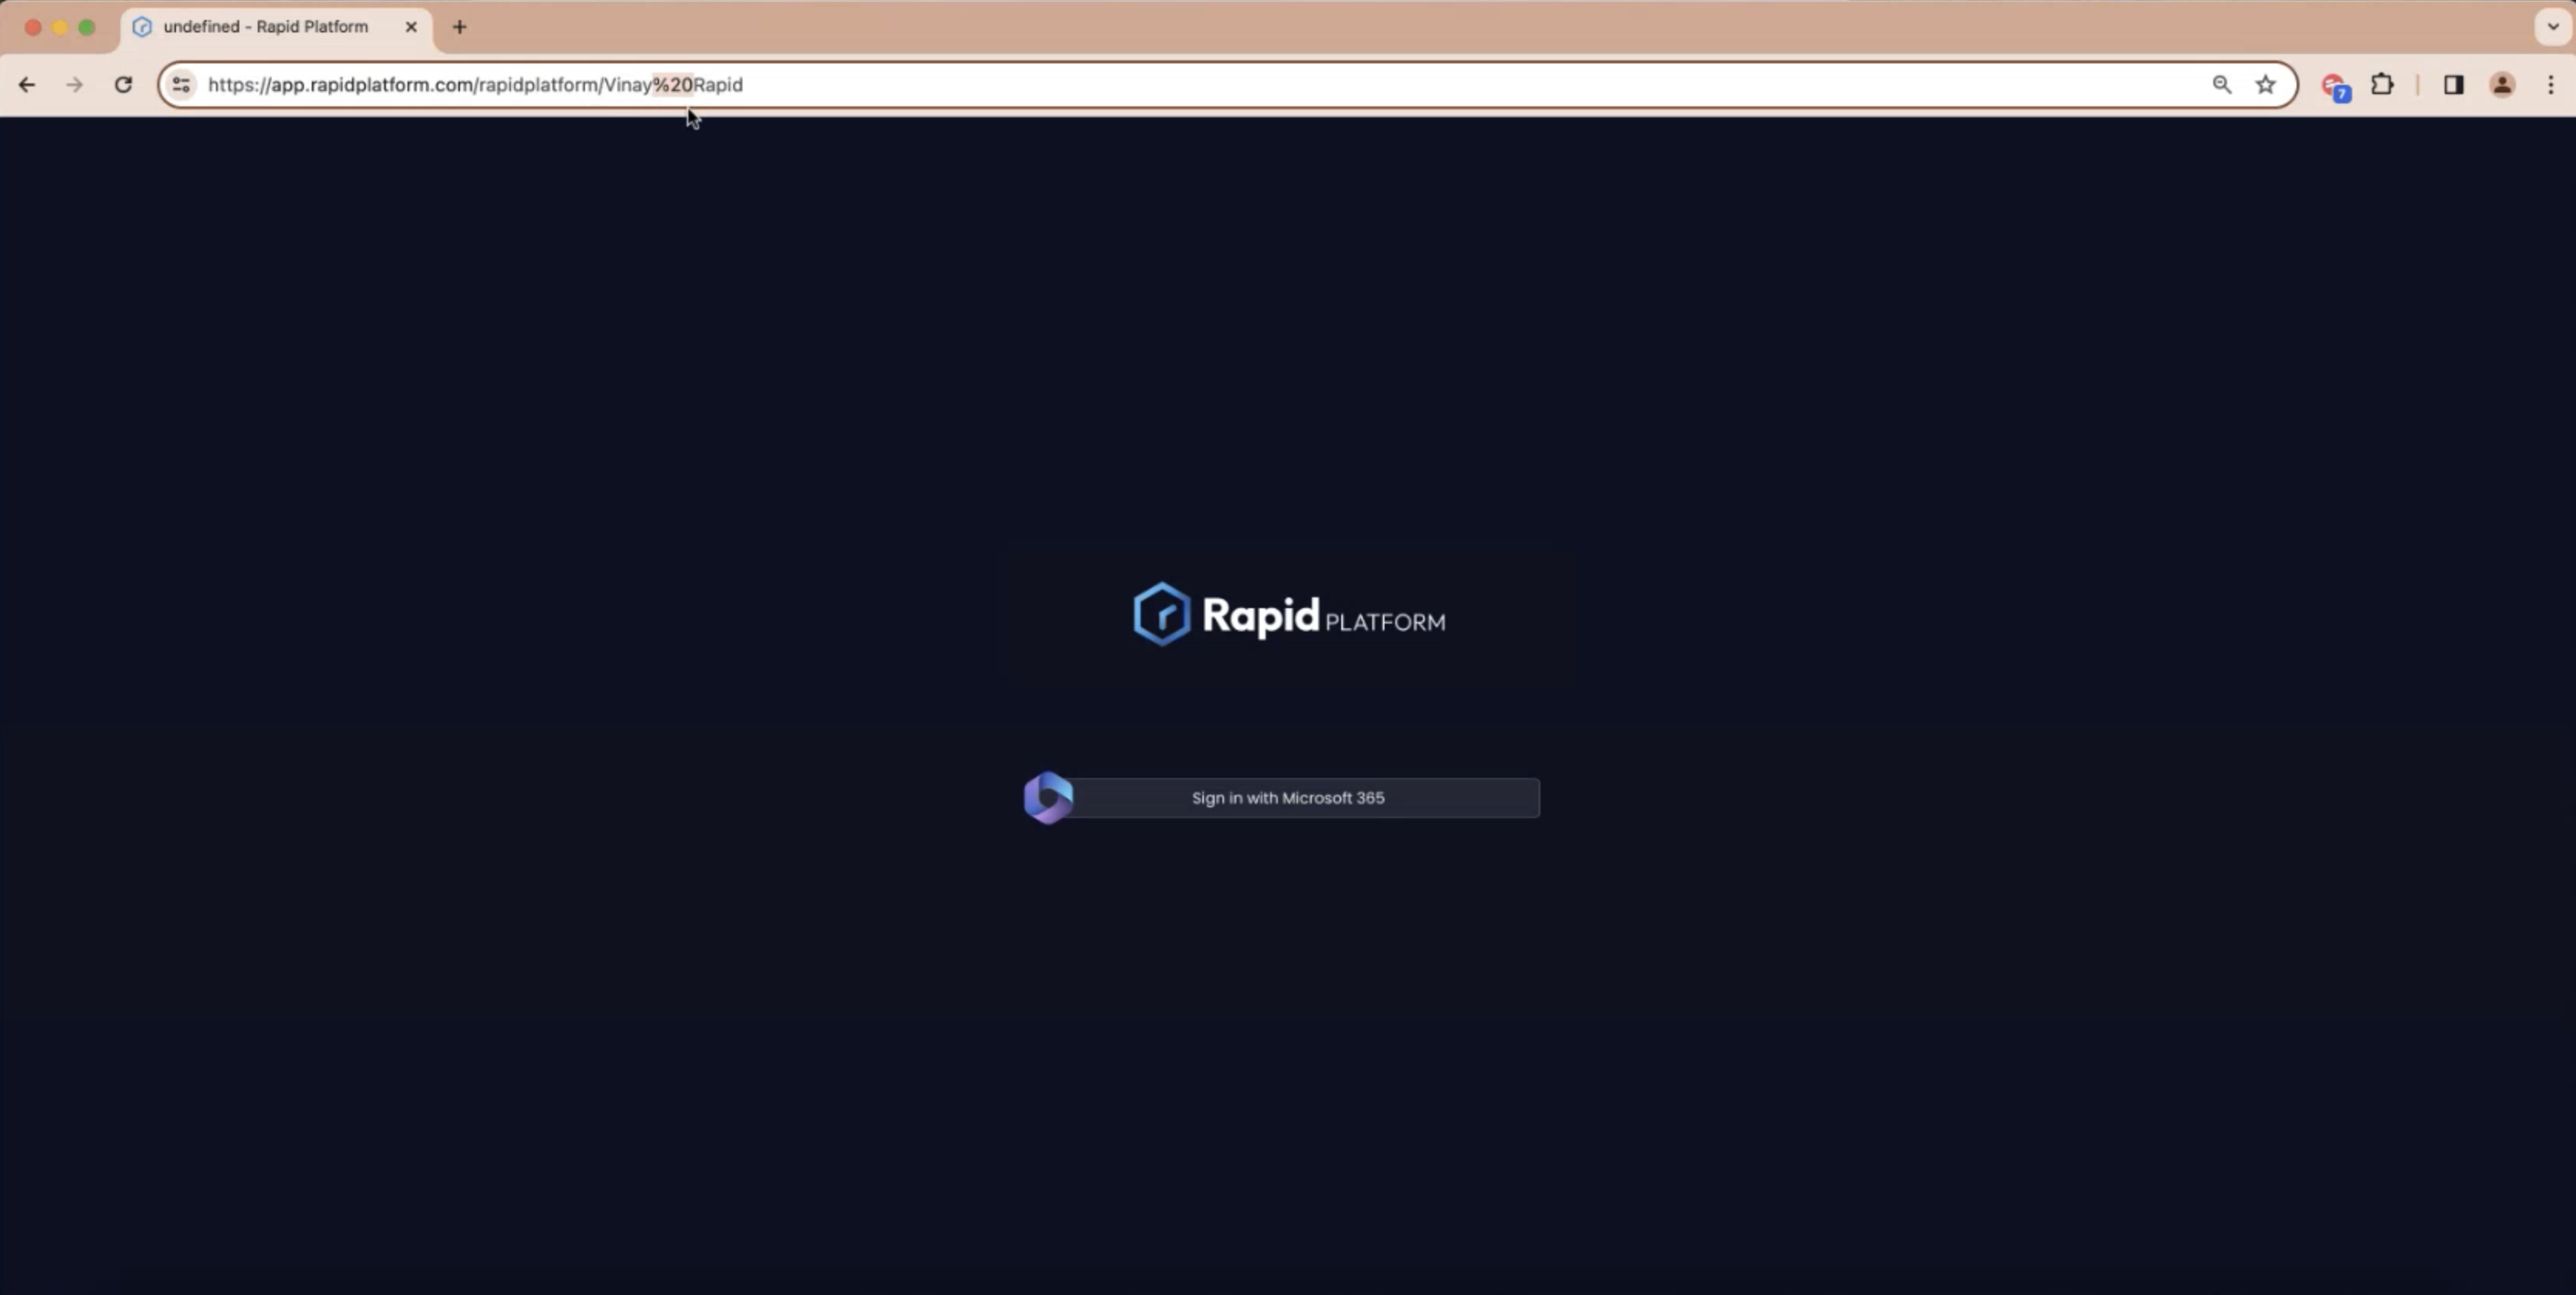
Your Rapid site is ready!