1.39.0 - Rapid Platform

30/04/2024
Features
System Settings Table
While creating reports in Rapid Platform, it is not an uncommon to be want to create links to items within the report. You can now dynamically generate these links to regard the site they come from using the new Settings table. This table holds configuration information about the site itself, such as its identity.
The problem To link an item in a report, a URL is required. This URL to the item has the title of the Tenant and Site.
Previously this would need to be baked into the reports themselves as the site was not aware of its own identity.
This notably failed in reporting scenarios that spanned multiple sites, or product reports that are deployed dynamically to customer sites.
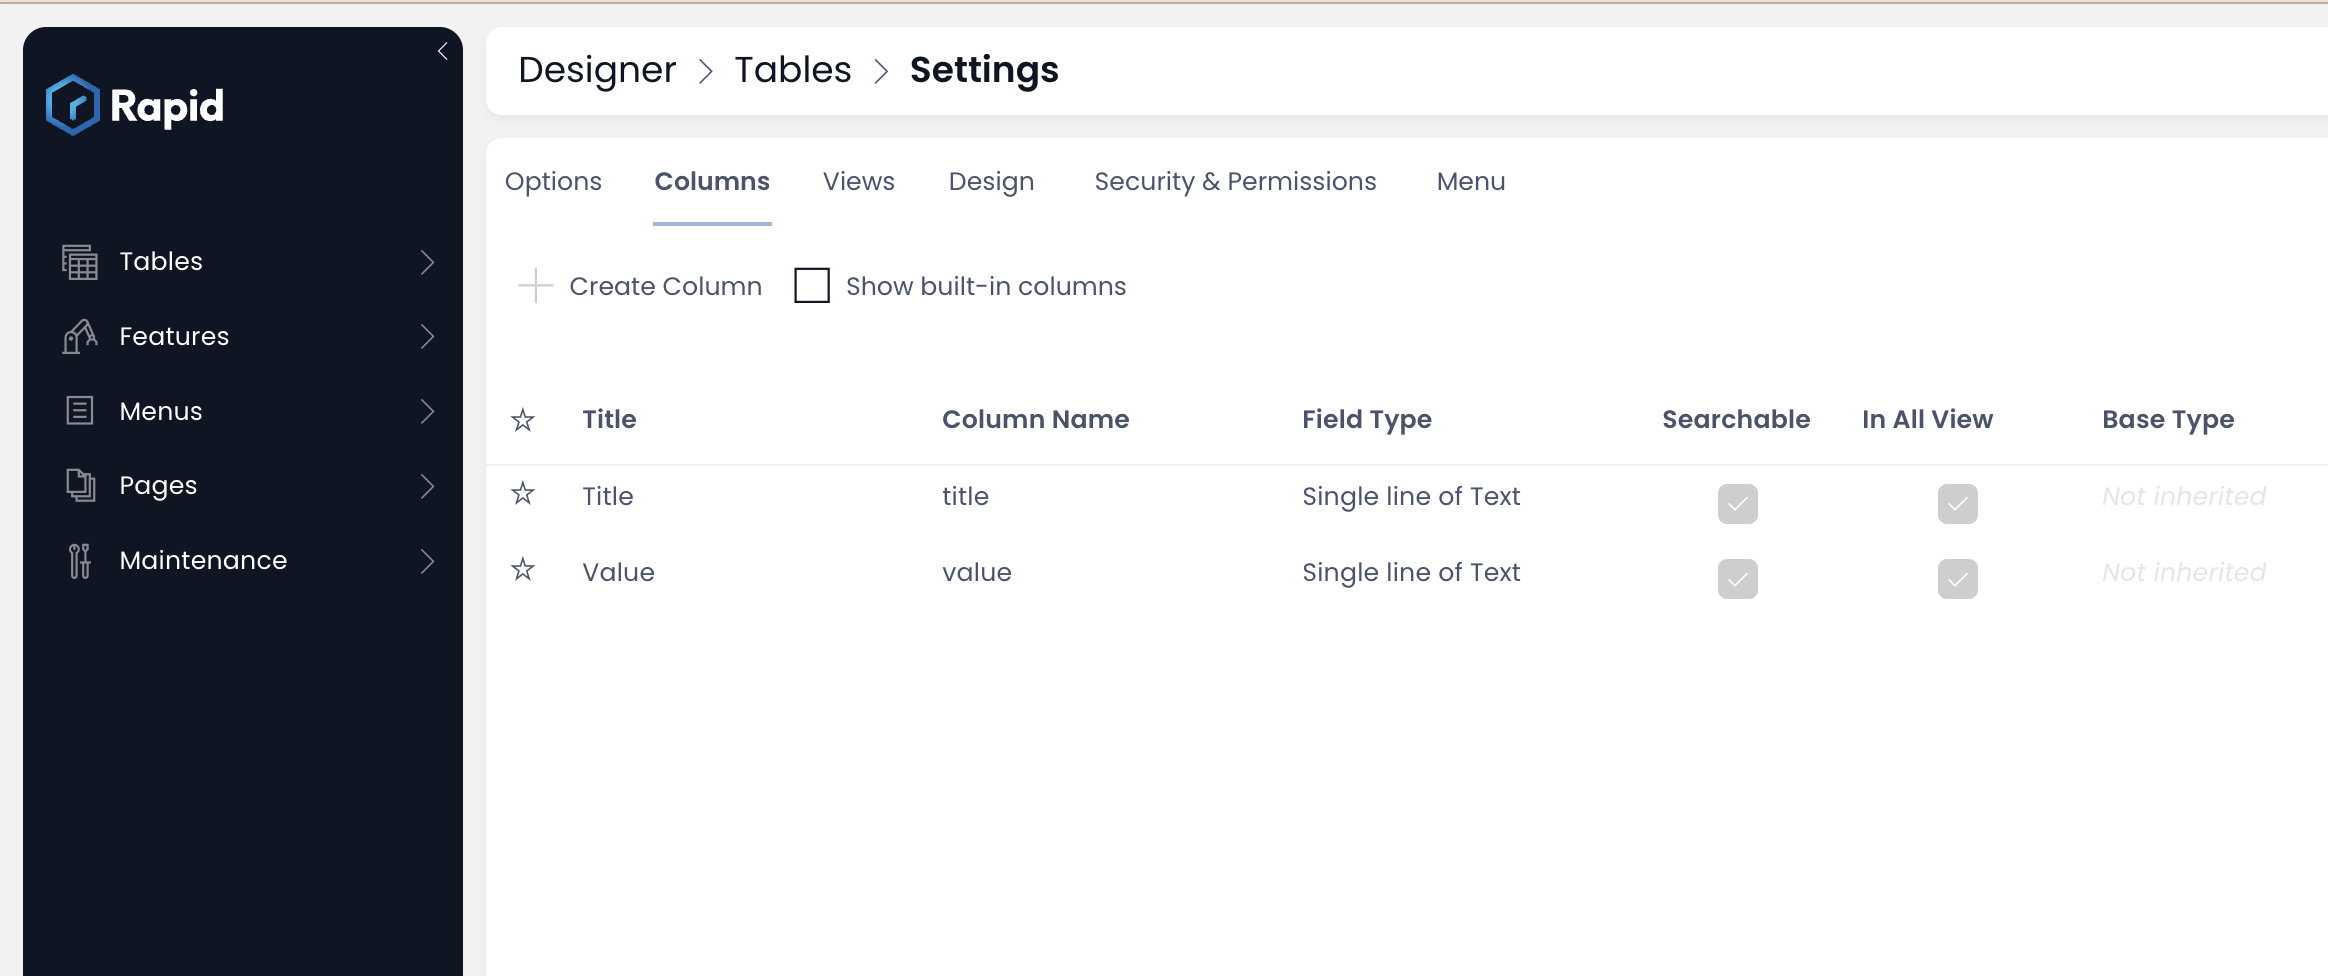
The solution - "Settings" Table In release v1.39, there is a new system list created with the title - "Settings". This Settings table has two columns - Title and Value.
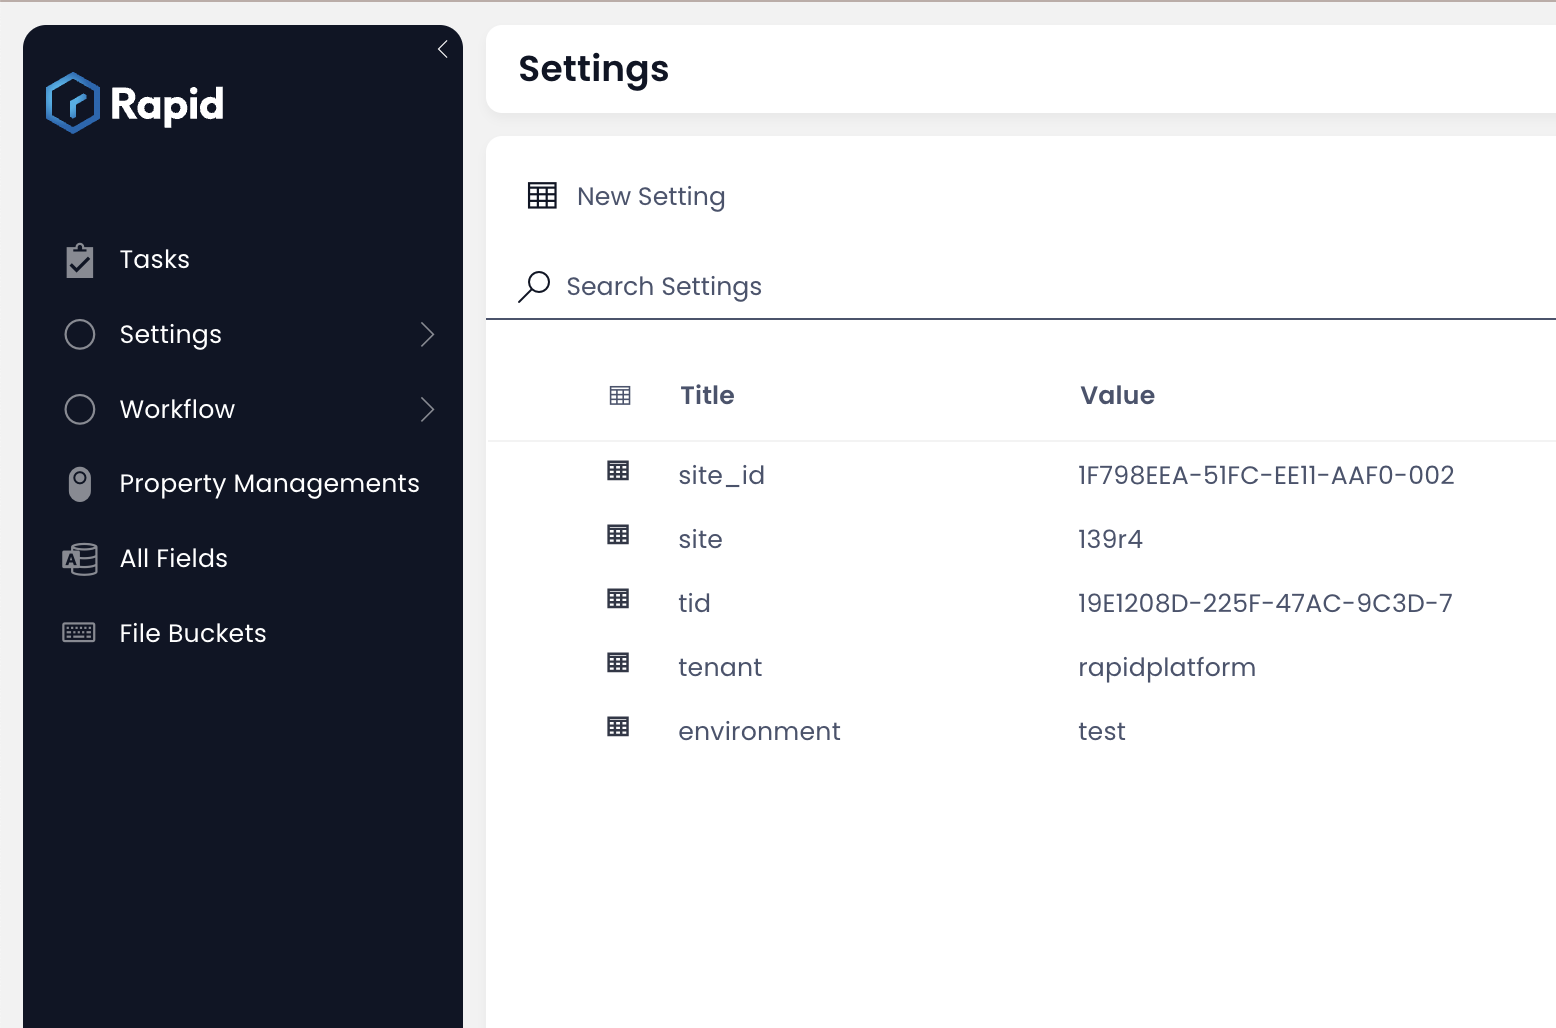
This table stores the following about the subject site:
- The Site Title
- The Site ID
- The Tenant Title
- The Tenant ID
- The Environment
Using the Settings Table, the problem is addressed. The title and id of the site is now stored in the system and hence is accessible by the report for creating links.
Using Settings in PowerBI
Settings is just a normal list as far as loading its data into your PowerBI reports. If you're interested in getting started straight away, here is a simple way to start generating dynamic links:
-
Load the settings table into your data model directly grabbing the Site and Tenant values
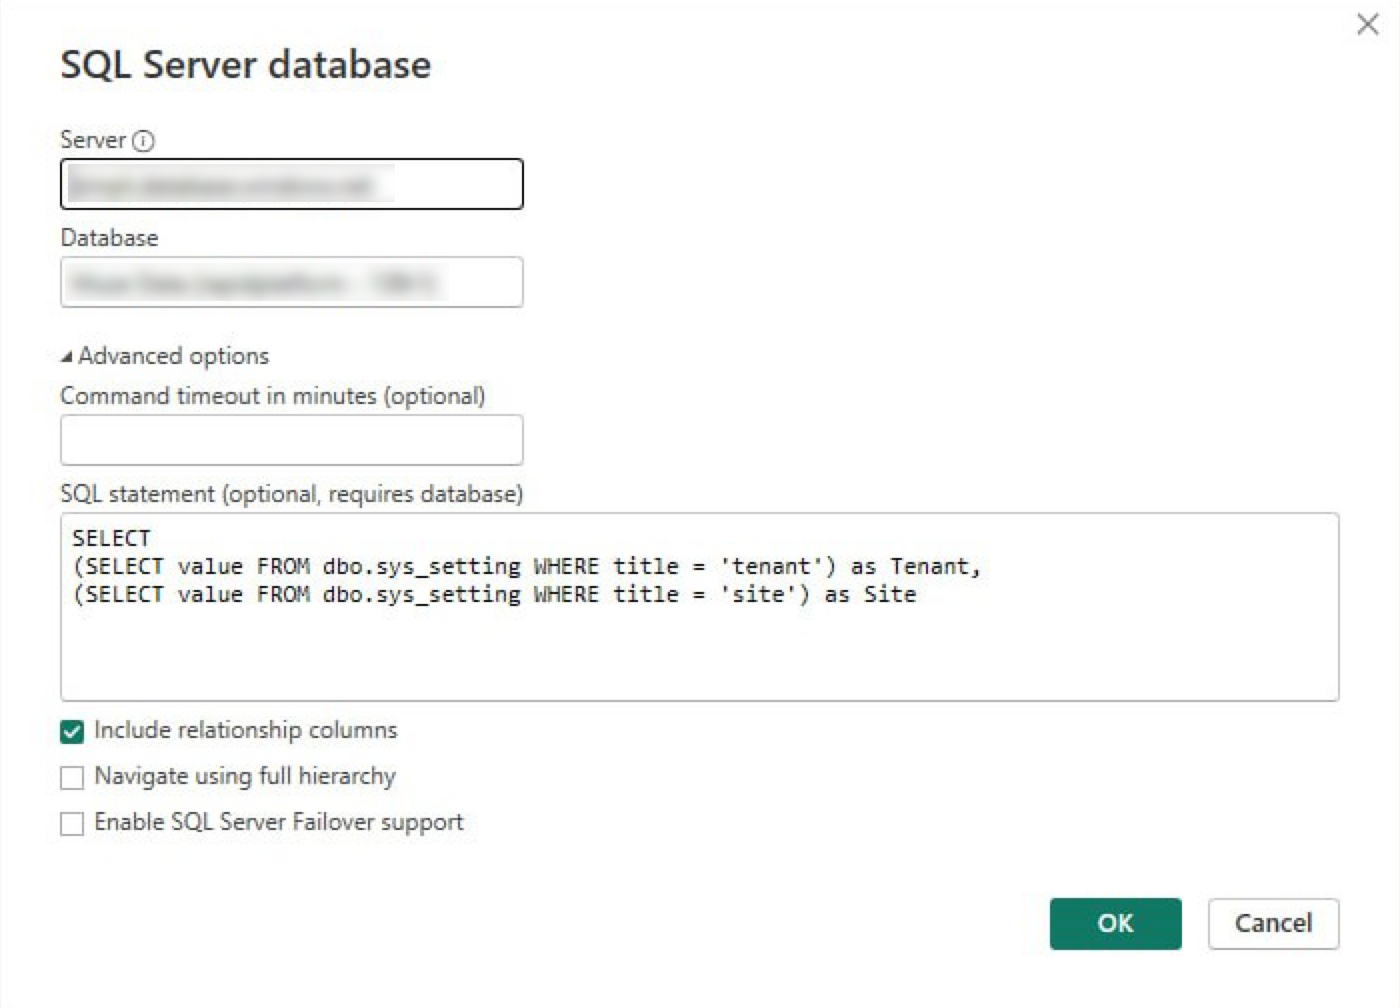
-
These are single row values, so use a measure to flatten the value into a scalar string for easy future referencing using the
MAXXfunction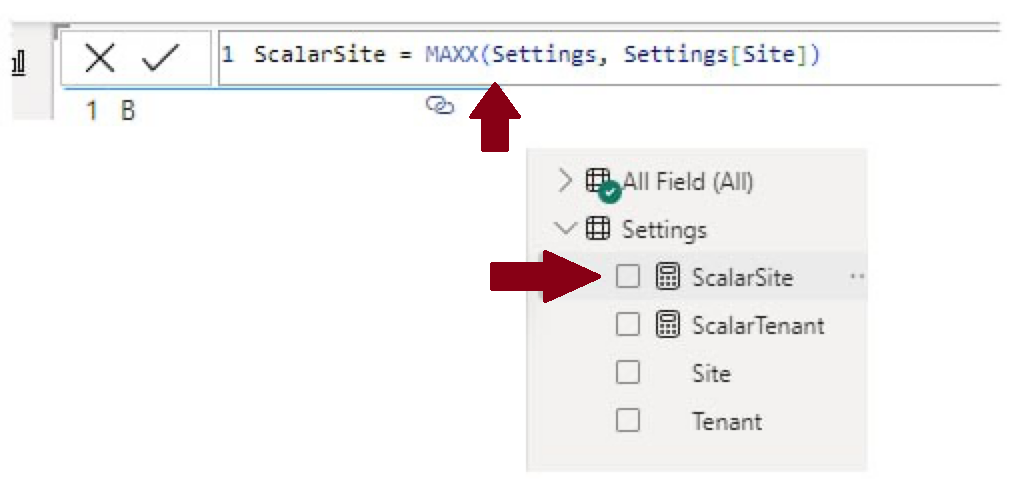
-
Setup the link URL using the values from the scalar Site and Tenant values you've created, the concatenation
&operator makes this nice and easy
Process Clean up
Processes frequently rely on certain items for the process to make sense. When a process run is triggered from a signal event the triggering item is now flagged as important to that process run. With this new feature, deletion of the important item will now abort the associated process(es).
This is an early feature exploring automated clean-up. Any feedback on what you expect, how it behaves and what you imagine it working would be greatly appreciated.
Conditionally Enabled Menus
Menu items can be configured to perform specific actions like triggering a workflow, opening an adaptive document, sending an email etc.
There can be occasions when the defined action is eligible based upon a certain condition.
For example - consider a menu button is configured to trigger a workflow - to "wrap-up the project". This process involves sending out thank you emails to all stakeholders, checking for any pending deliverables, unpaid invoices, release of resources etc.
A project wrap-up is only eligible for projects having status - "completed and ready for wrap-up". Imagine an employee (by mistake) clicks the "wrap-up project" button for an "in progress" project. This can cause anxiety and frustration among stakeholders, along with data changes that may be difficult to manage.
You can now enable / disable the menu button based on specific conditions.
Steps to conditionally enable a menu
- Navigate to your desired table in Designer.
- Goto the Menu tab.
- There is a field titled - "Conditionally Enable".
The Conditionally Enable field is visible when the location to display is either "Both" or "Item". This field will not be visible if the location to display of the menu is set as "Table".
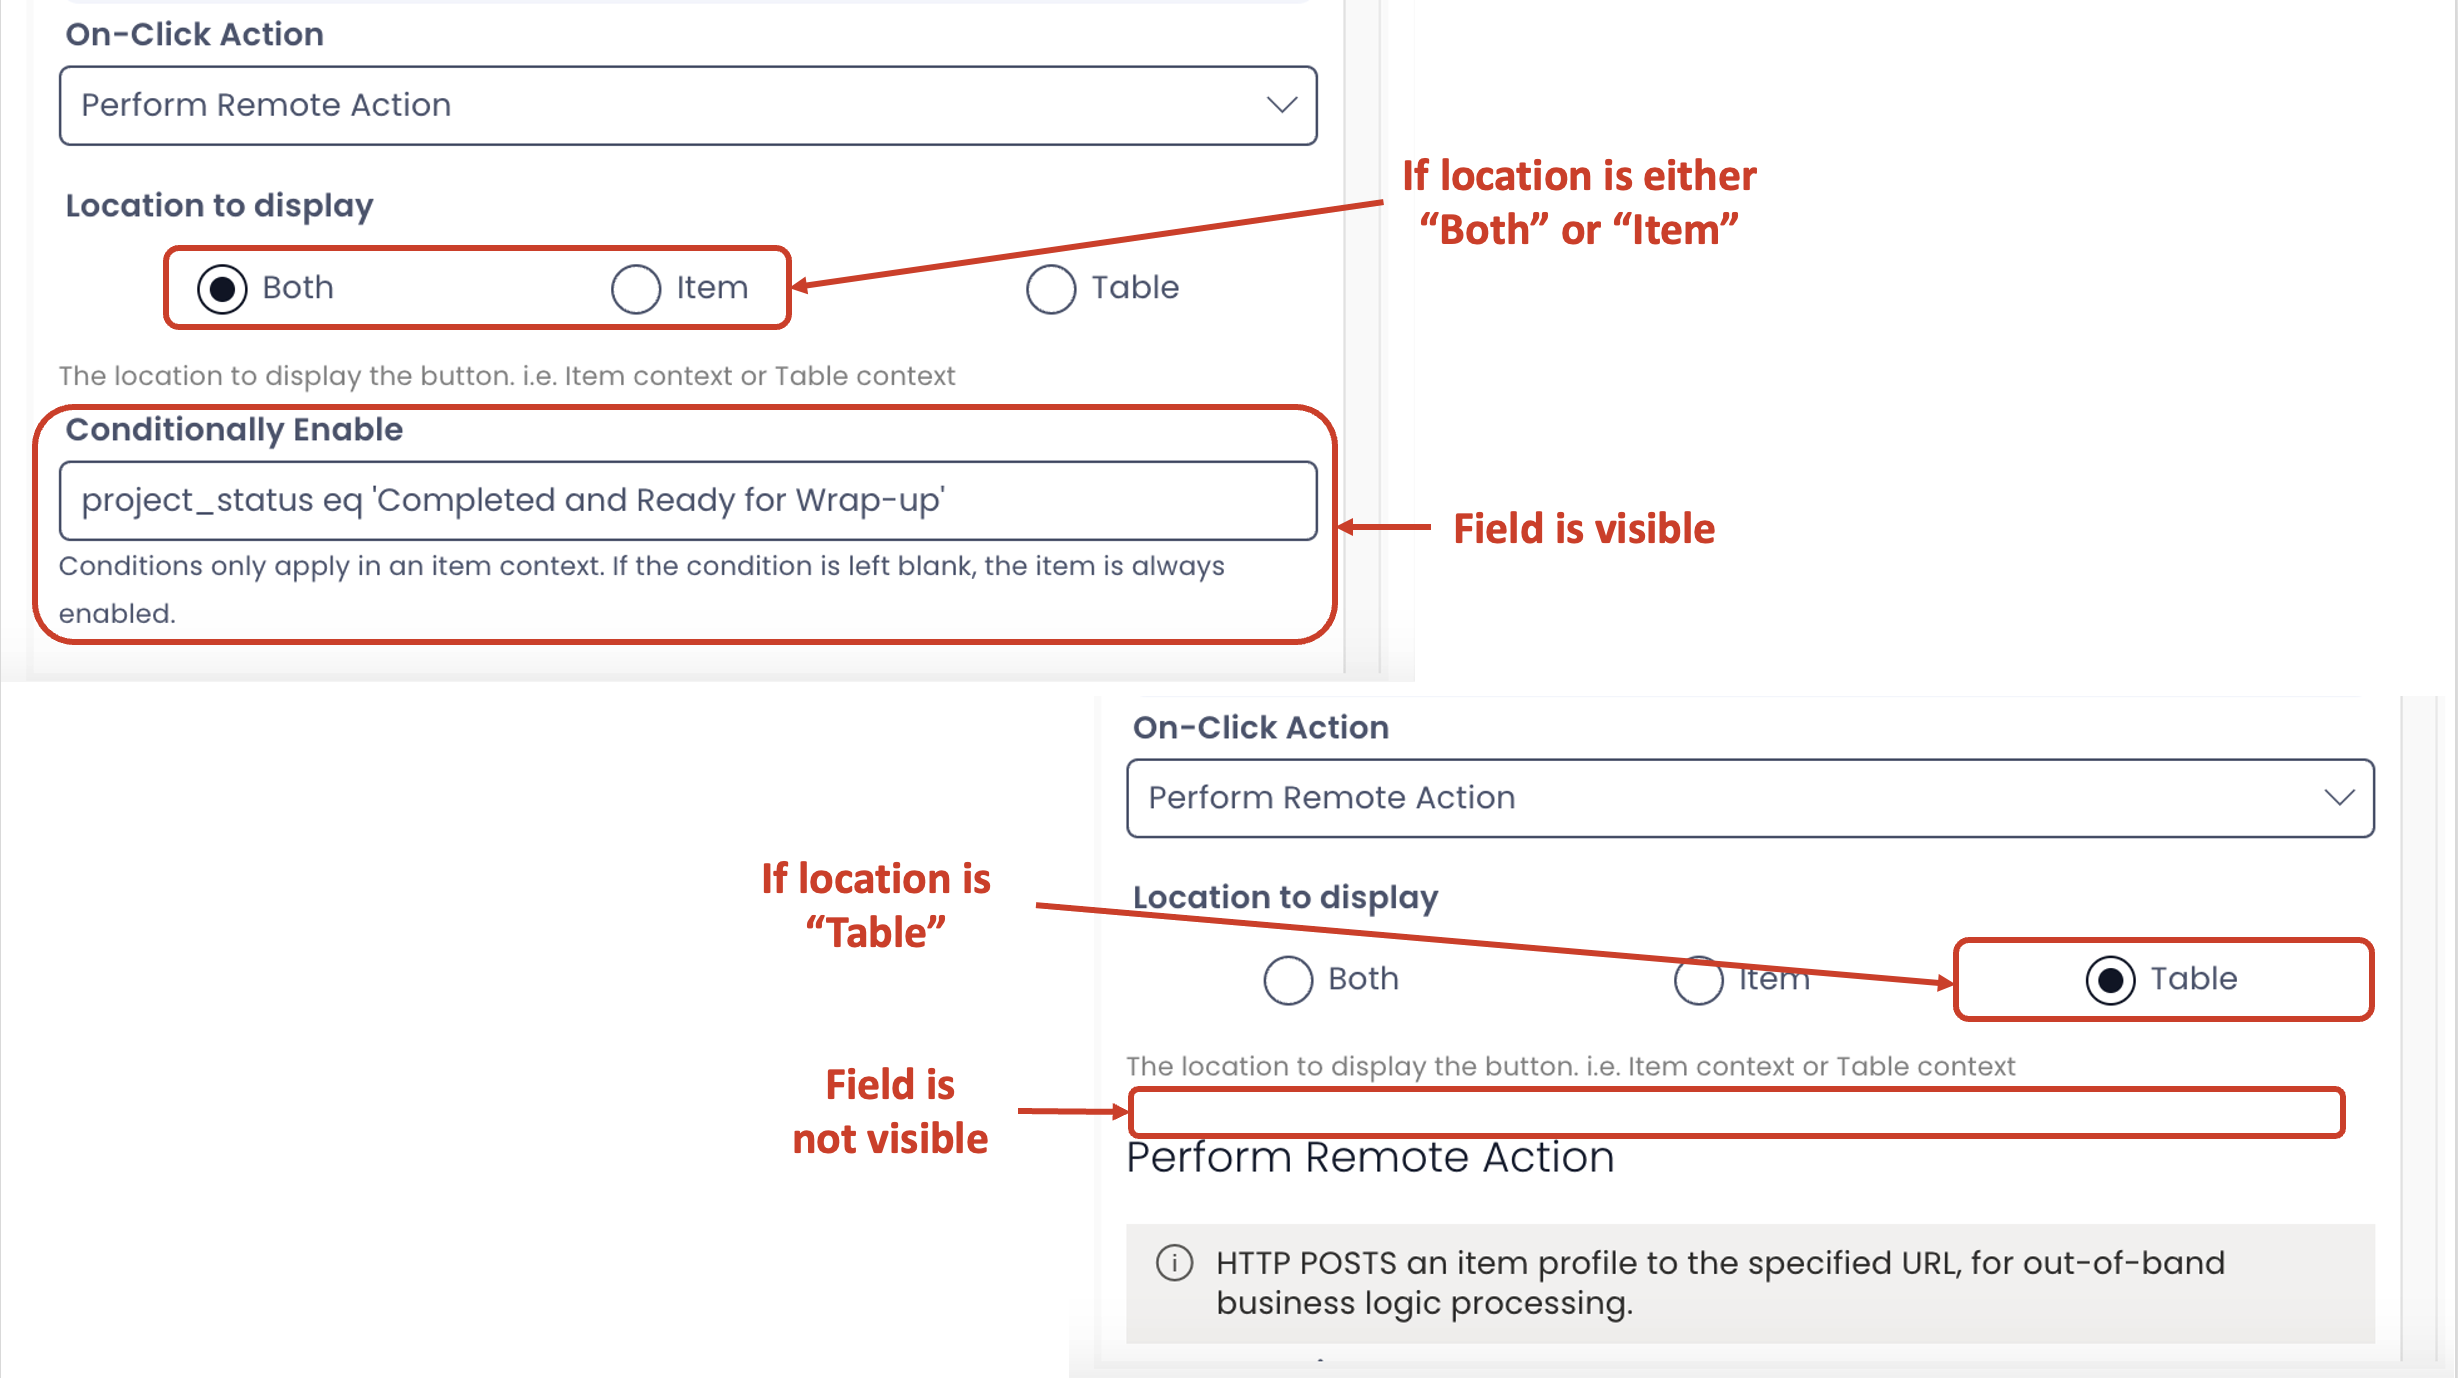
This is because, the functionality to enable / disable menu button checks for the condition at the item level. It does not hold any meaning at the list level.
With reference to behaviour of enable / disable of menu button's location on List / Item pages, please consider the following:
-
If the location to display is set as "Both" AND there is a condition specified in the "Conditionally Enable", then the subject menu button will always be disabled for the List page. It will be enabled or disabled on the item page based on whether the condition is met or not.
-
If the location to display is set as "Item" AND condition is specified in the field, then the menu button will be enabled / disabled based on whether the condition is met or not.
-
If the location to display is set as "Table", you cannot specify the condition as the field "Conditionally Enable" will not be visible in Designer.
-
If the location to display is set as "Both" OR "Item" AND there the "Conditionally Enable" field is left blank, then the menu button will always appear as enabled on both List Page and Item Page (if location as Both) and Item Page (if location as Item).
- Provide the condition in the field. The syntax for the condition uses our OData filter query syntax. Fundamentally, there are three elements to the OData filter query
a. The column name. For example - project_status.
b. The operator. For example - eq (stands for equals).
c. The value to be operated against. For example - 'Completed and ready for Wrap-up' (the string value needs to be provided in single quotes)
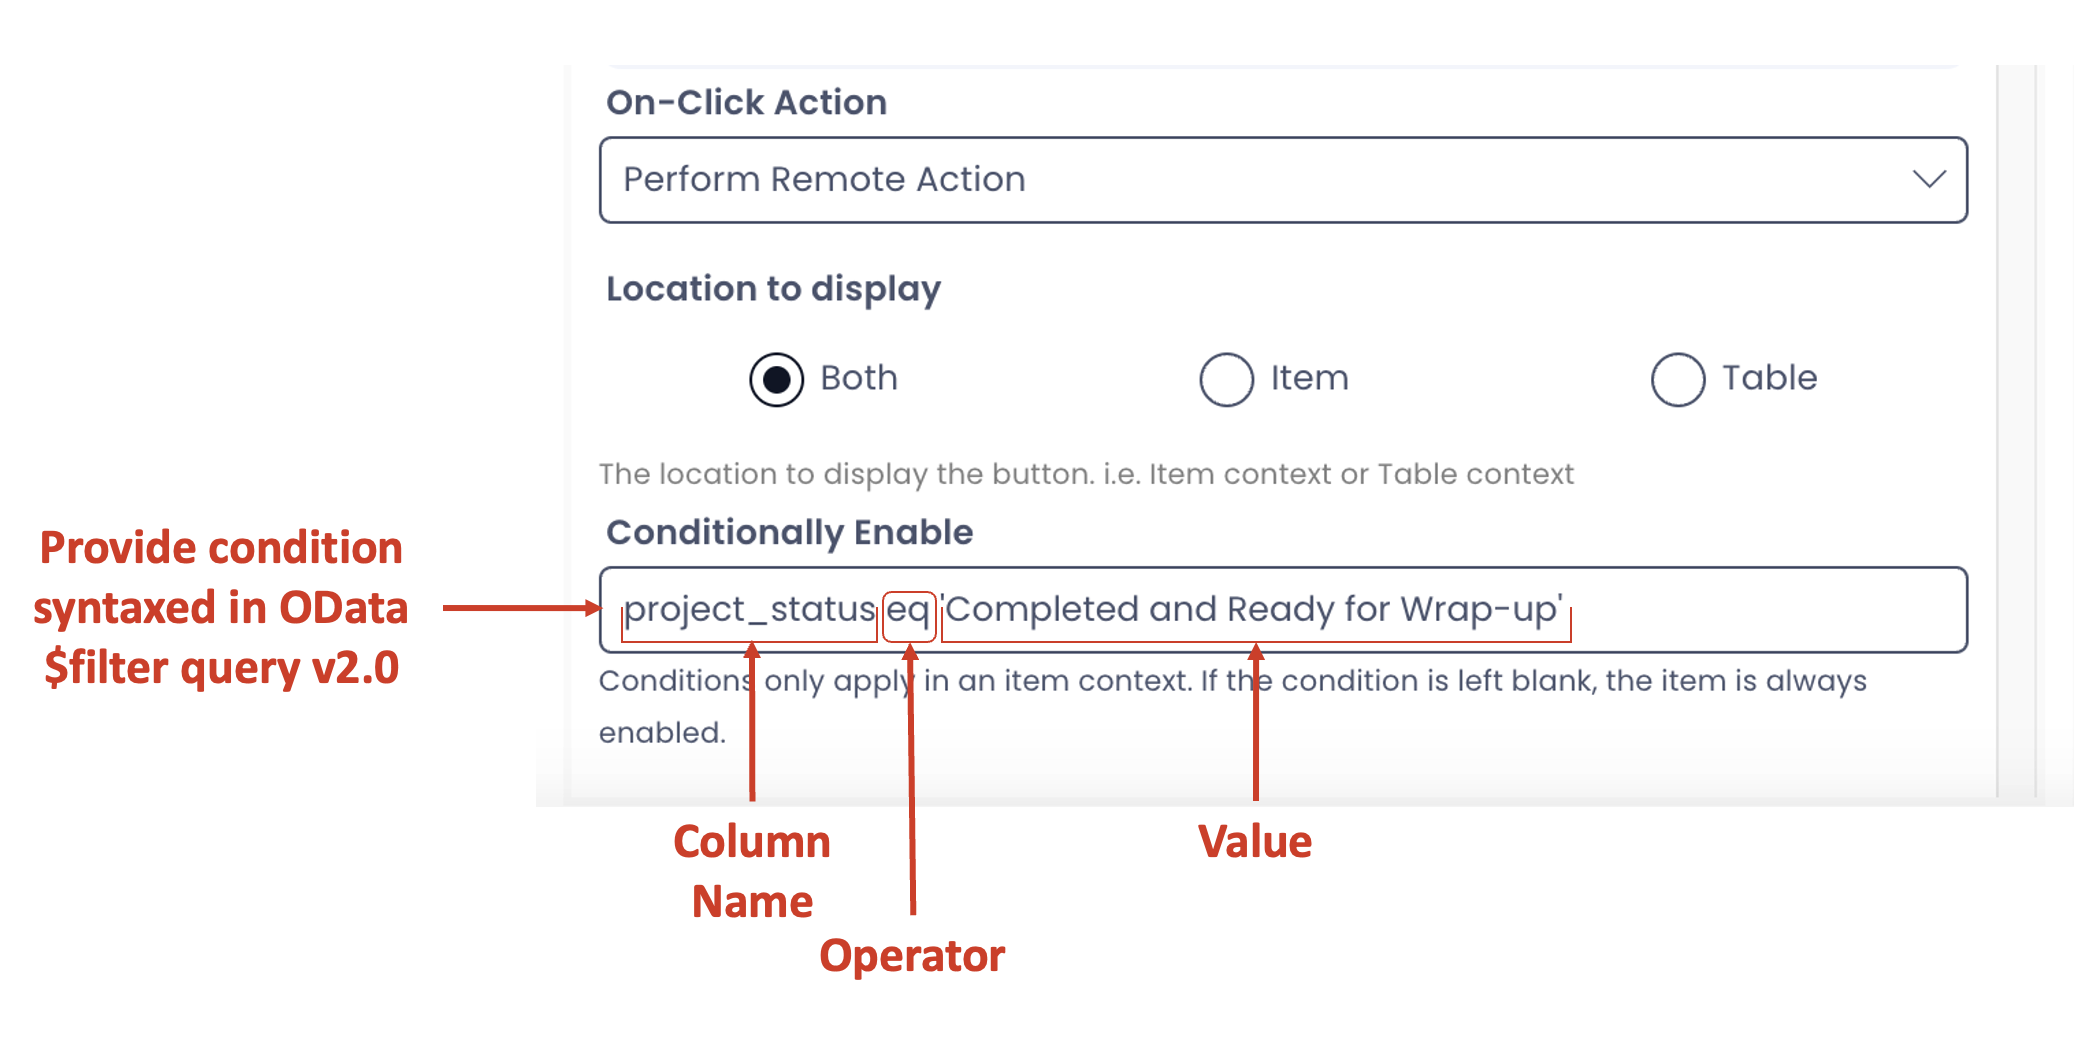
To learn more about OData $filter query click here.
- Click Save.
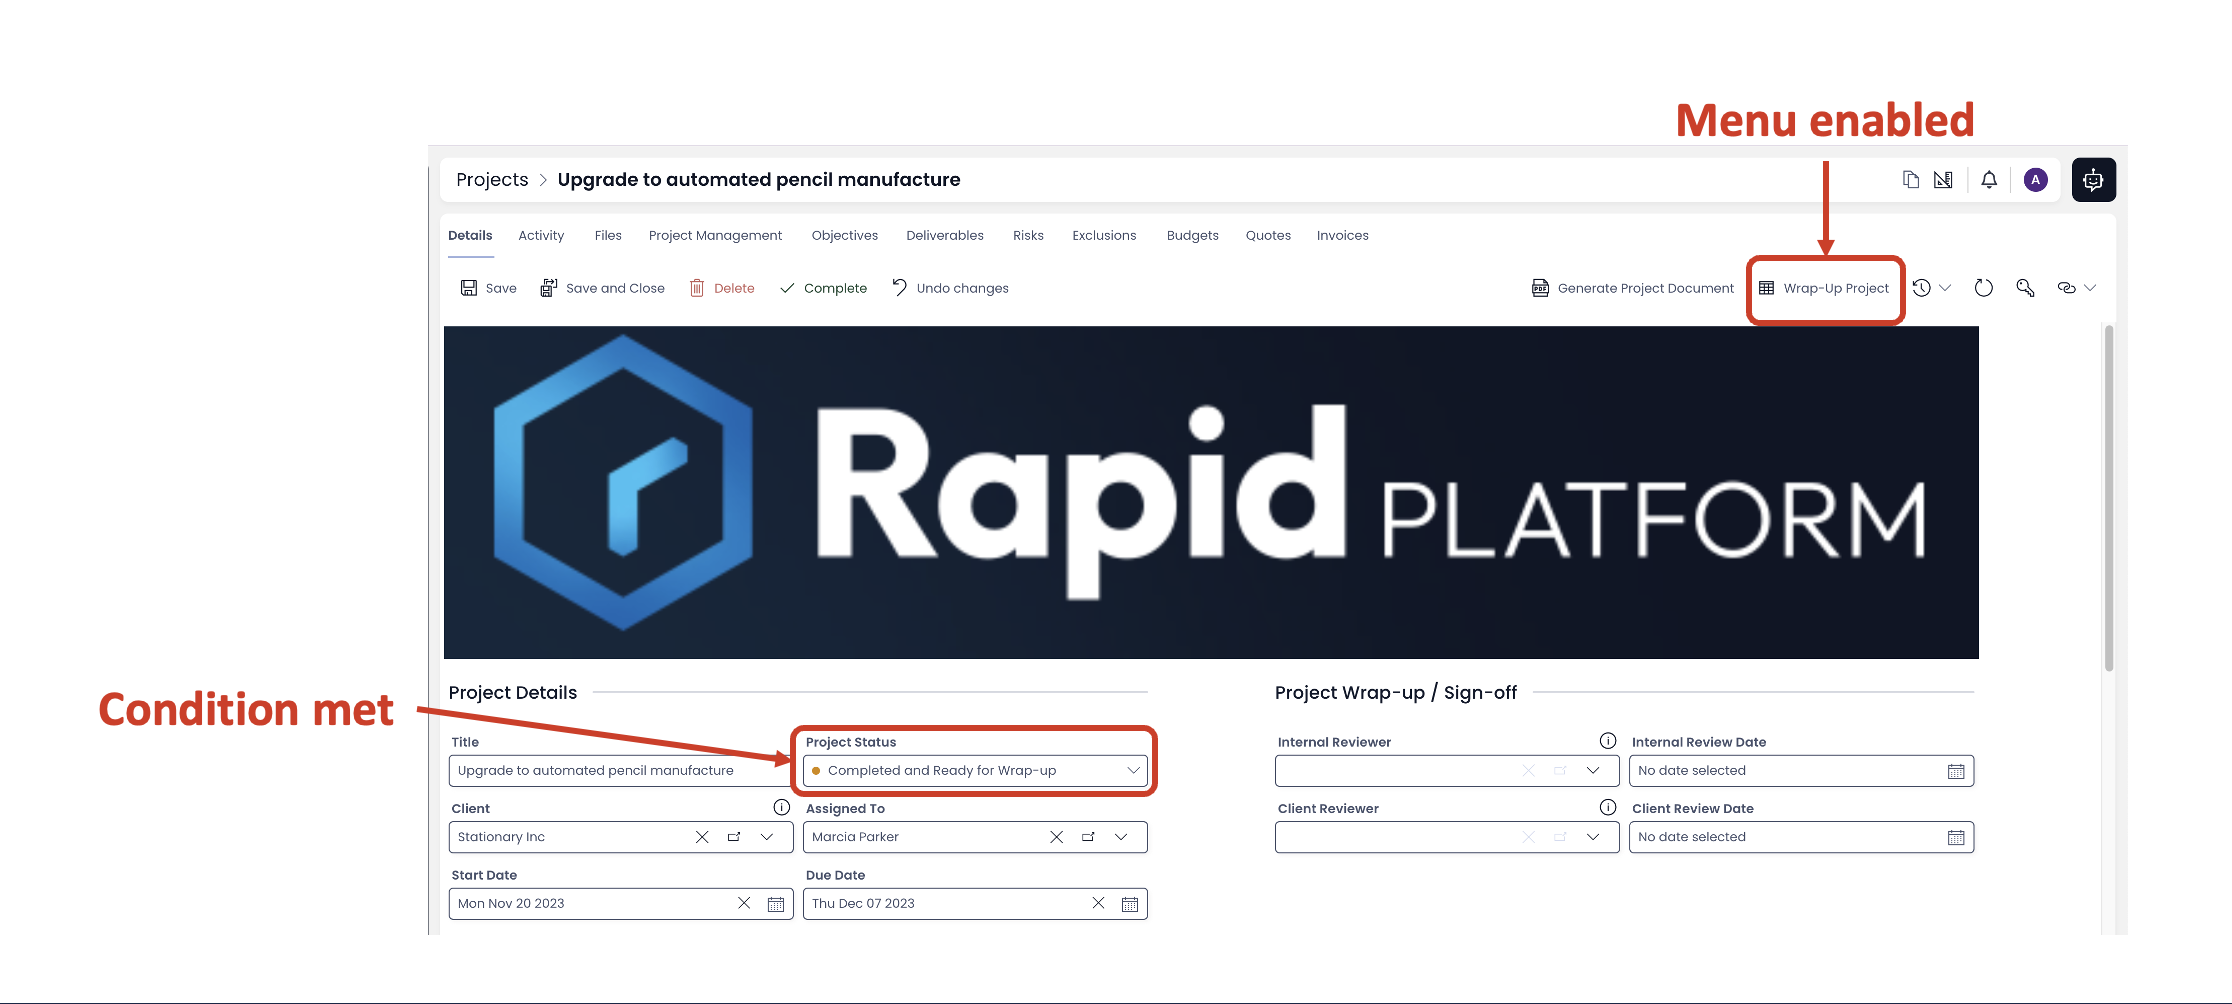
Output in Explorer
The menu button is enabled on the item page when the specified condition is met.
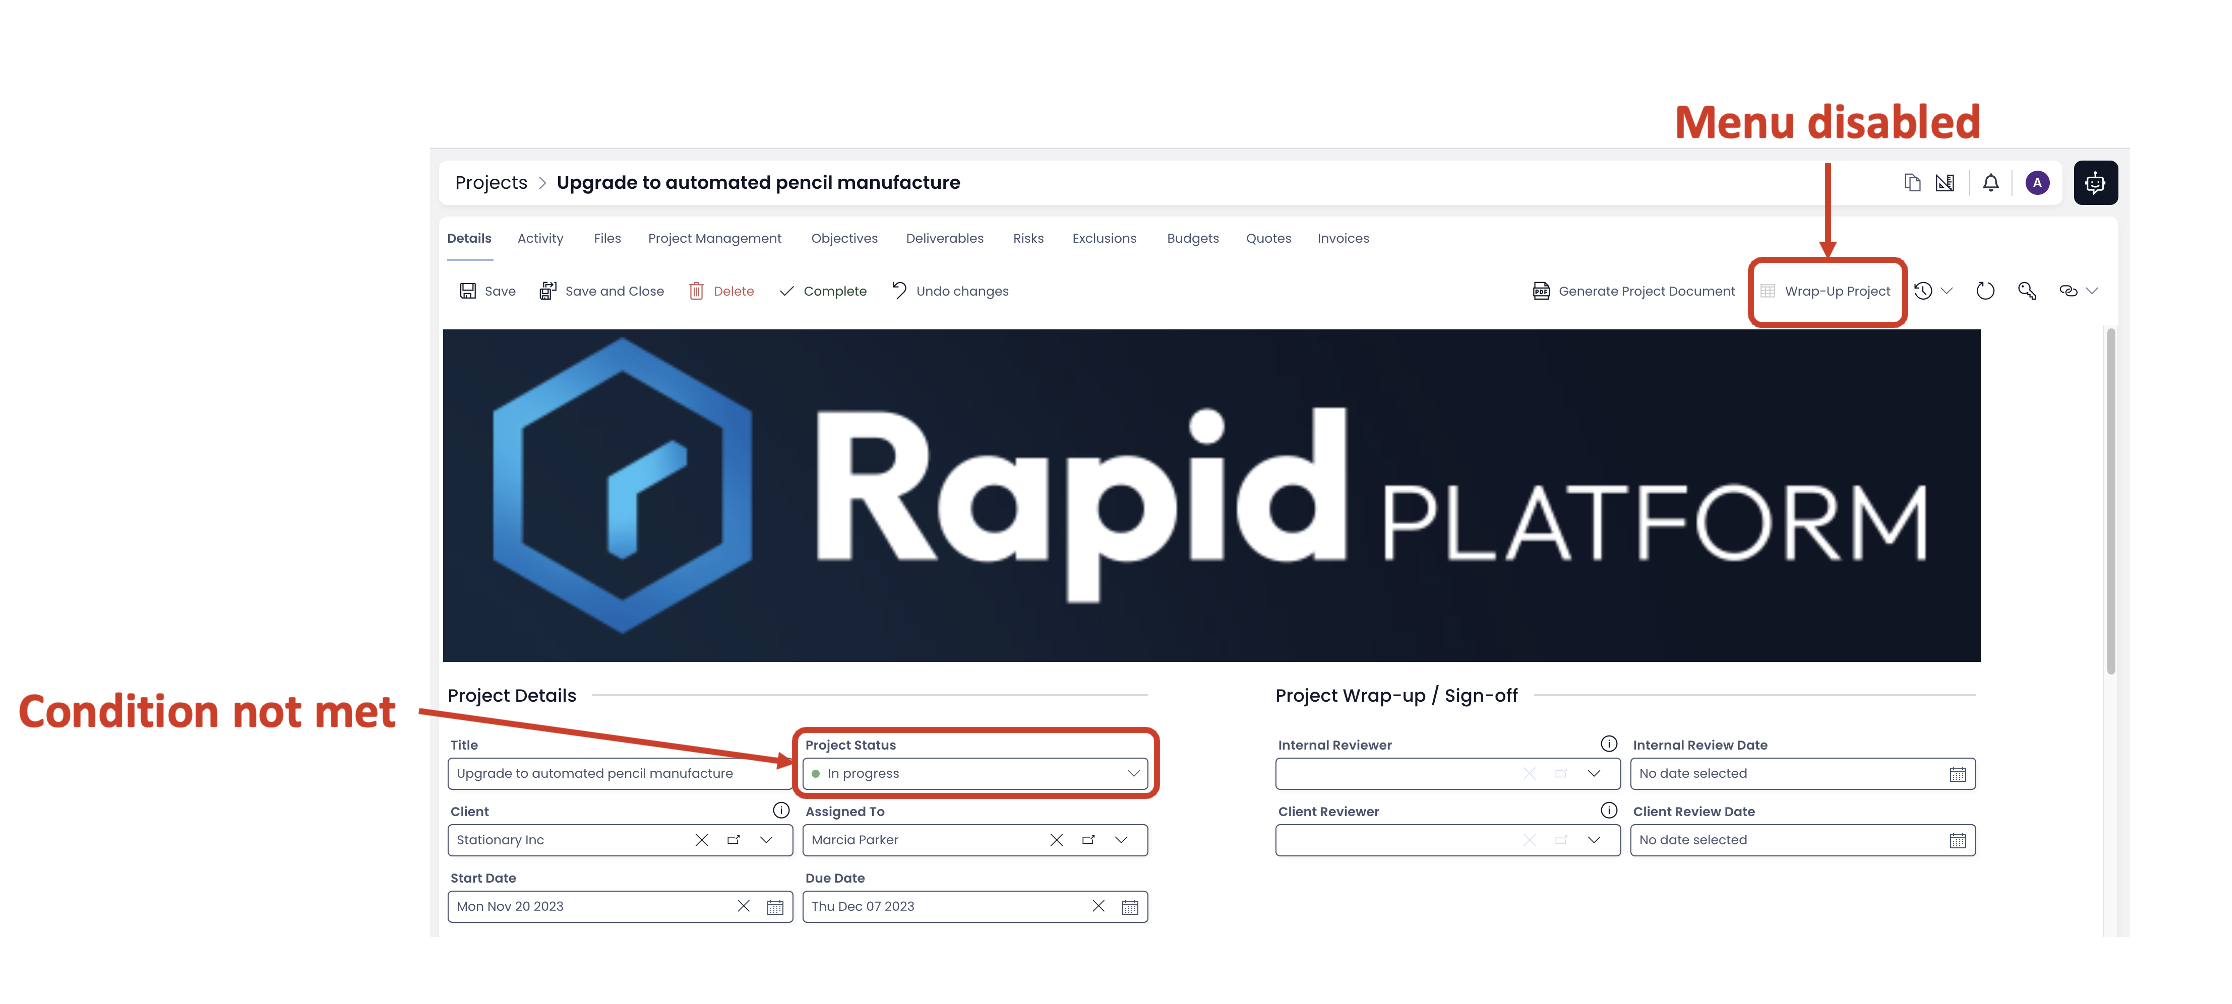
The menu button is disabled on the item page when the specified condition is not met.
Improvements
- You can now edit, remove and add to lists installed from a product definition
- Enabled editable system fields to be altered by data association update actions
- Adaptive v3 validation rules now only process once per pass
- Lookups & Multi-lookups can have default views configured in Public Forms
- The element picker in Adaptive Designer can now add elements in nested contexts
- Adaptive repeating contexts can have their default number of repeating sections configured
- Unique / Generic flags on Adaptive documents has been replaced with a global save button
- Adaptive Boolean elements can now display an undefined or null state
- Improved scrolling behaviour in Public Forms for mobile users
- Menus can now have descriptions added to them, displayed as a info call out
- Set the default time on DateTime pickers in Explorer to midday
- Added warning message to Data Cans that they can only fetch up to 250 items
- Added better pattern matching in Adaptive validation rules
- Updated system generated emails to use new branding
- Huge improvement to styling of Adaptive validation configuration controls
- Enabled default view configuration for lookups generated in Embedded Forms
Bug Fixes
- When configuring the create page the details page is no longer affected
- Fixed installing PowerBI workspaces from failing as often
- Disabled fields with validation, especially from modules, no longer prevent item creation in Explorer
- Padding on Adaptive currency fields now regards the selected currency type
- Improved consistency when setting the SharePoint folder name automatically based off a Computed field
- Fixed field placeholder values not being able to be set in Designer
- Multi-Lookup fields in Explorer will now actually clear all selected elements when told
- Fixed the Time picker component failing to display when configured in Adaptive Designer
- Date inputs on process diagrams will no longer be stored as ISO DateTime strings but instead
yyyy-MM-dddate strings