Creating a SendGrid integration
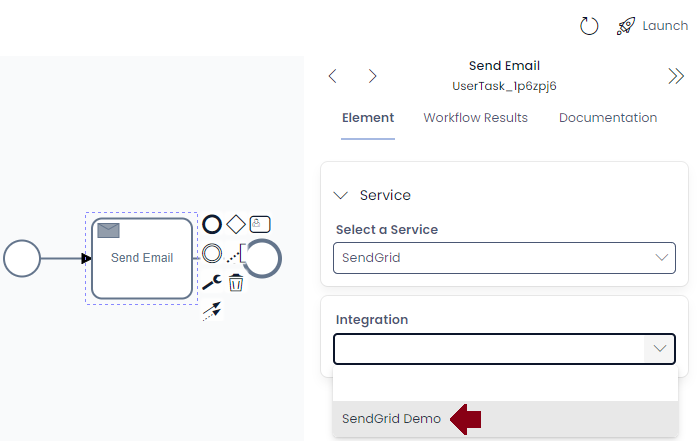
Rapid natively supports SendGrid for bulk email sending in both the Workflow engine and via menu action buttons. To use these features your site will need a SendGrid integration item that stores a link to the credentials needed to access their service.
Connecting SendGrid to your site
- Navigate to Designer
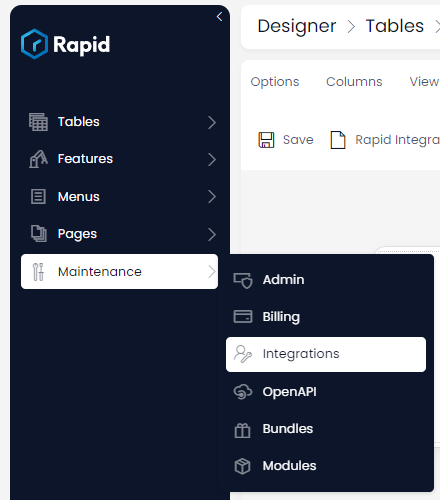
- Using the side menu, navigate to Maintenance -> Integrations
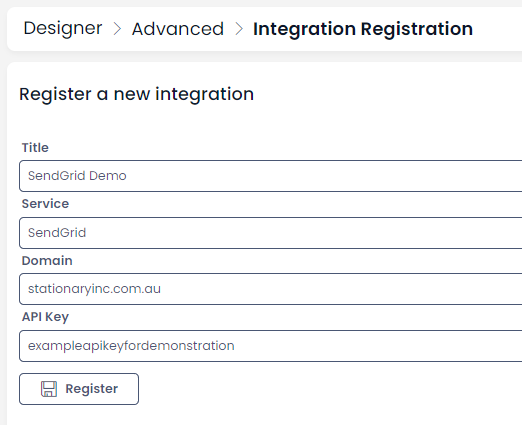
- Give your new integration item a name using title. A name that helps you identify which service and account is typically most practical
- Select the SendGrid service
- If you plan to use the Inbound Parse system in SendGrid, fill in your email domain that will be receiving emails (everything after the @ symbol). This is used in Workflow to detect received emails to progress a diagram.
- Finally, enter your API key from SendGrid. This will not be saved against your site and instead stored in a secure Azure Key Vault.
Registering your new integration will create a Rapid Integrations item in your site. This item stores a unique reference to the stored Key Vault key in it's GUID column. This allows the system to reference your key without needing to directly store it.
You can now select the Rapid Integrations item in Menus and Workflow to start using your new integration.