Modules
What are modules?
One can visualise Modules as a Package of Tables, Menus and Pages that are related to each other. For example - a CRM module is a package of CRM related tables, pages and menus.
This is particularly helpful in managing the information infrastructure (tables / pages / menus) based on functional usage. For example - if an organisation does not want to use the CRM module, then they can simply disable the CRM module, and all the associated information infrastructure will be disabled from the system.
For product developers this is especially handy to create 'suites' of sub-systems within Rapid that can be toggled via policy, such as customers purchasing add-ons.
Adding a module to the system
Please follow the below steps to add a module to the system:
- Goto Designer
- Click on Maintenance in Designer Sidebar
- Select Modules
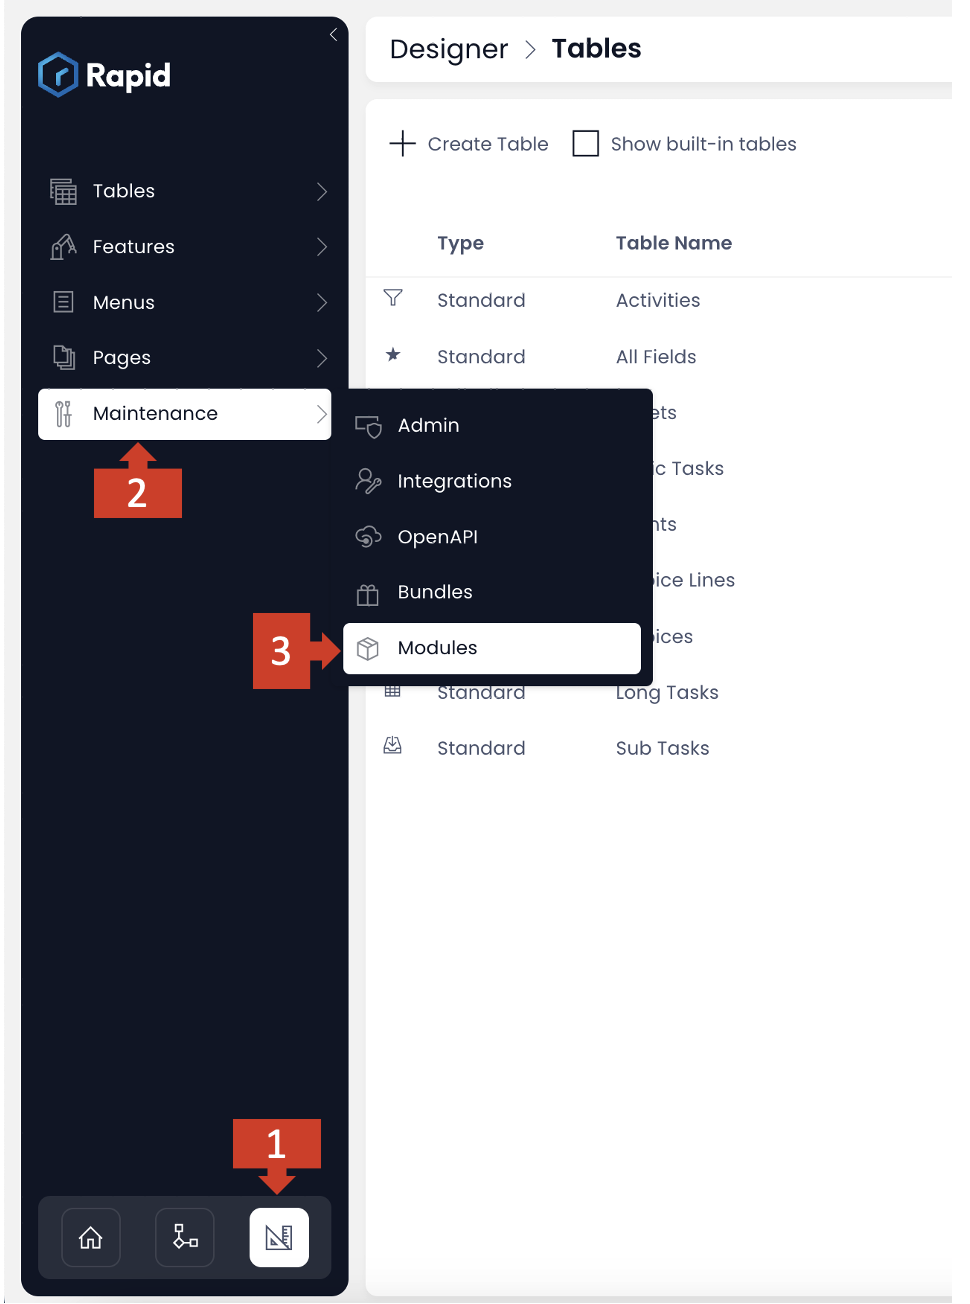
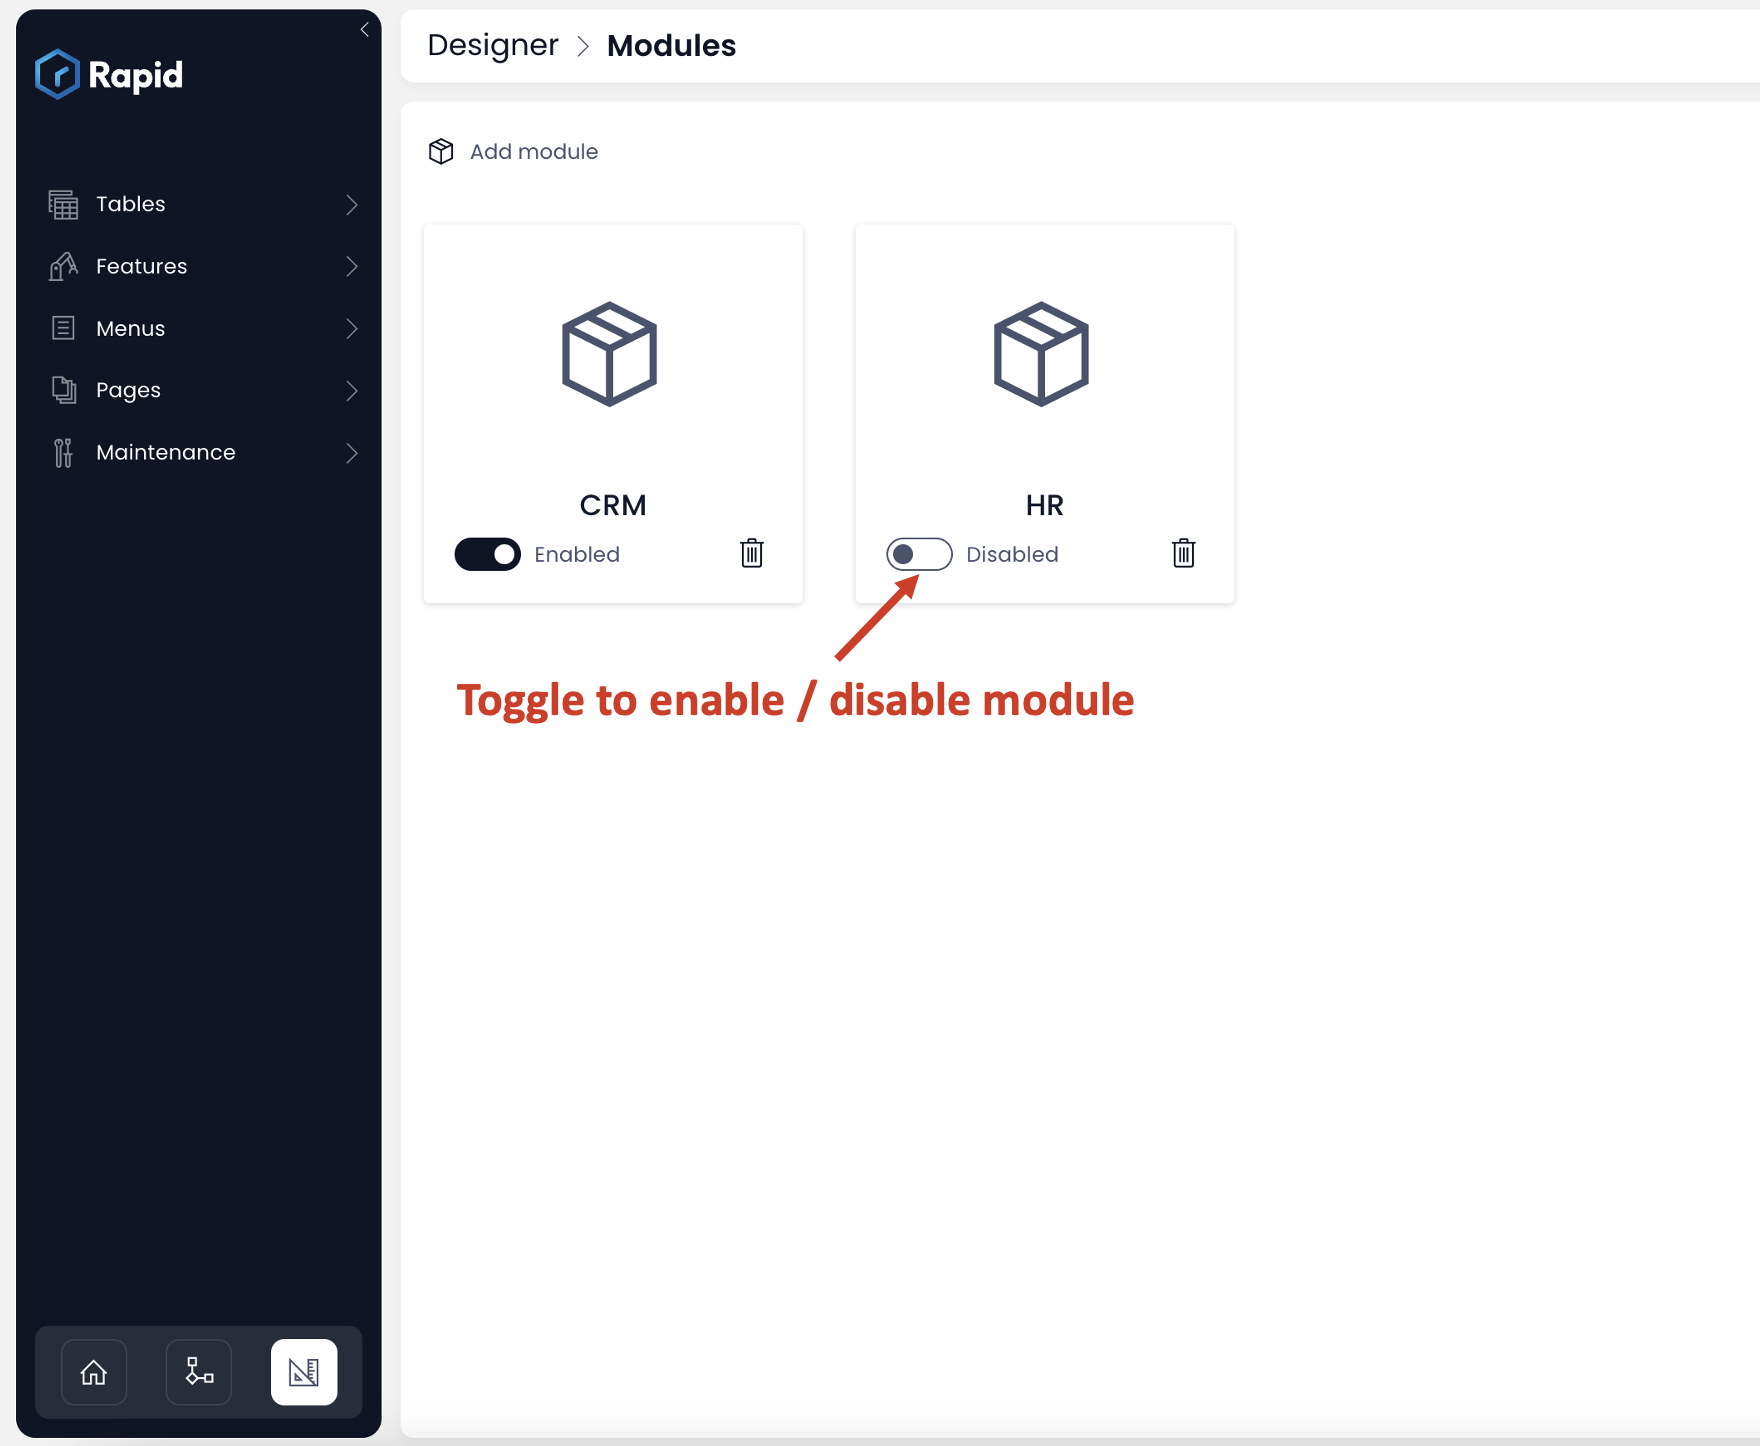
- The Modules page (as shown below) will appear.
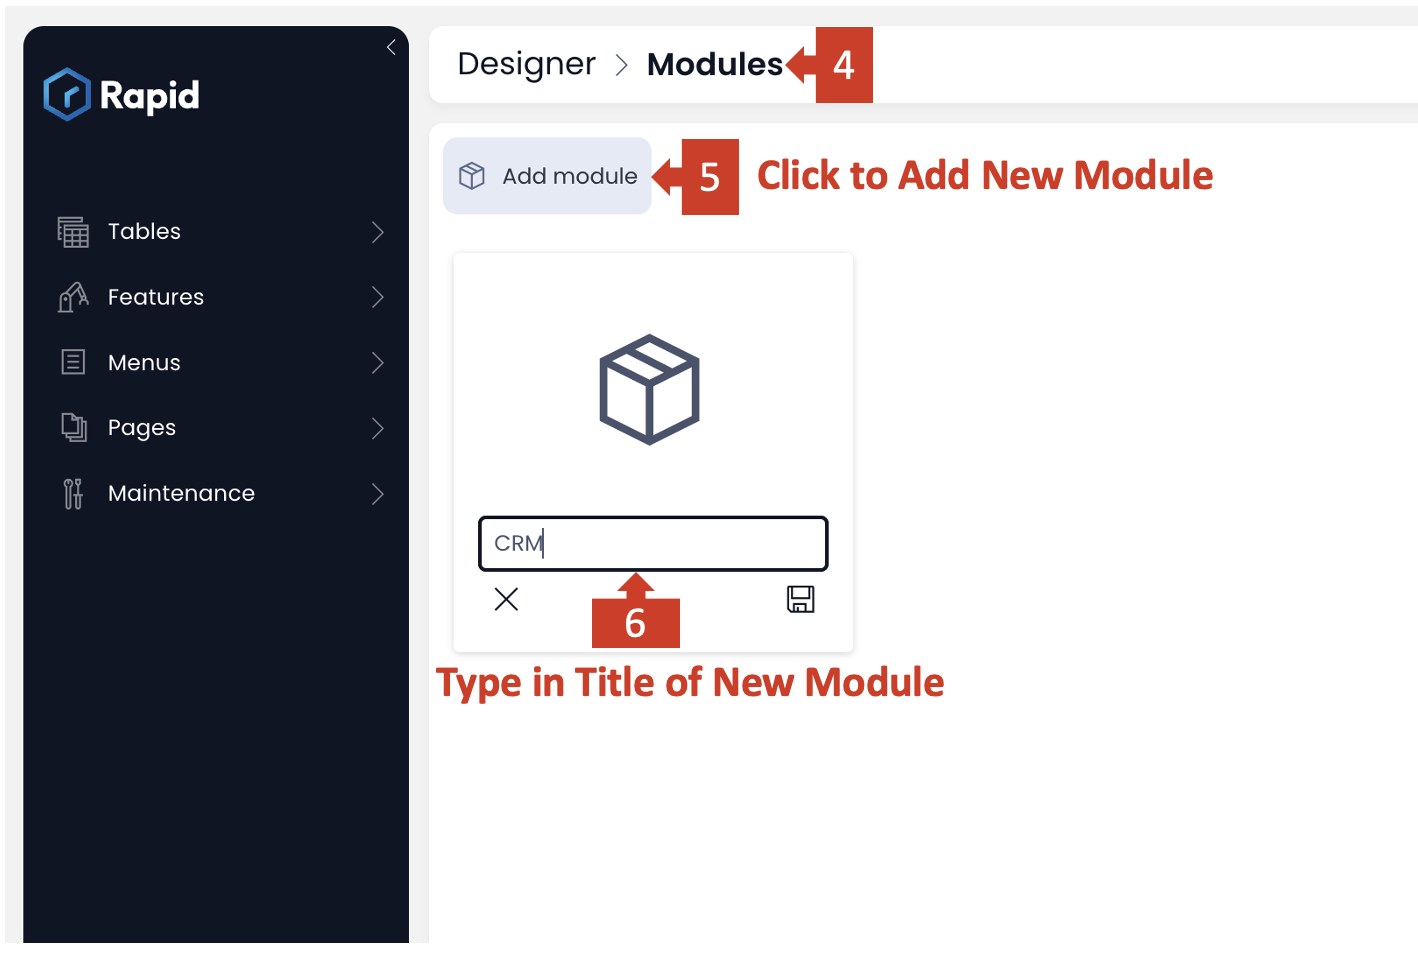
- Click Add module.
- A section will appear with an module icon. Type the module title - say - CRM.
- Click the save icon.
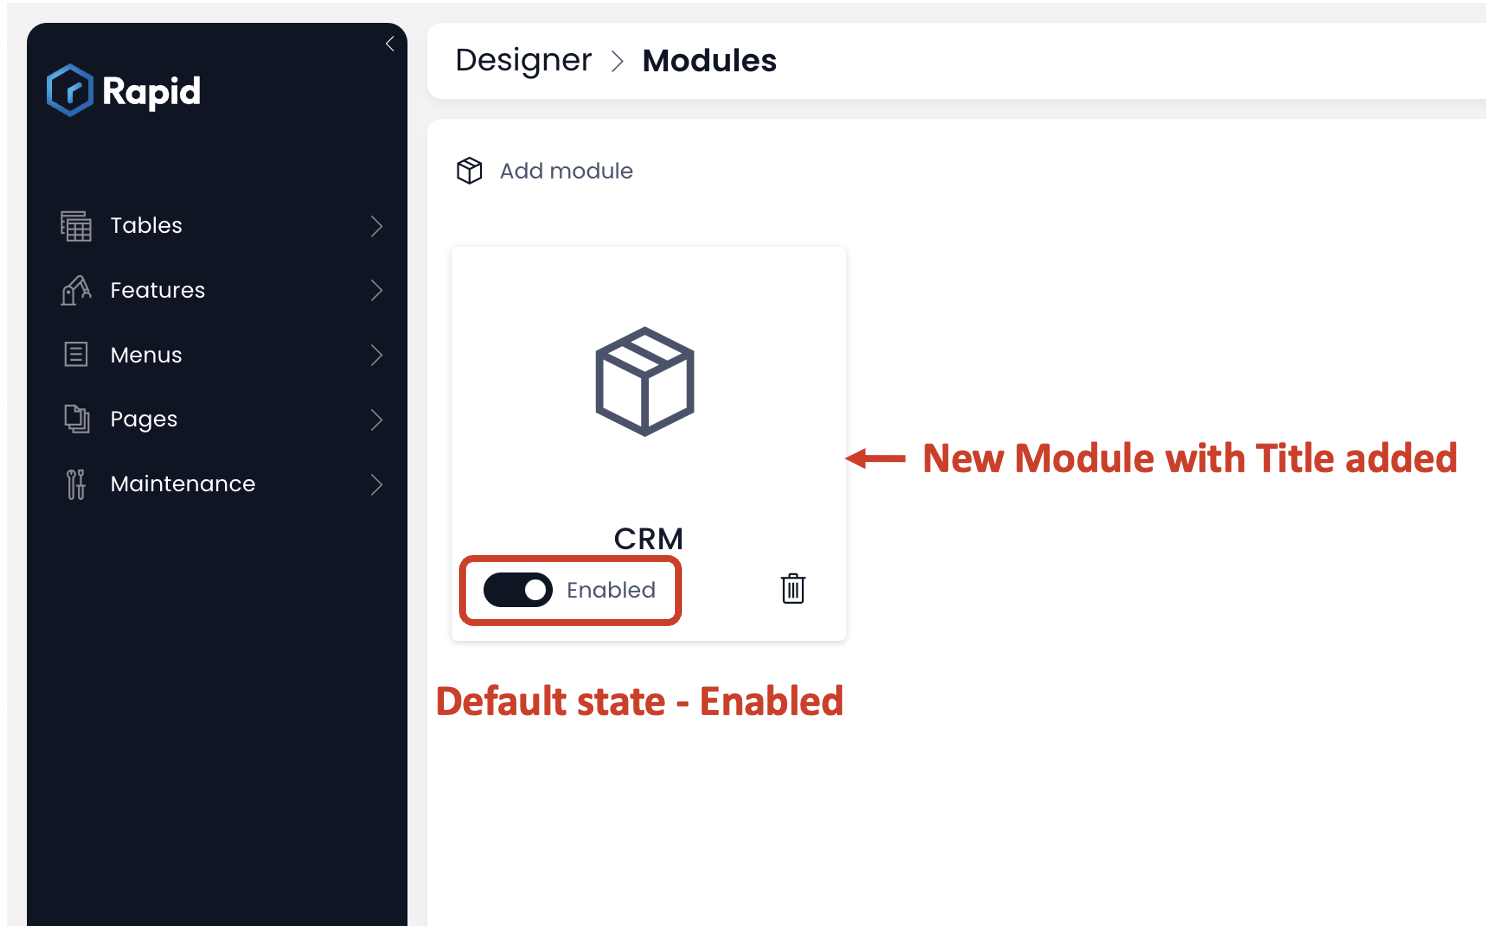
This will add a new blank module to the system. This new module will not have any associated tables / menus / pages. Observe by default the module is in Enabled state. However, you can toggle it to disabled state, as needed.
Associating information infrastructure to Modules
Tables
You can easily associate tables to a module. Please follow the steps:
- Goto Designer
- Navigate to your desired table.

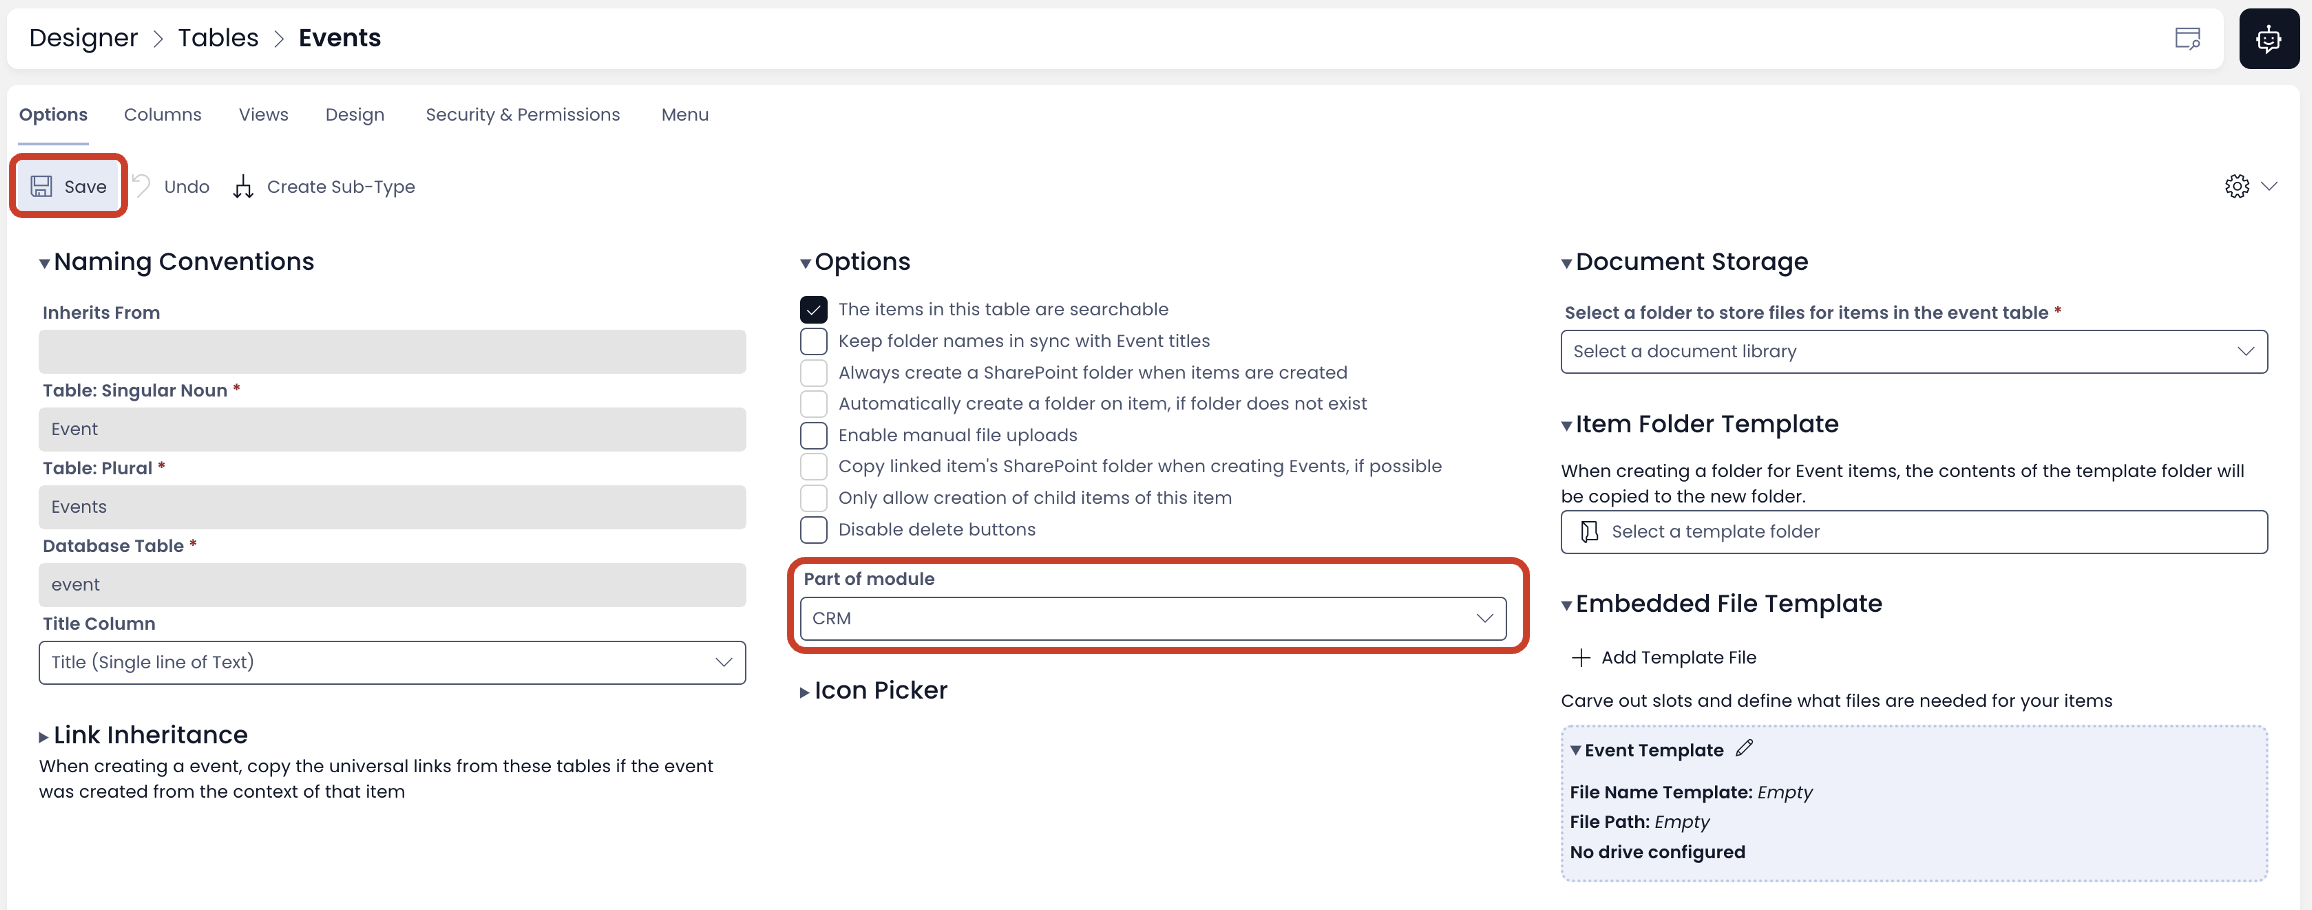
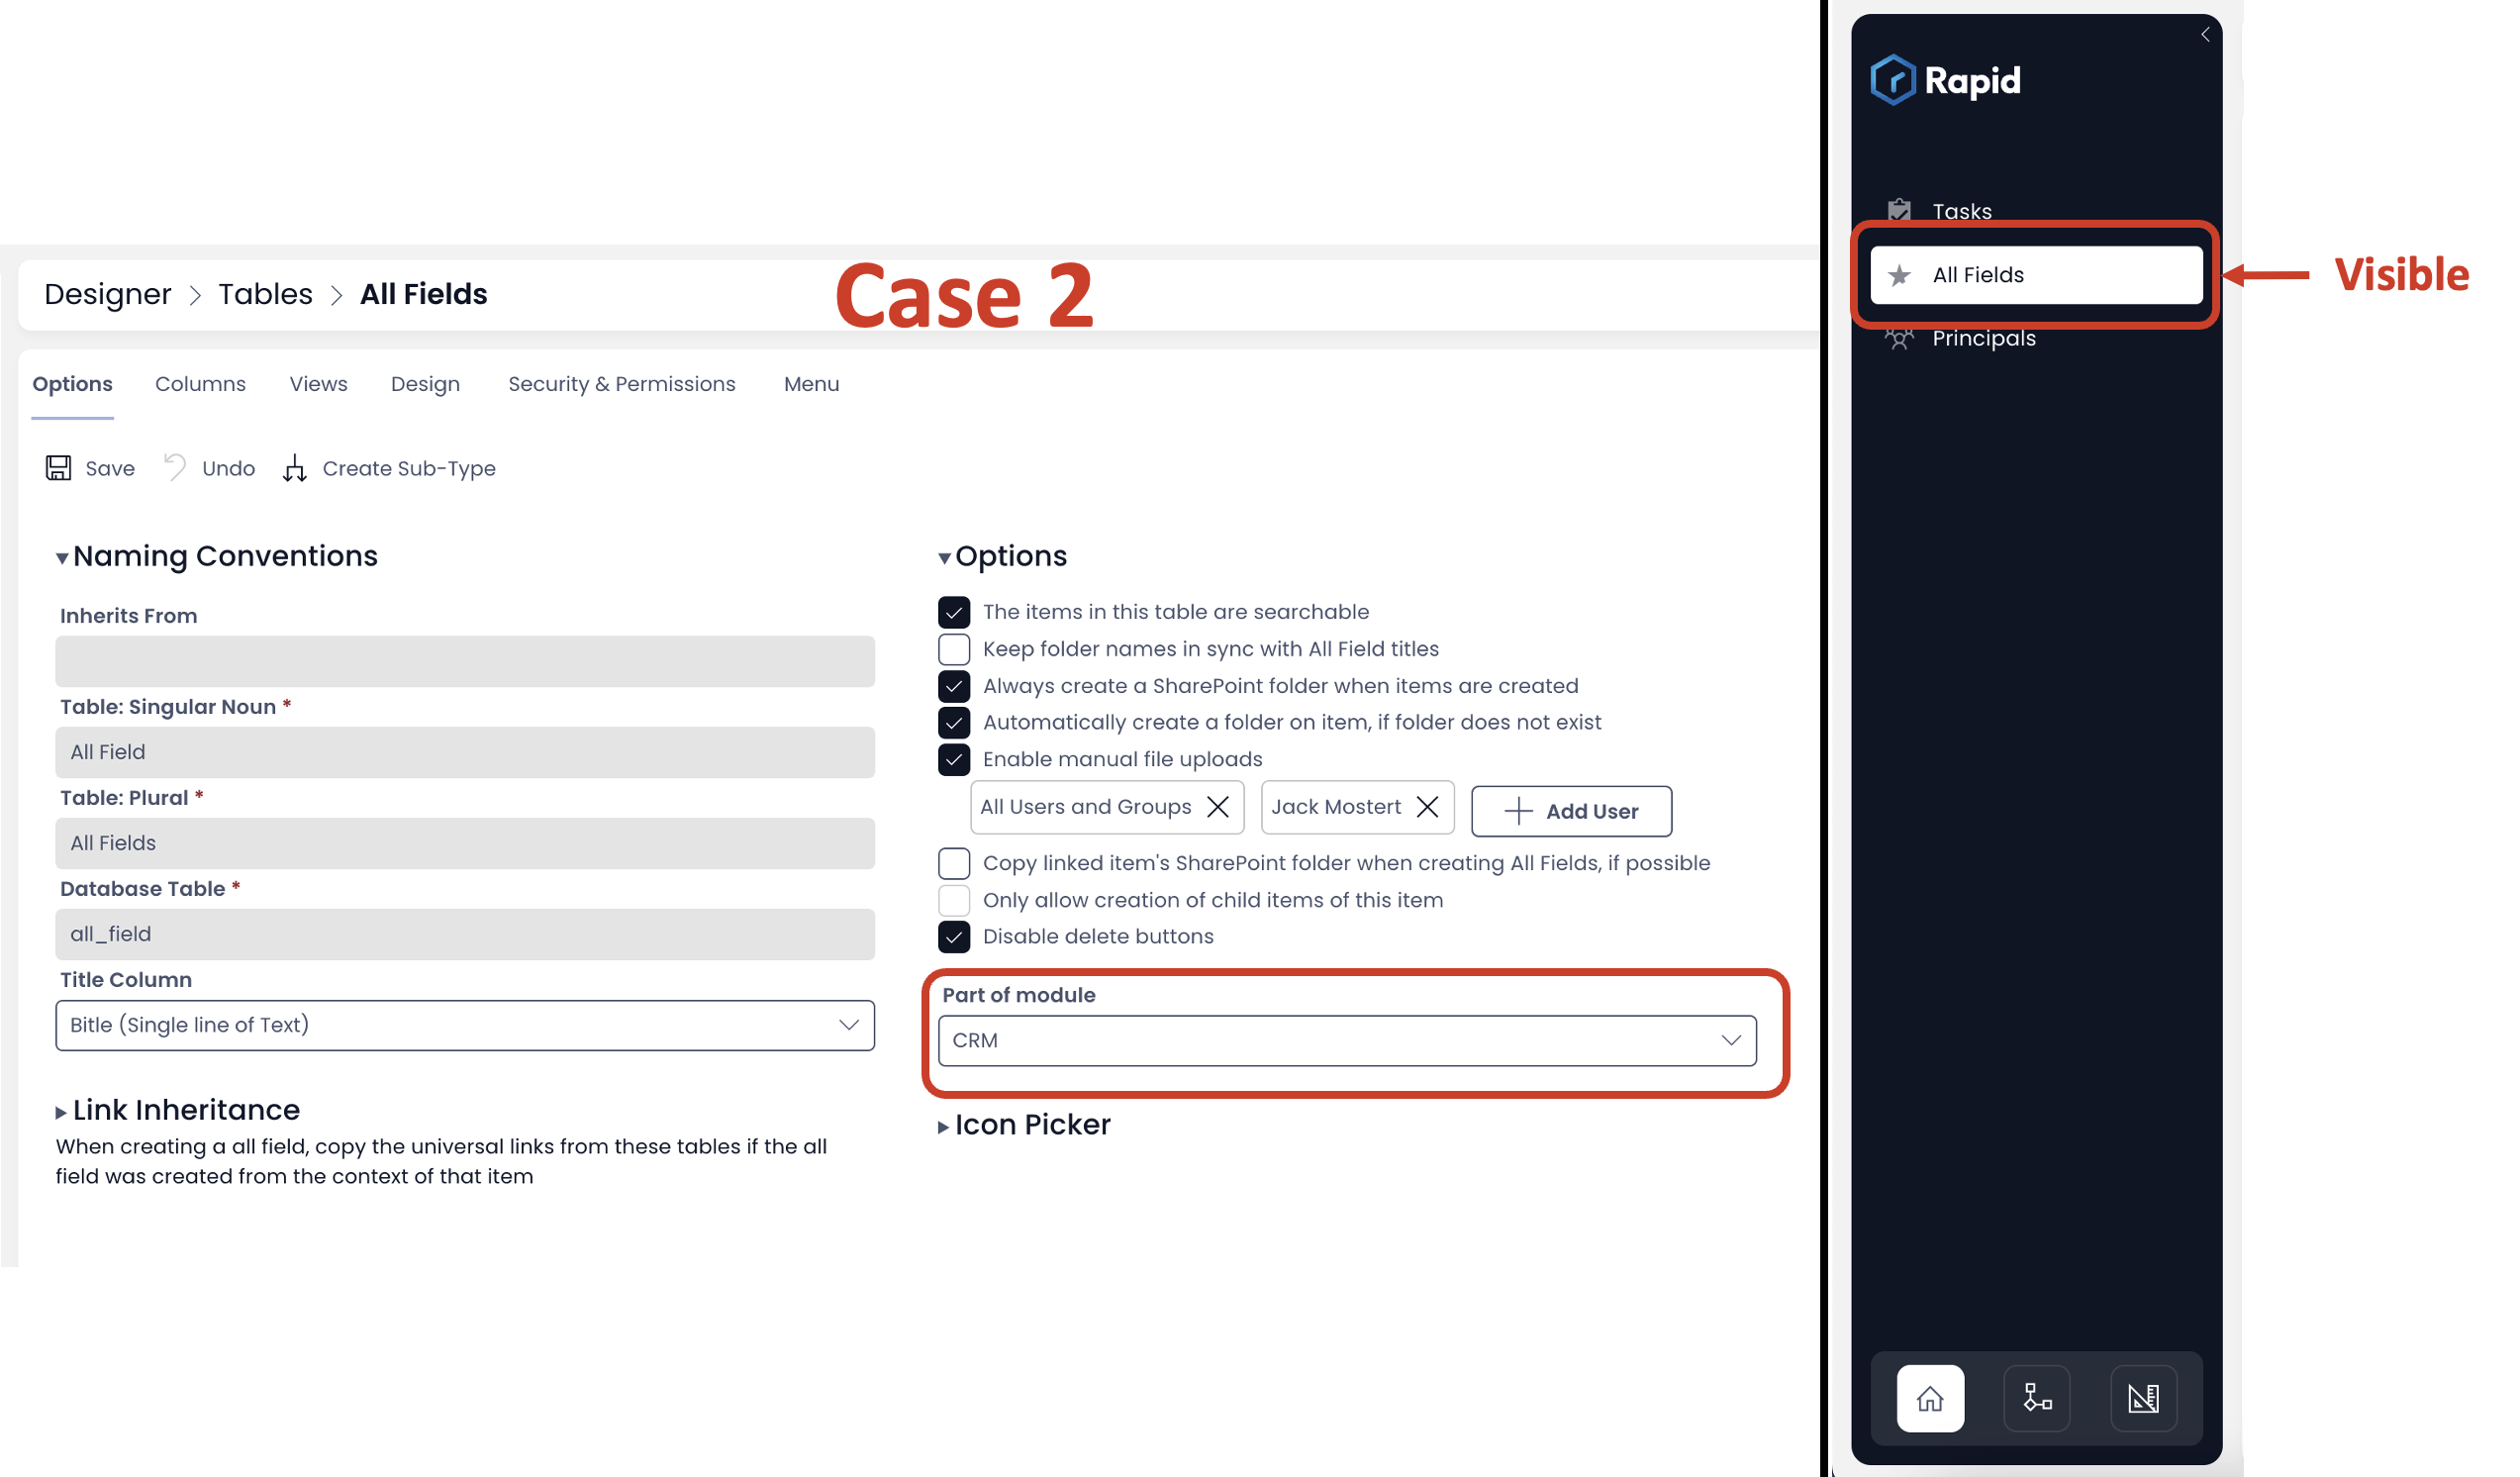
- In the Options Tab, observe the dropdown field "Part of module".
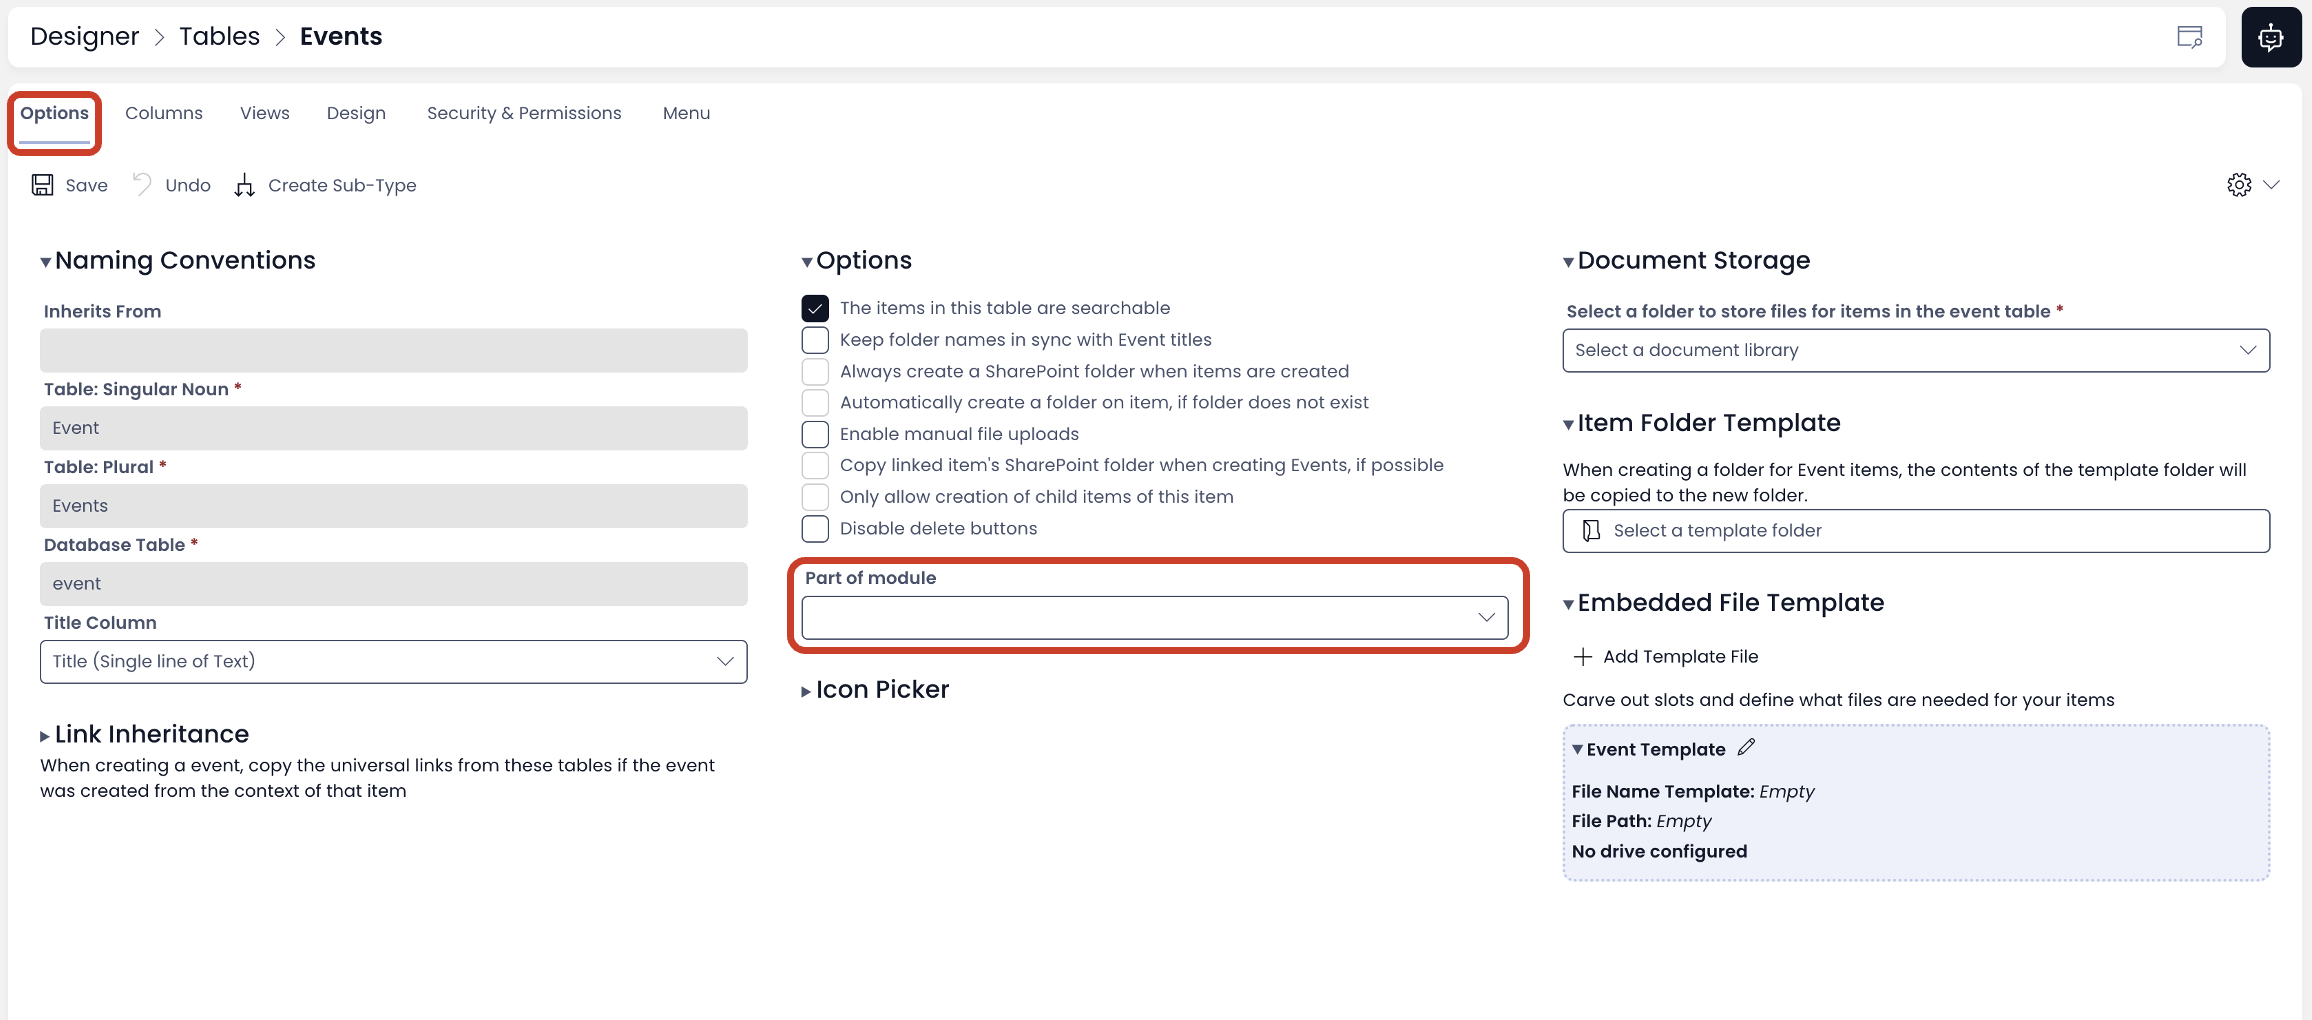
- Click on Part of module field and select the desired module title.
- Click Save.
That's it! the subject table is now associated with your desired module.
Menus
To associate menus to a module, consider the following:
- In Designer, navigate to your desired menu.
- Observe two fields both titled as - "Part of module"
a. The field on top right corner of the menu screen, corresponds to all the menus in the page. b. The field at the bottom centre of the screen, corresponds to individual menu item.
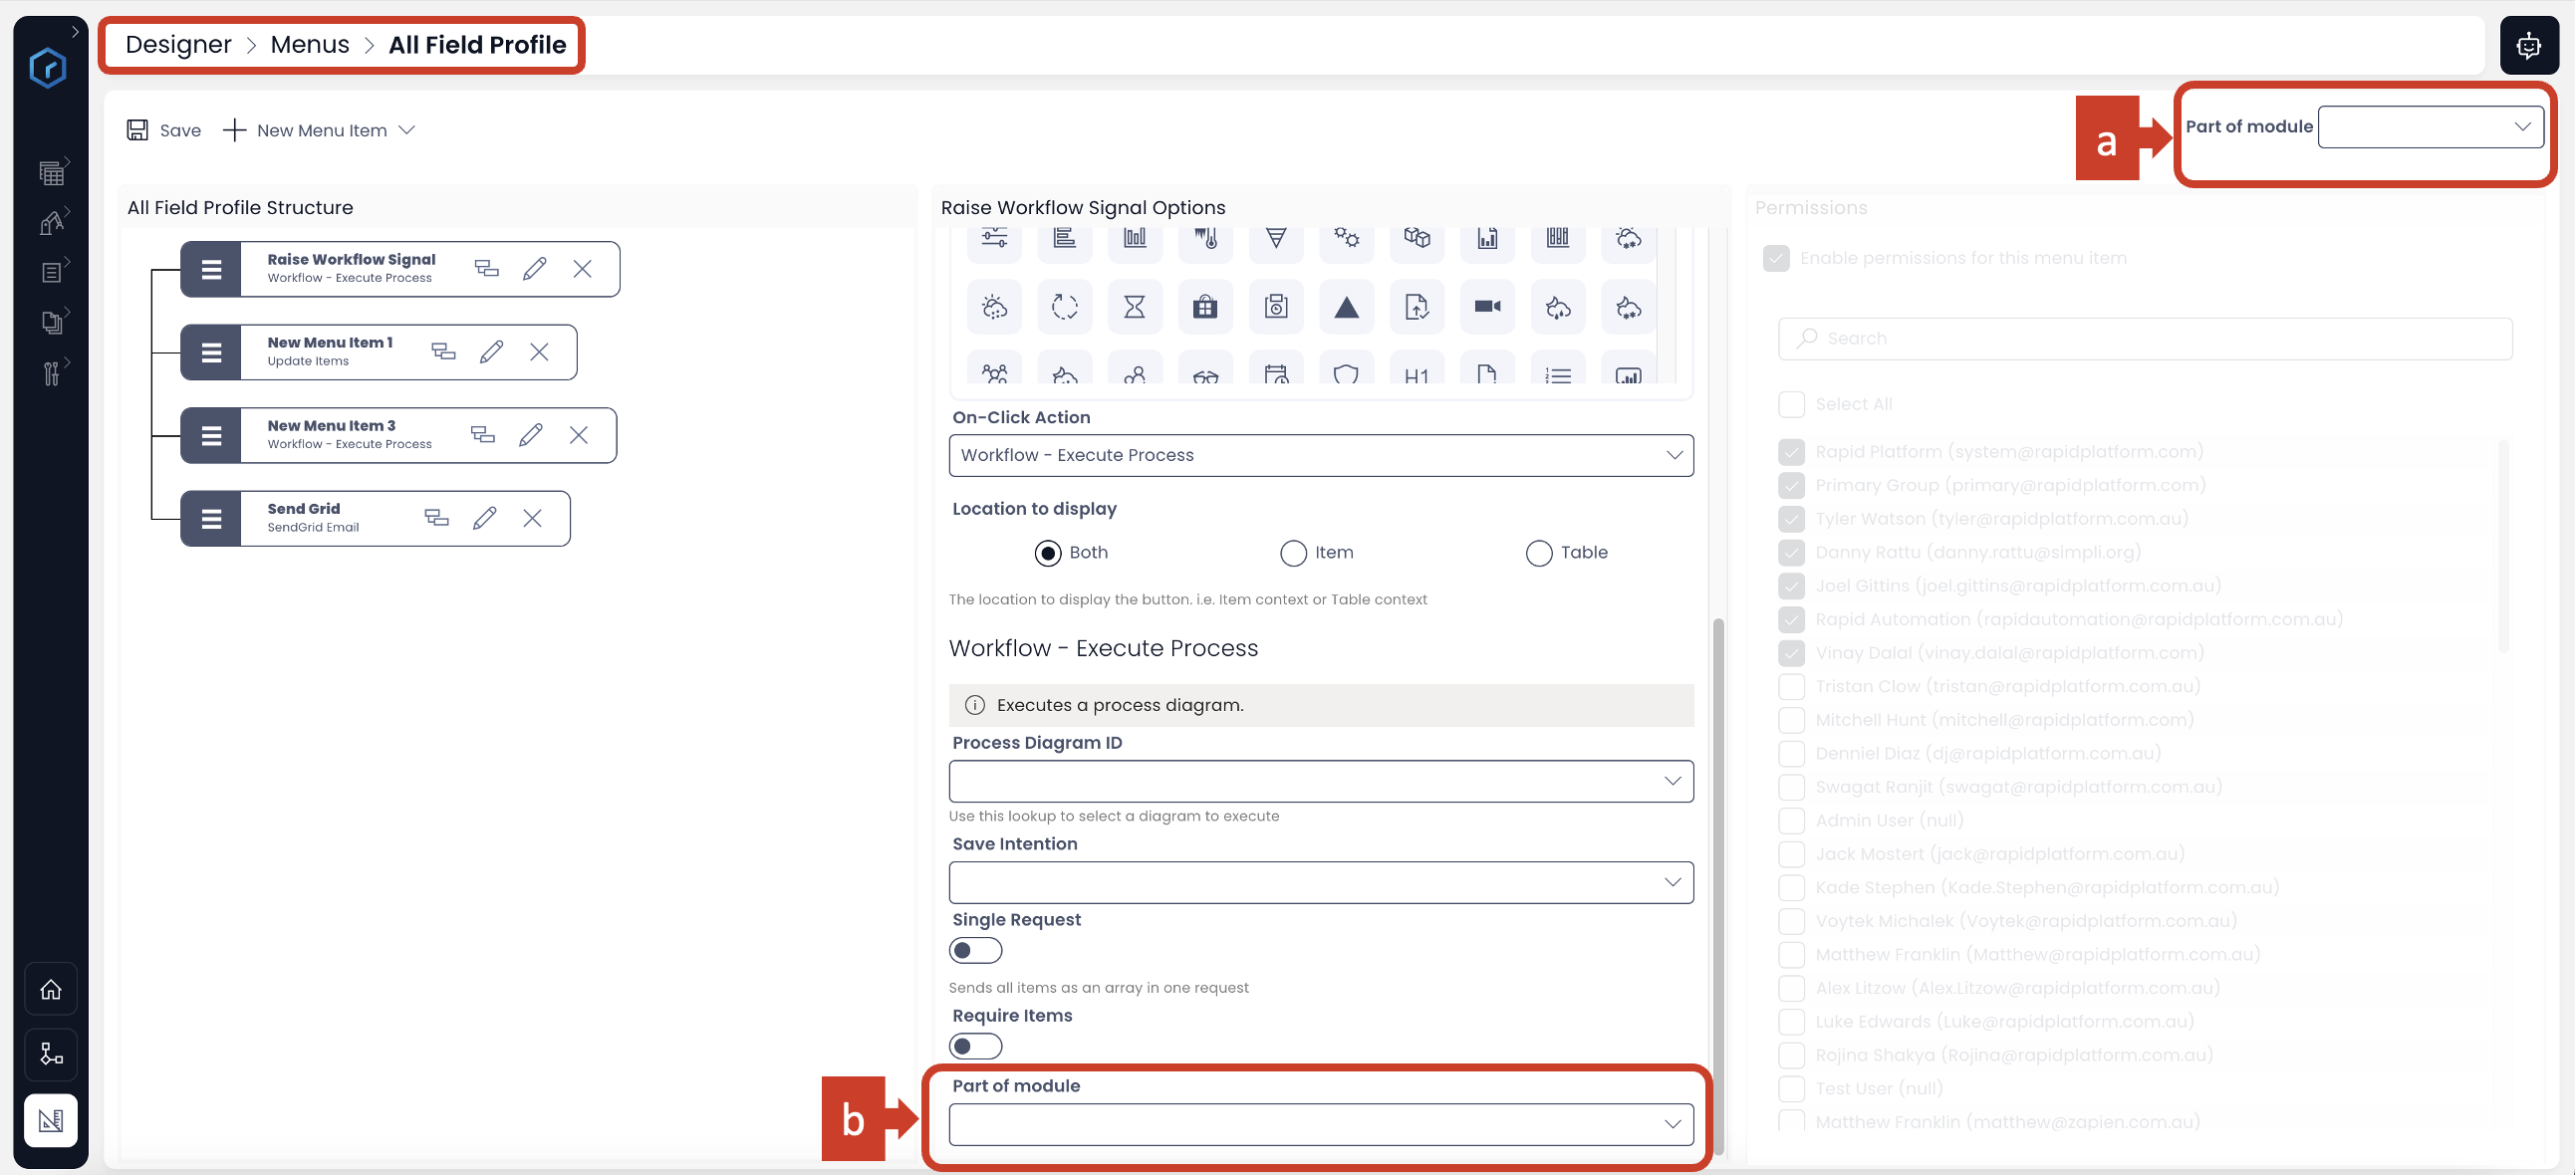
Therefore, if you wish to associate all the menus, click a. and associate all menus on the page. If you wish to associate selected menu items, then goto the desired menu item, click b. and select module as desired.
Pages
To associate pages to modules, consider the following:
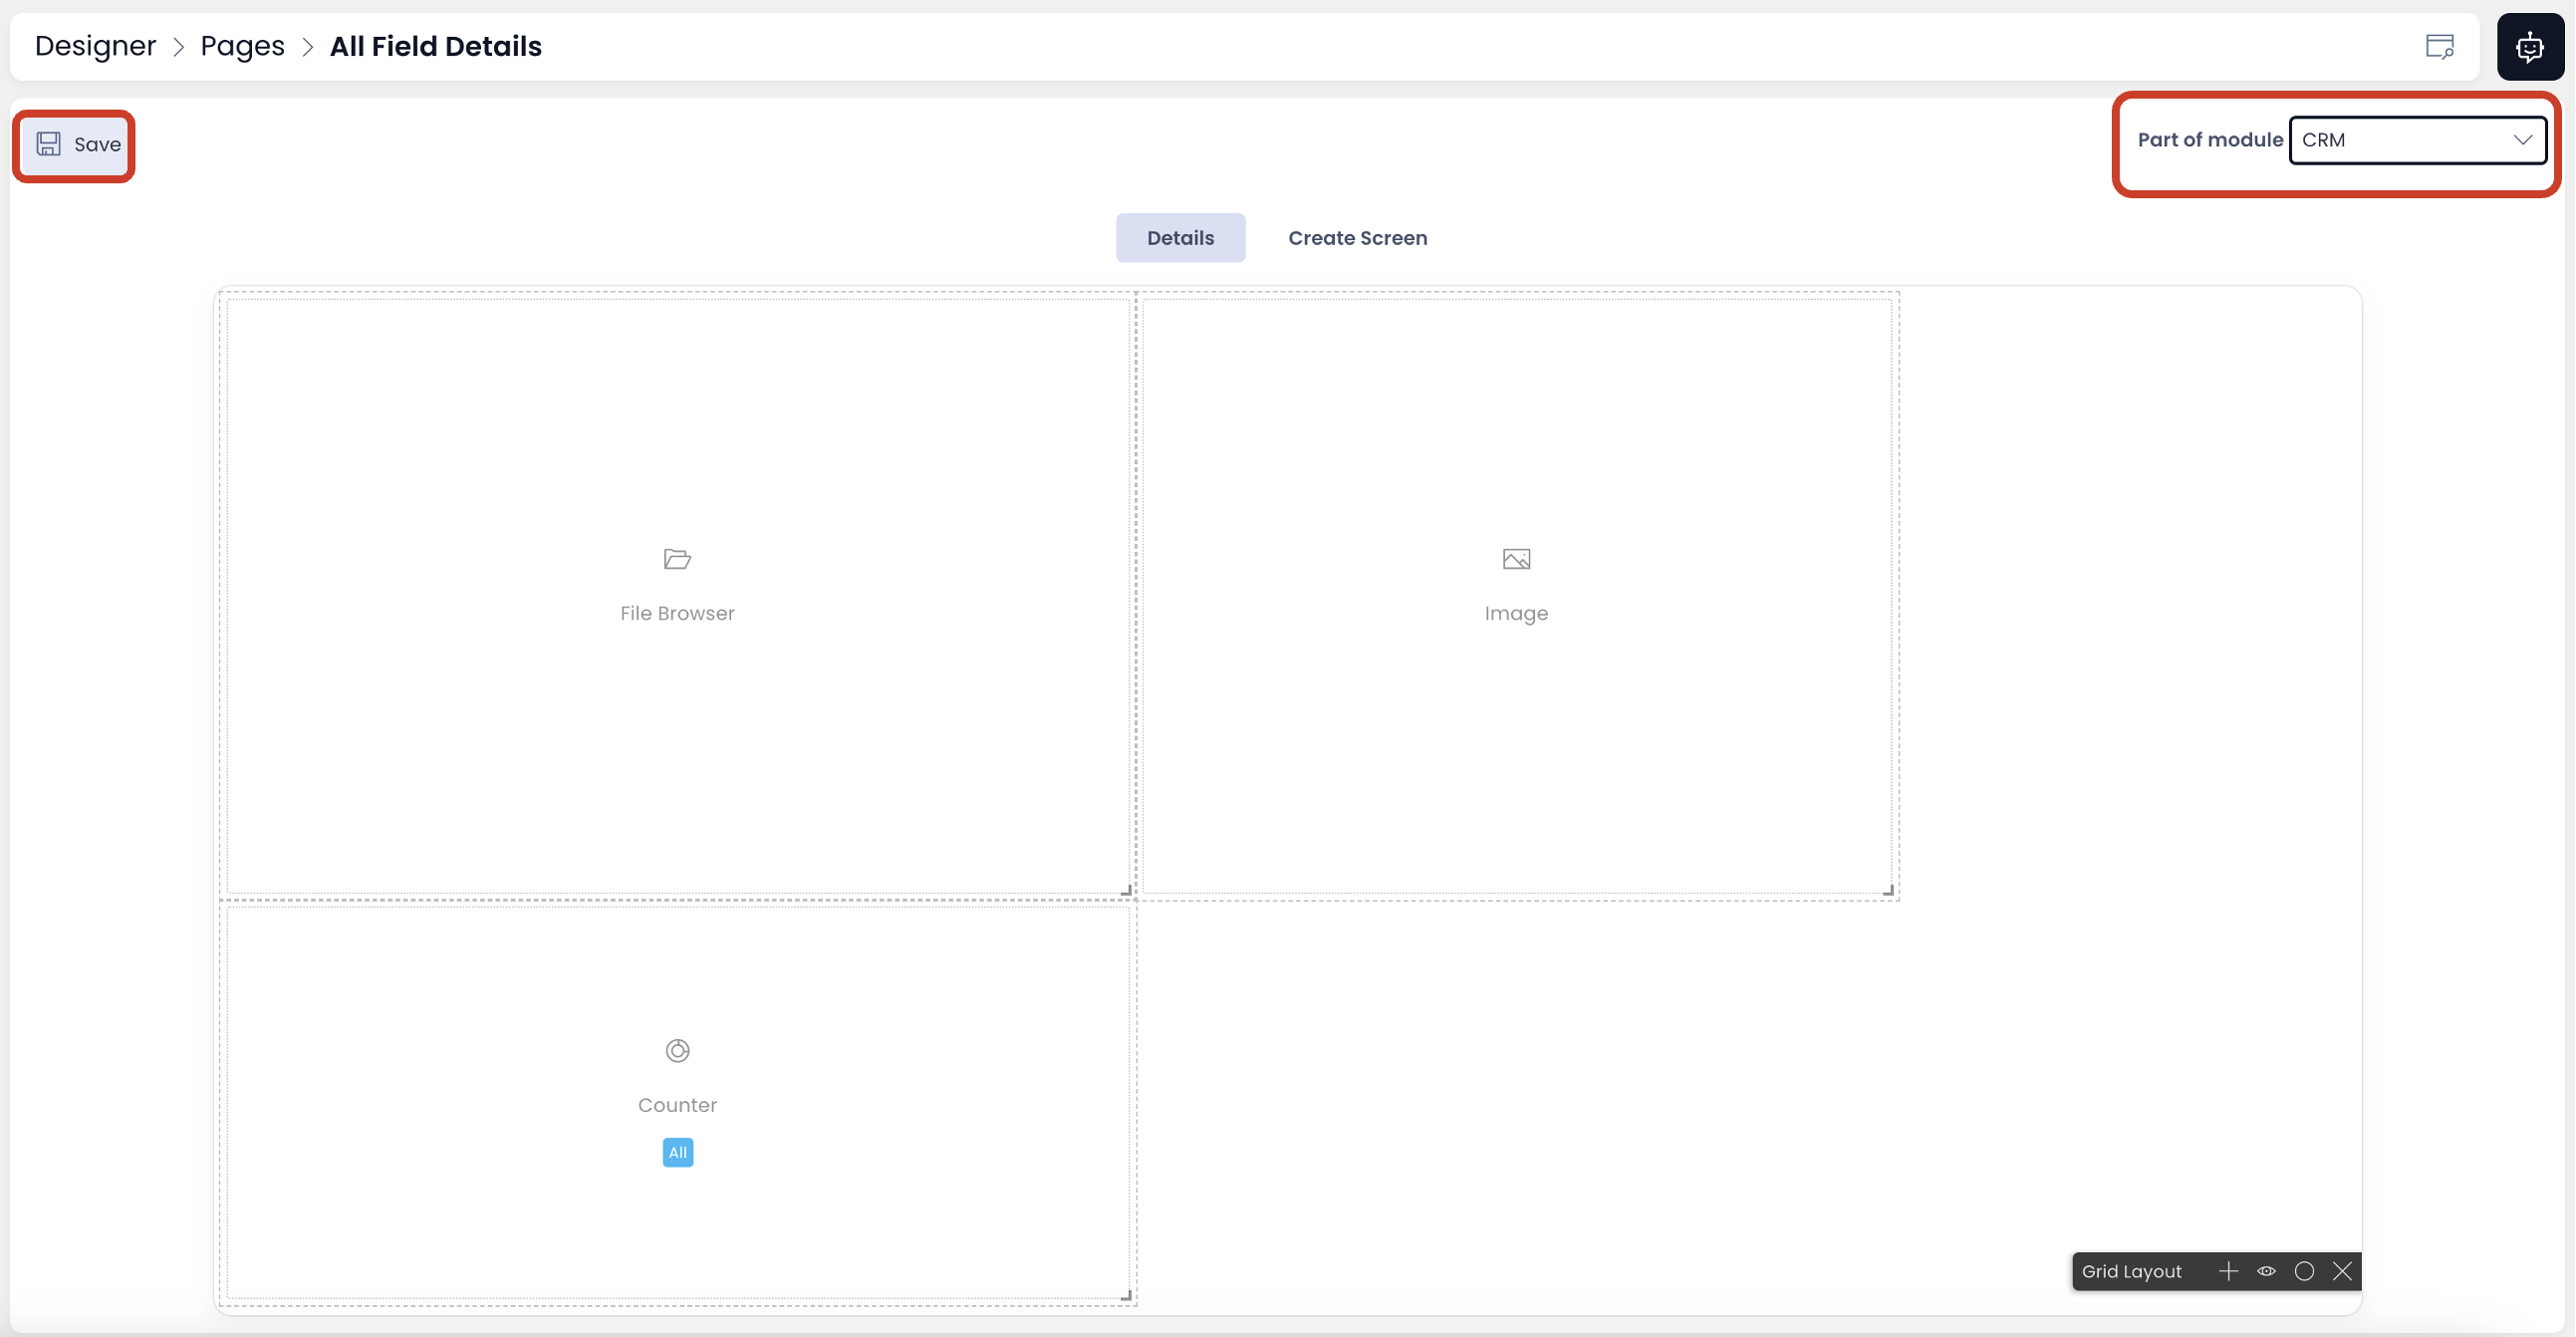
- In Designer, navigate to your desired page.
- Observe the field on top right corner of the screen - "Part of module".
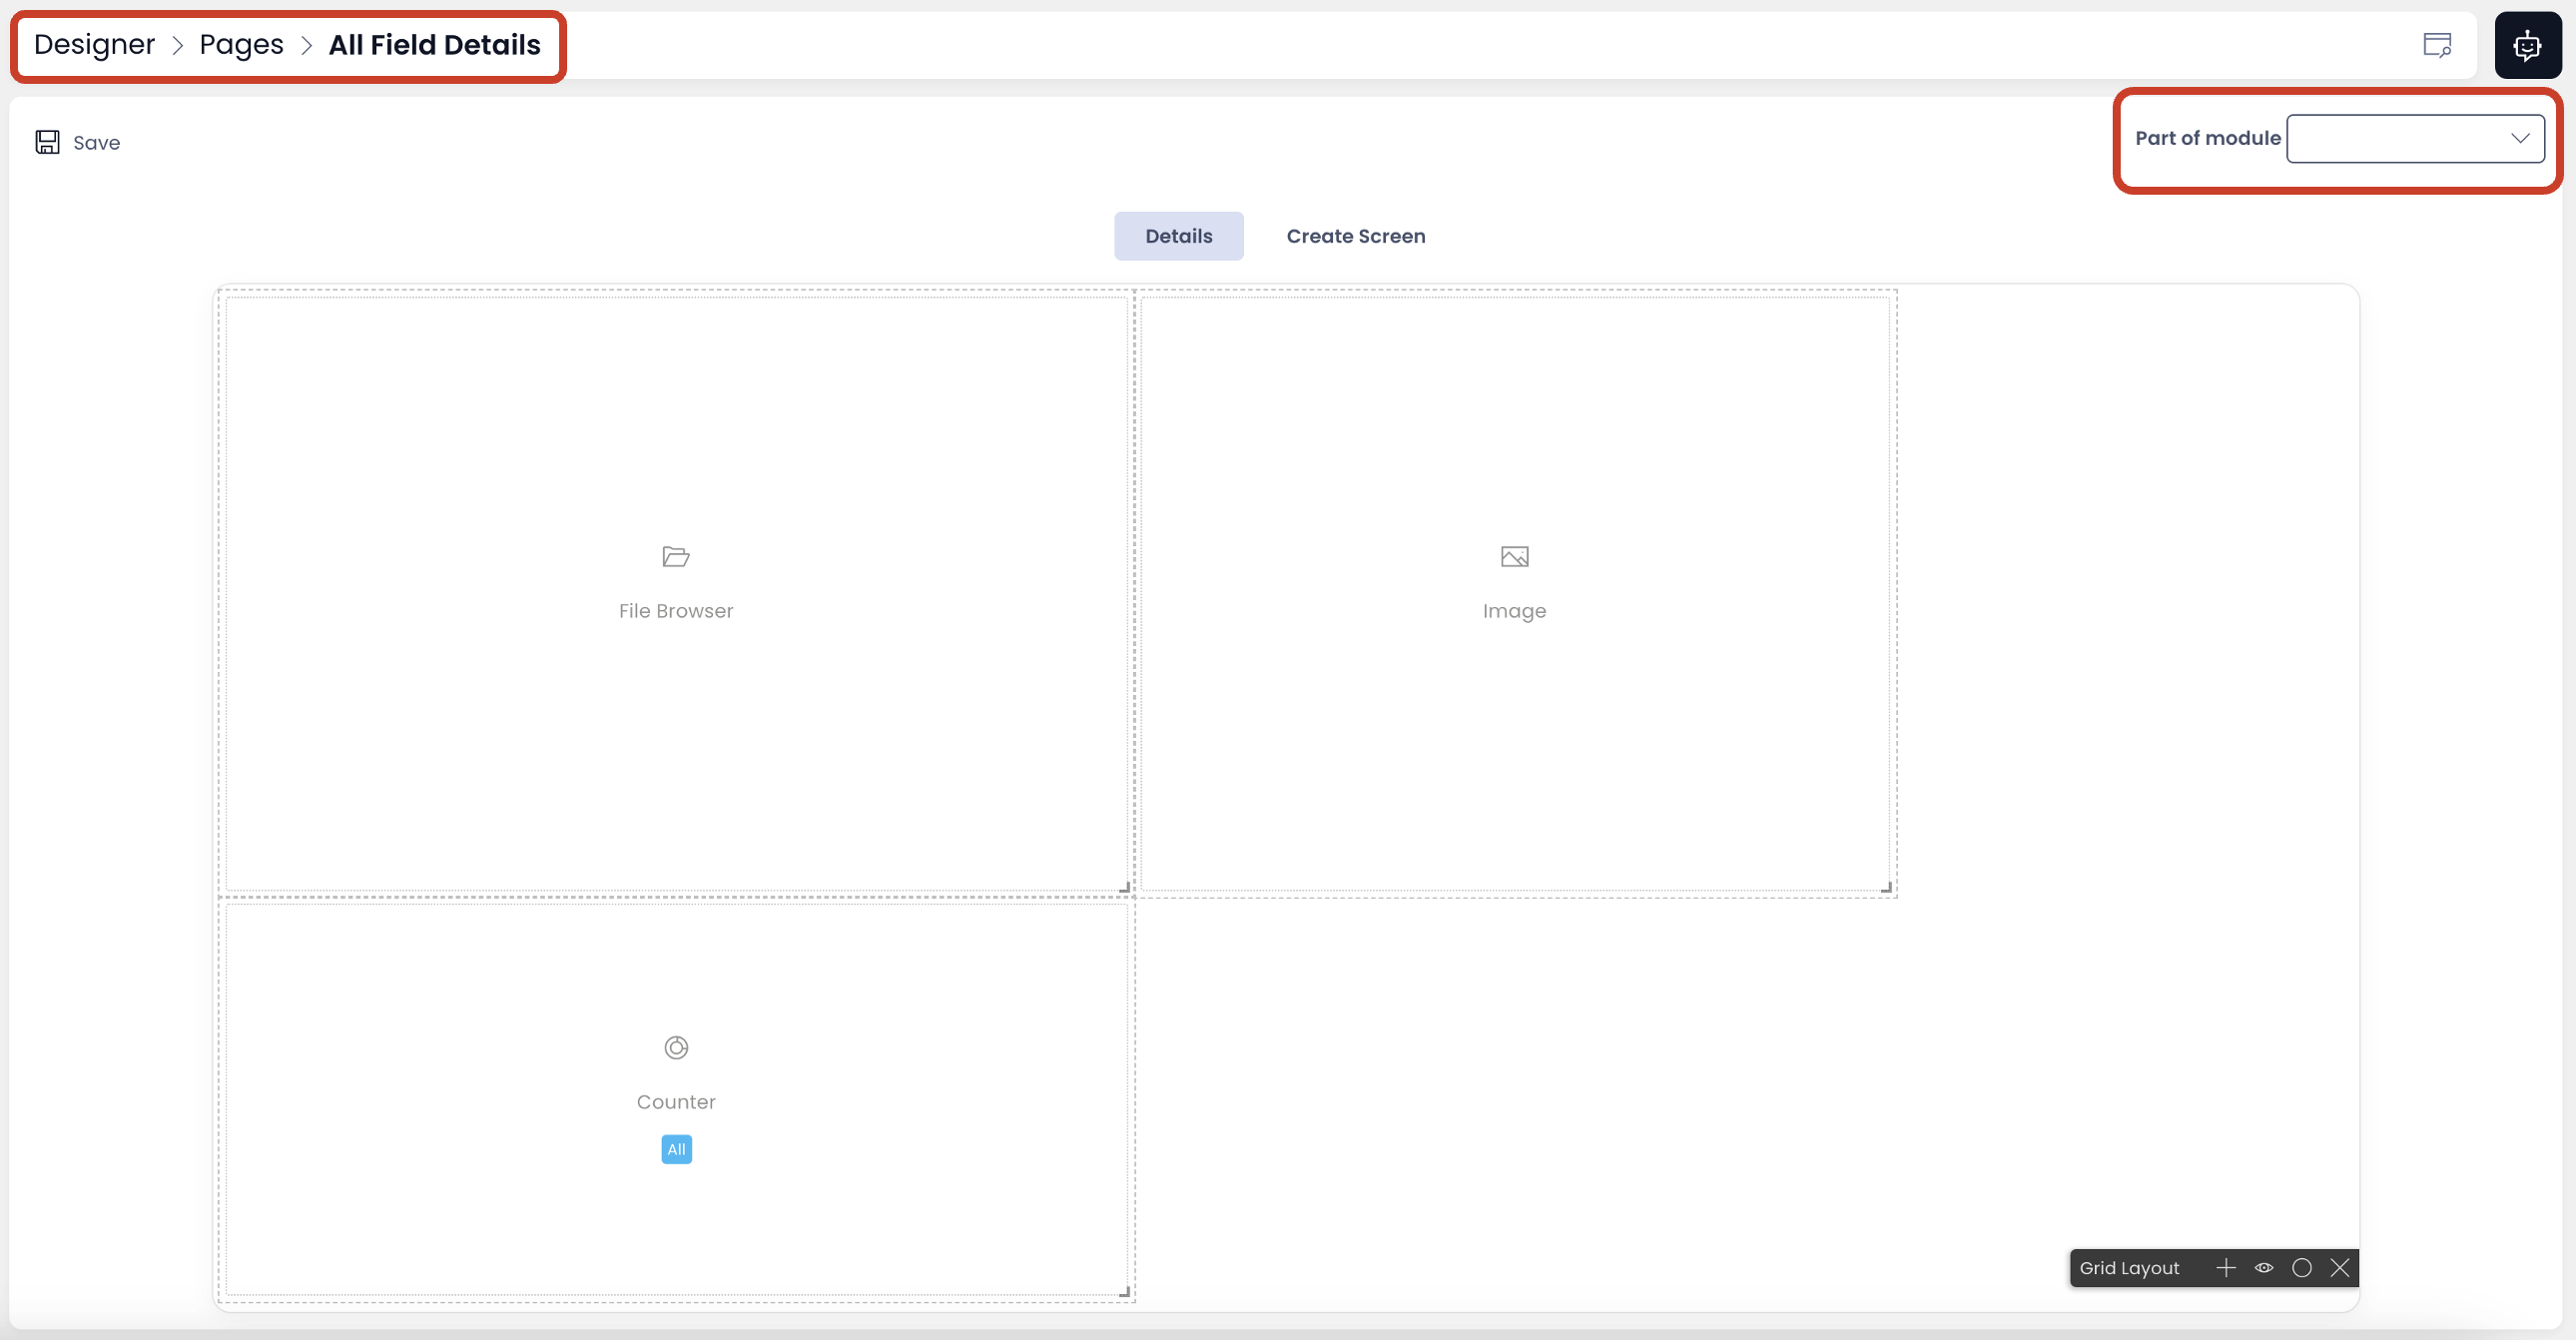 3. This is the dropdown field. Select your desired module with which you wish to associate the page.
4. Click Save.
Now all the components present on the page will get associated to the module.
Component
It is possible to associate a specific component (within a page) to a module.
- Navigate to the desired page in Designer.
- Click on the Edit (Pencil) icon on the component you desire to associate.
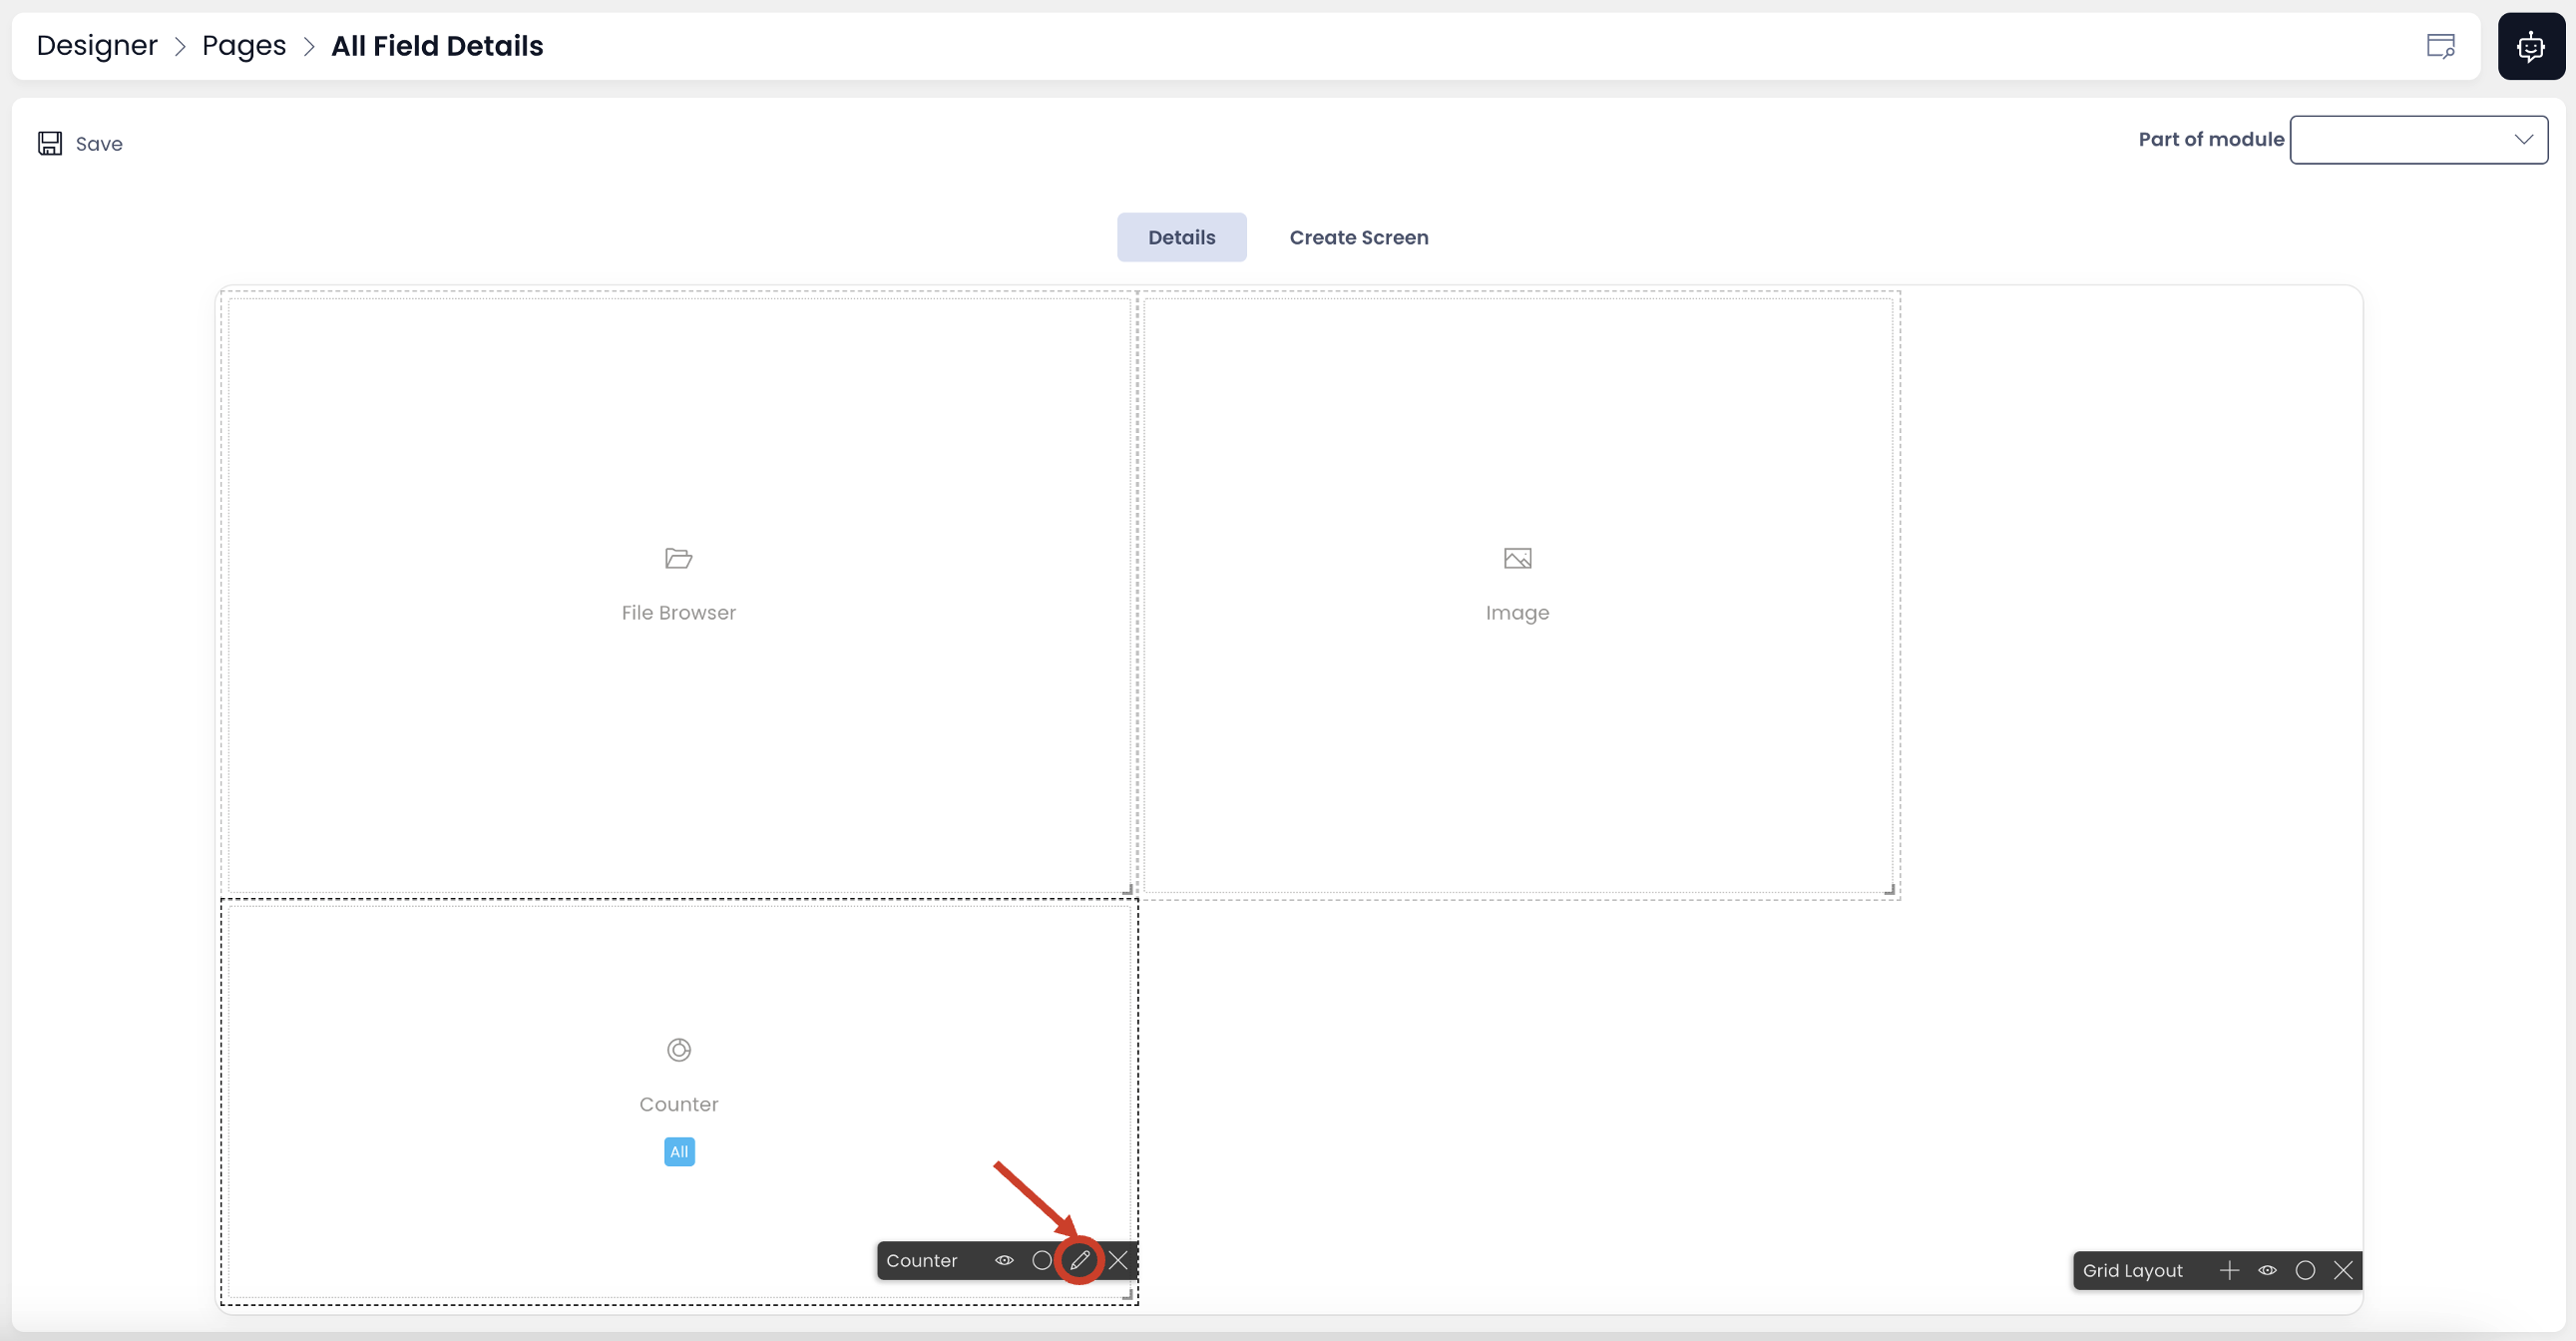
- An edit panel will open. In the Edit panel, locate the field "Part of module".
- Select your desired module to associate the subject component.
- Click Save to close the Edit panel.
- Click to save the Page.
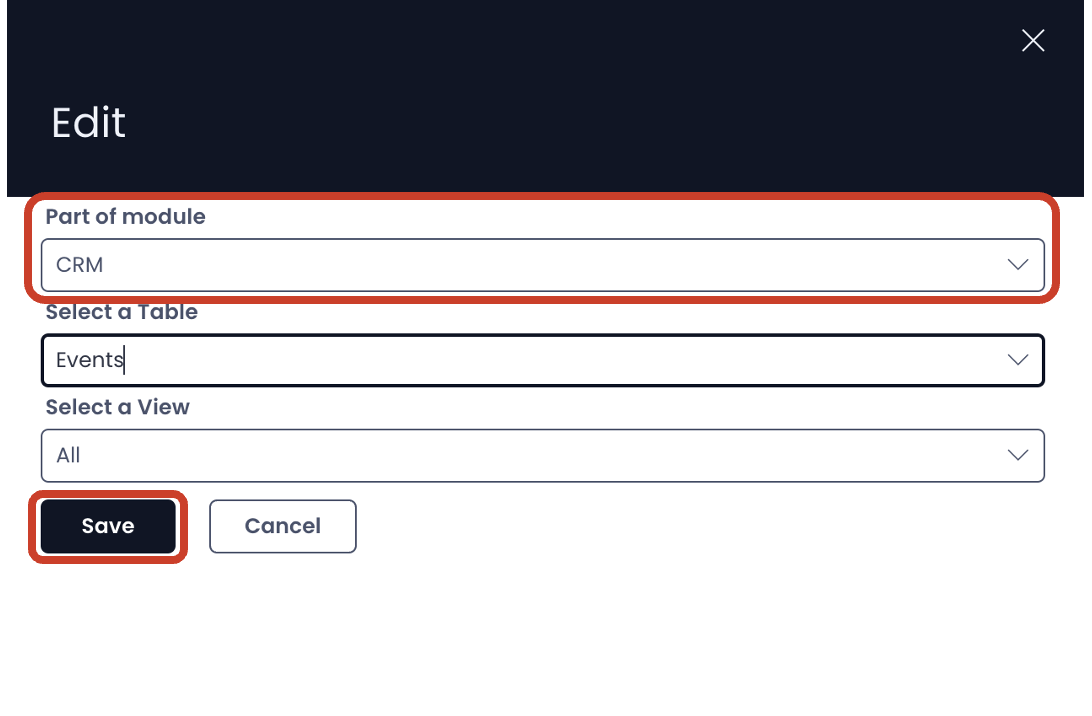
This will associate only the subject component to the module.
Enabling / Disabling modules
You can enable or disable modules by a toggle button. Please consider the following steps:
- Goto Designer
- In Designer Sidebar, click Maintenance
- Select Modules
All the existing modules in the system will appear as tiles.

- Toggle the state of the module to enable / disable it from the system.
What happens when you toggle a module?
Associated information infrastructure elements get enabled / disabled based on the state of the module.
To demonstrate how it works, we will take two modules - CRM (enabled state) and HR (disabled state) as shown above.
Table
The below image shows three cases:
Case 1: The Table is not associated to any module.
Result - the table appears in the Explorer sidebar

Case 2: The Table is associated with CRM module.
Result - the table appears in the Explorer sidebar as CRM is in enabled state.
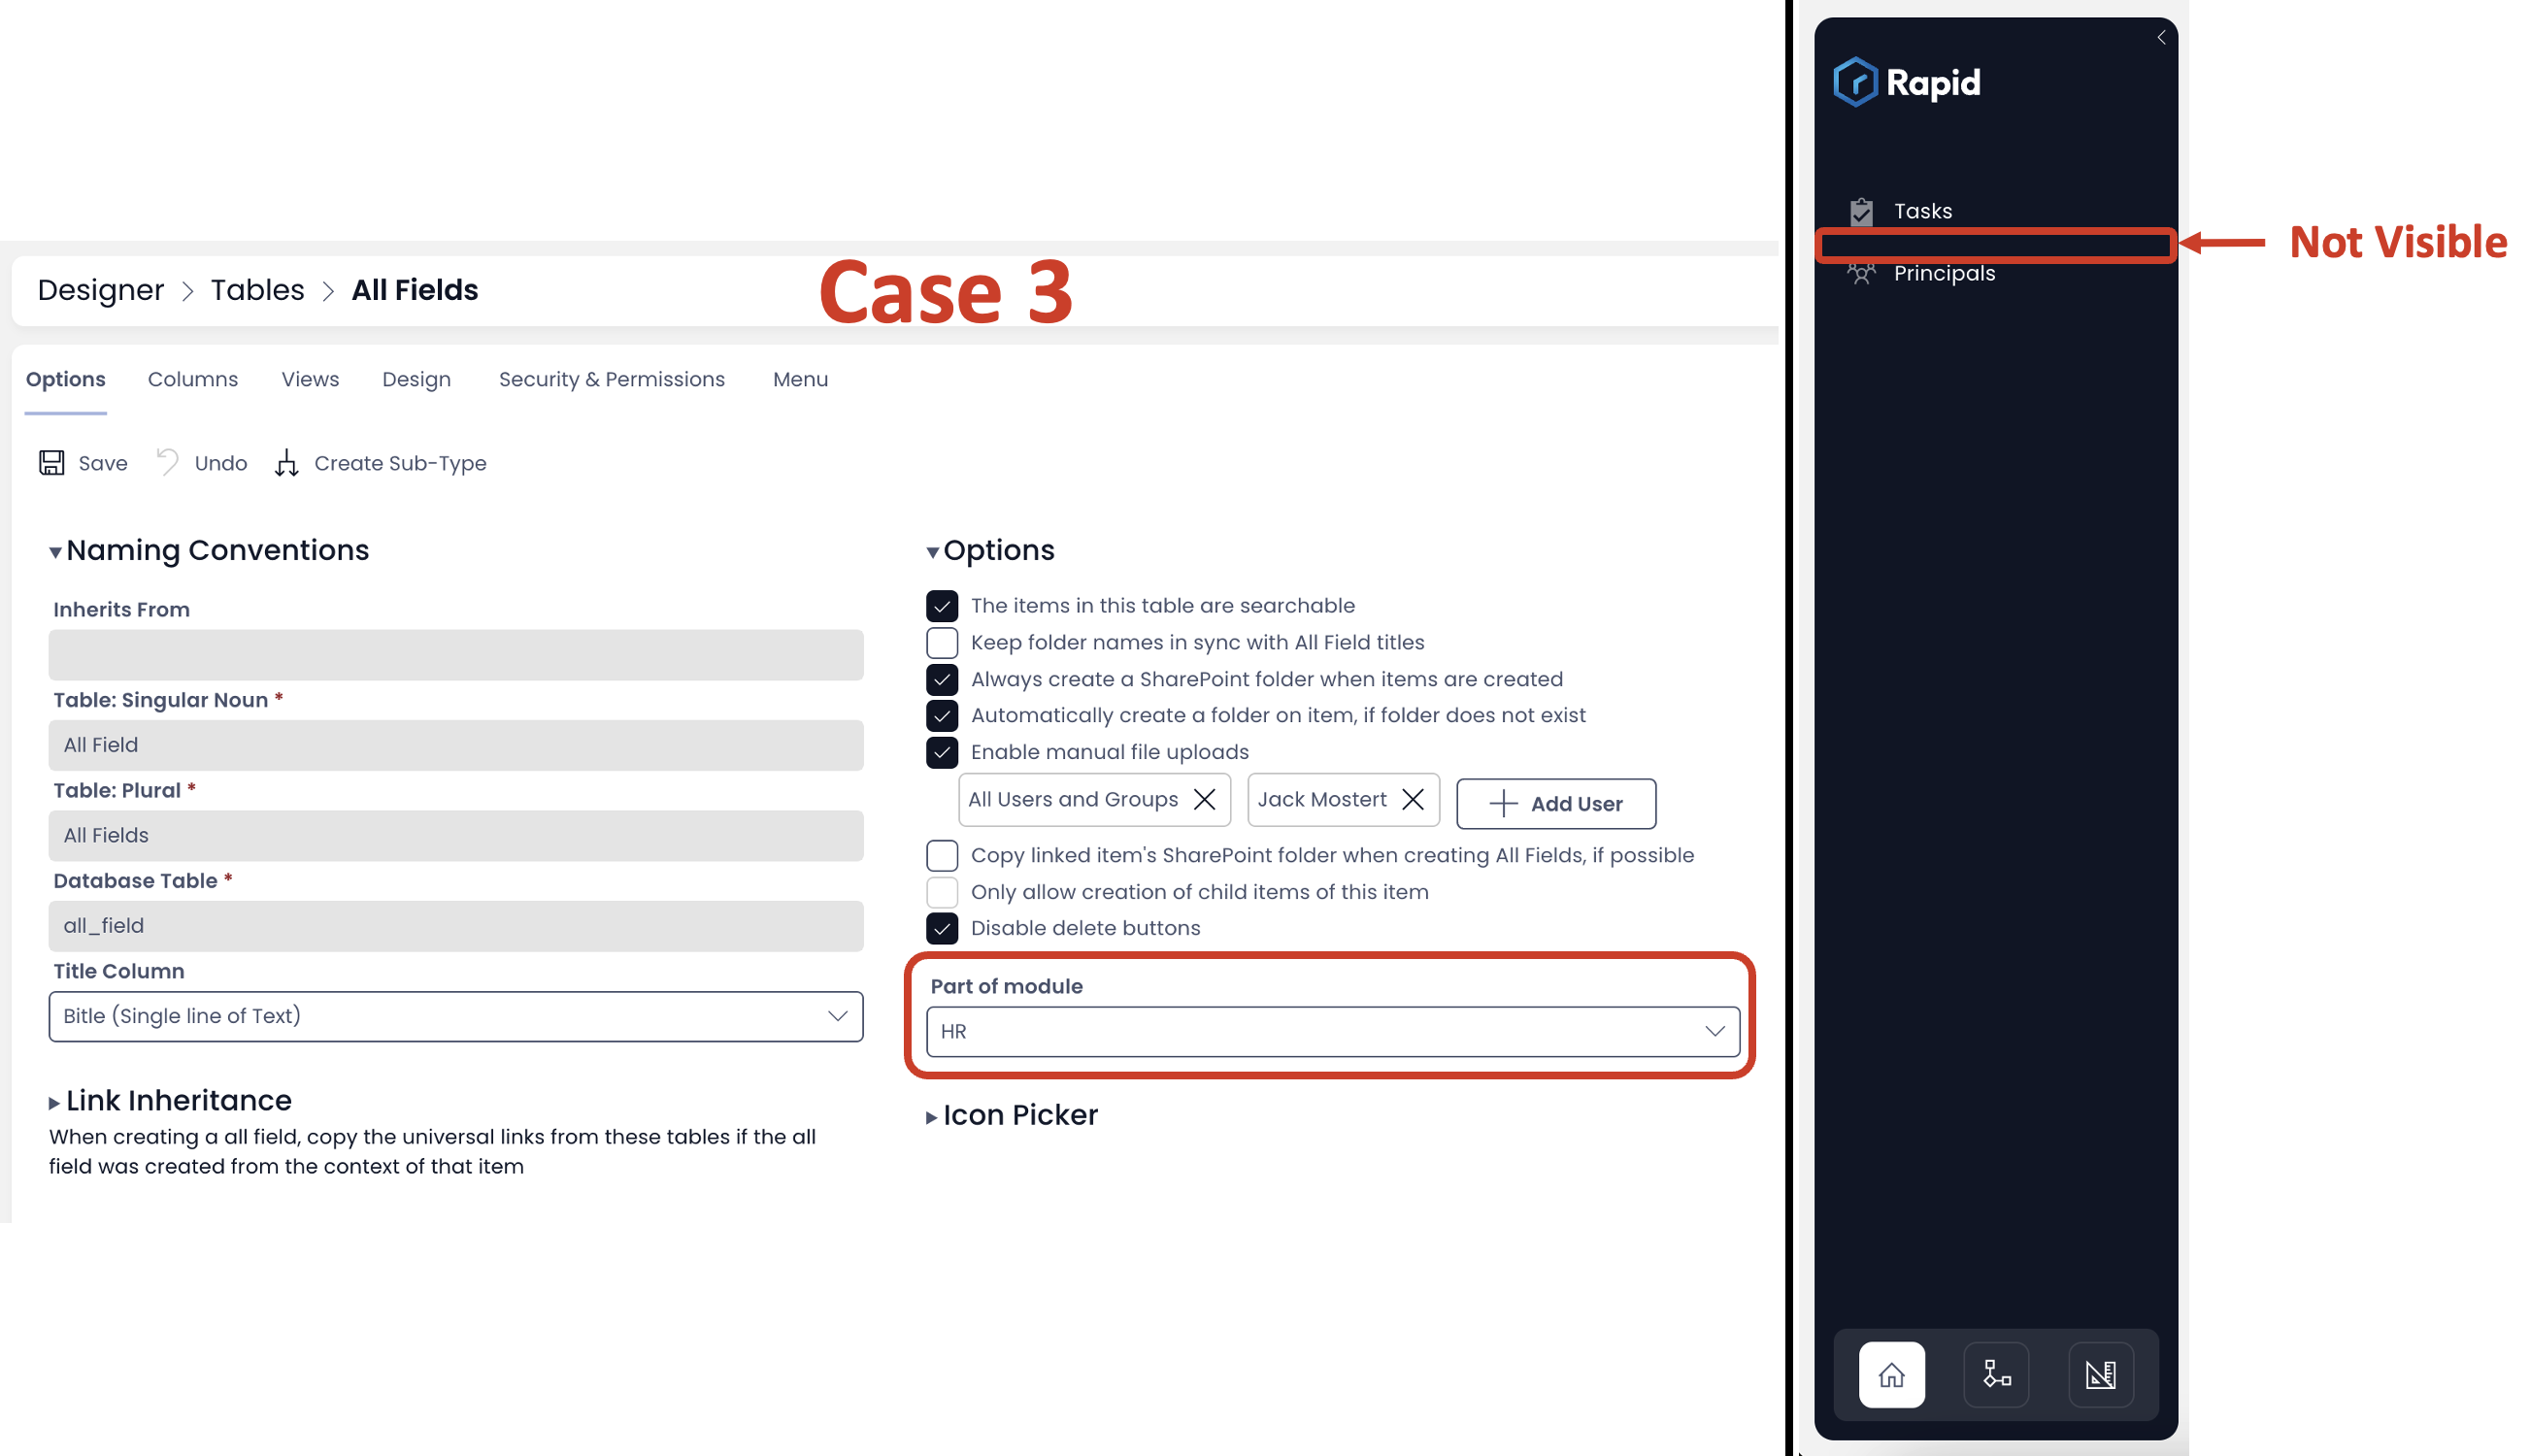
Case 3: The Table is associated with HR module.
Result - the table does not appear in the Explorer sidebar as HR is in disabled state.
Menu List
Case 1: The menu list is not associated to any module.
Result - All menu items appear in the command bar (Explorer) as configured.

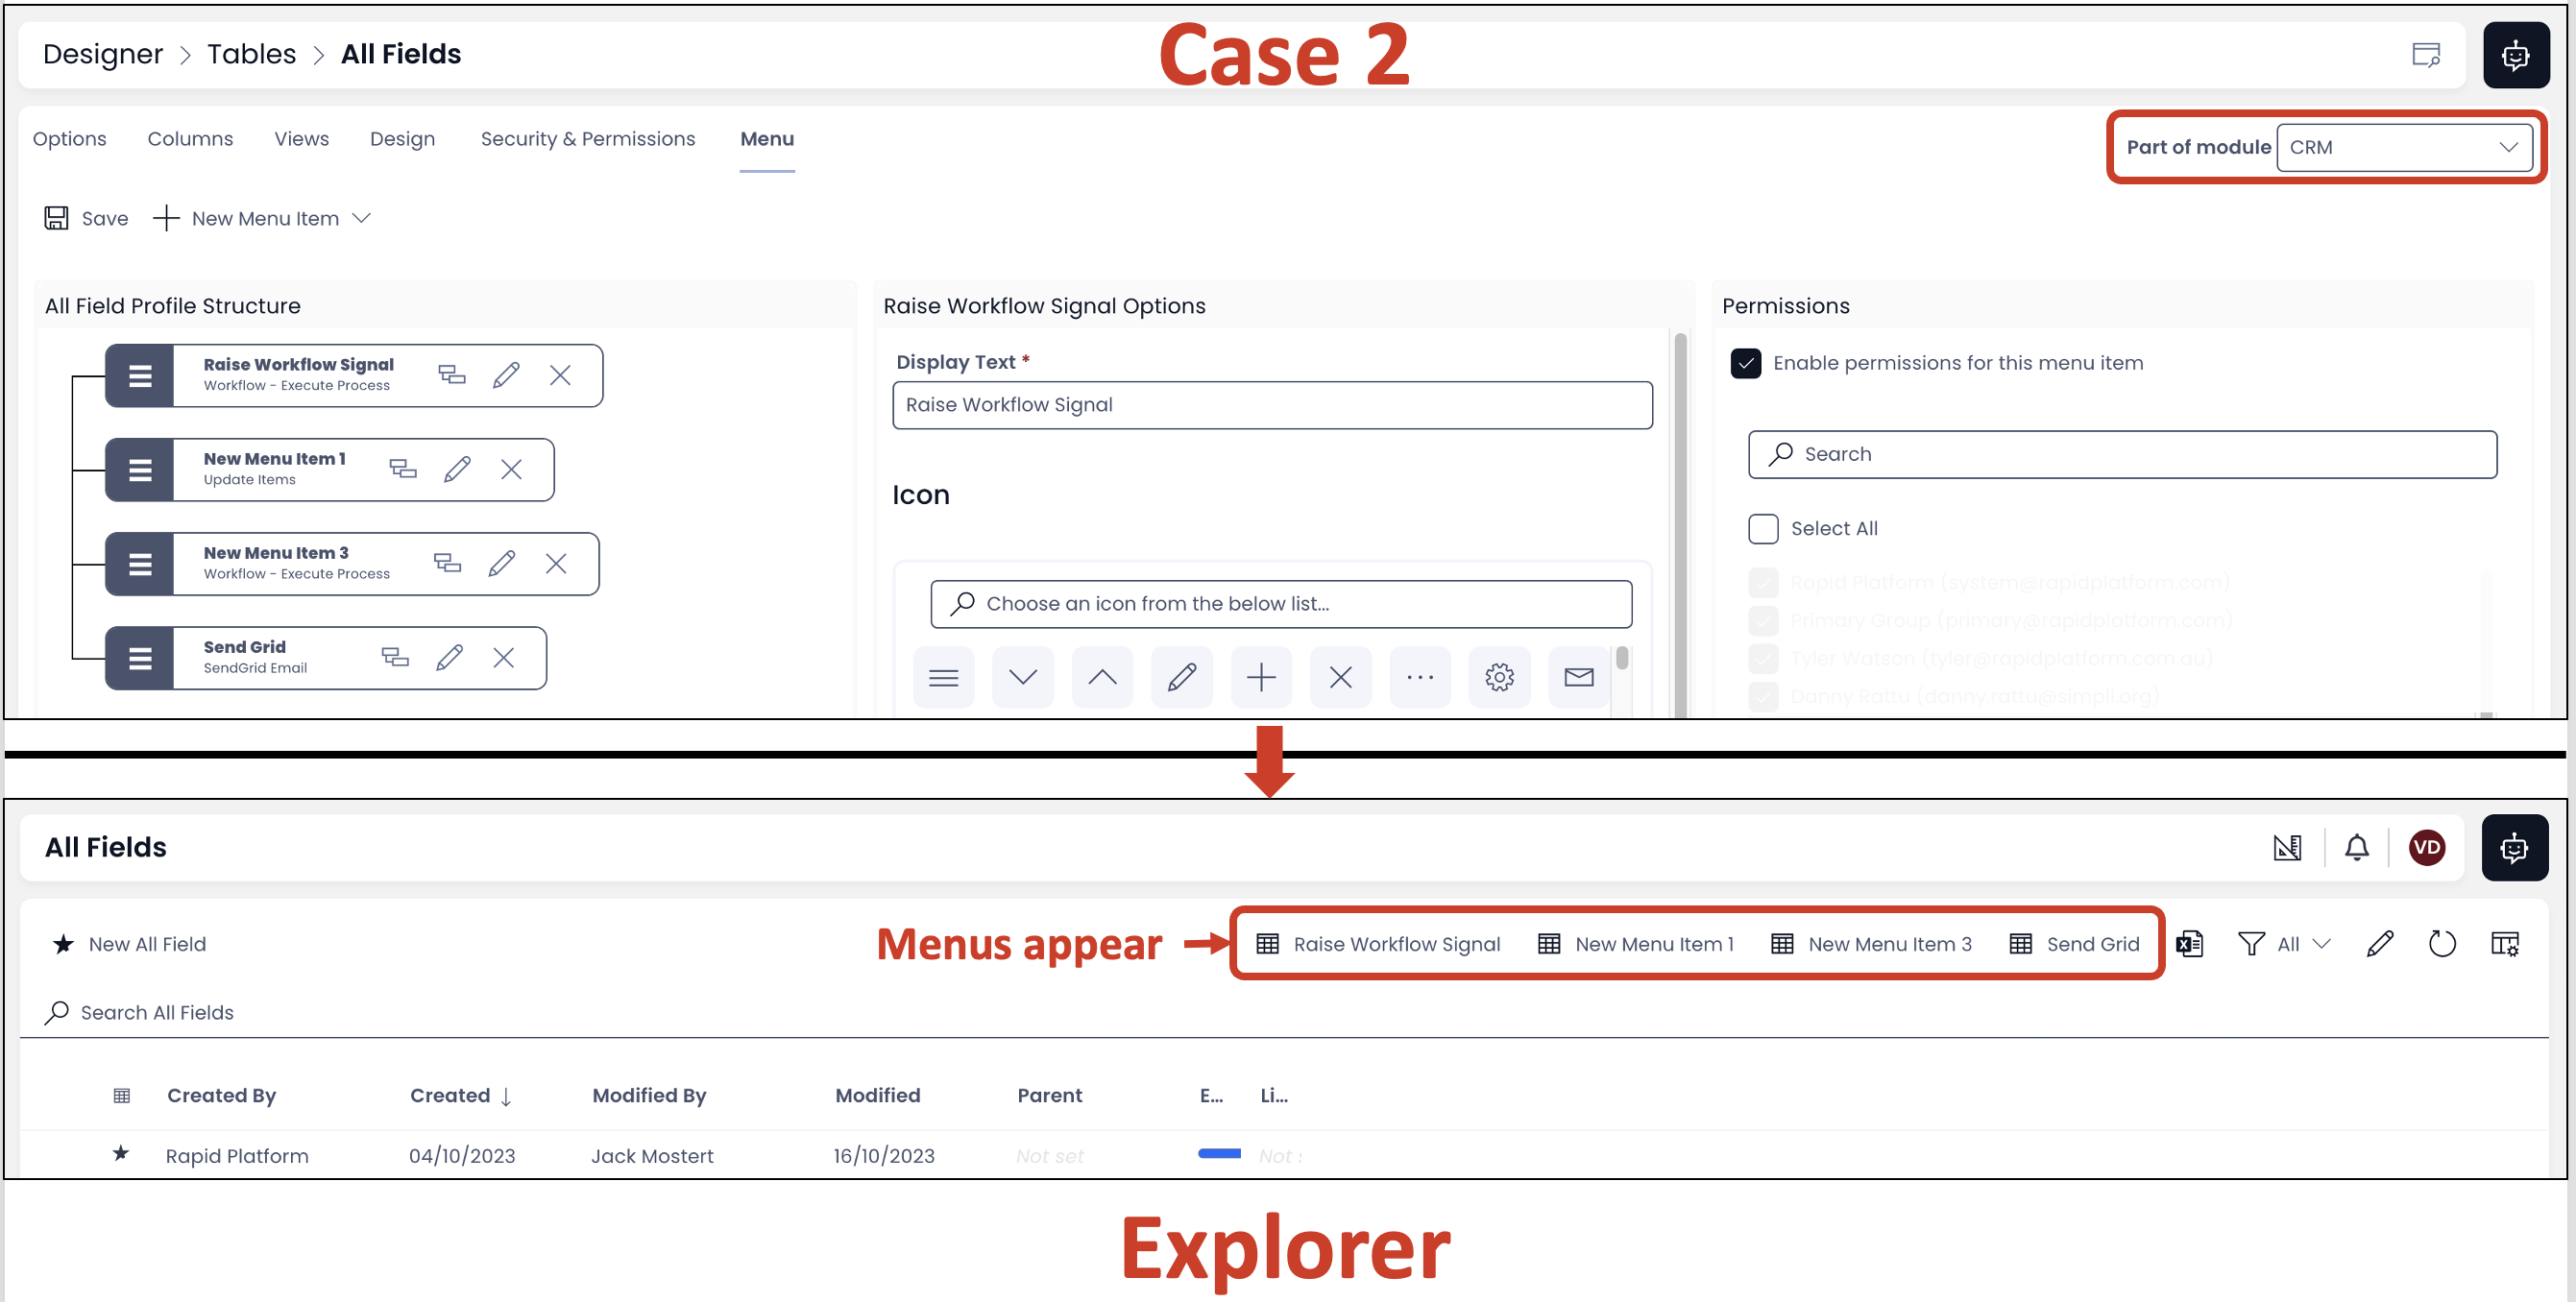
Case 2: The menu list is associated to CRM module.
Result - the menu items appear in the command bar (Explorer) as CRM is in enabled state.
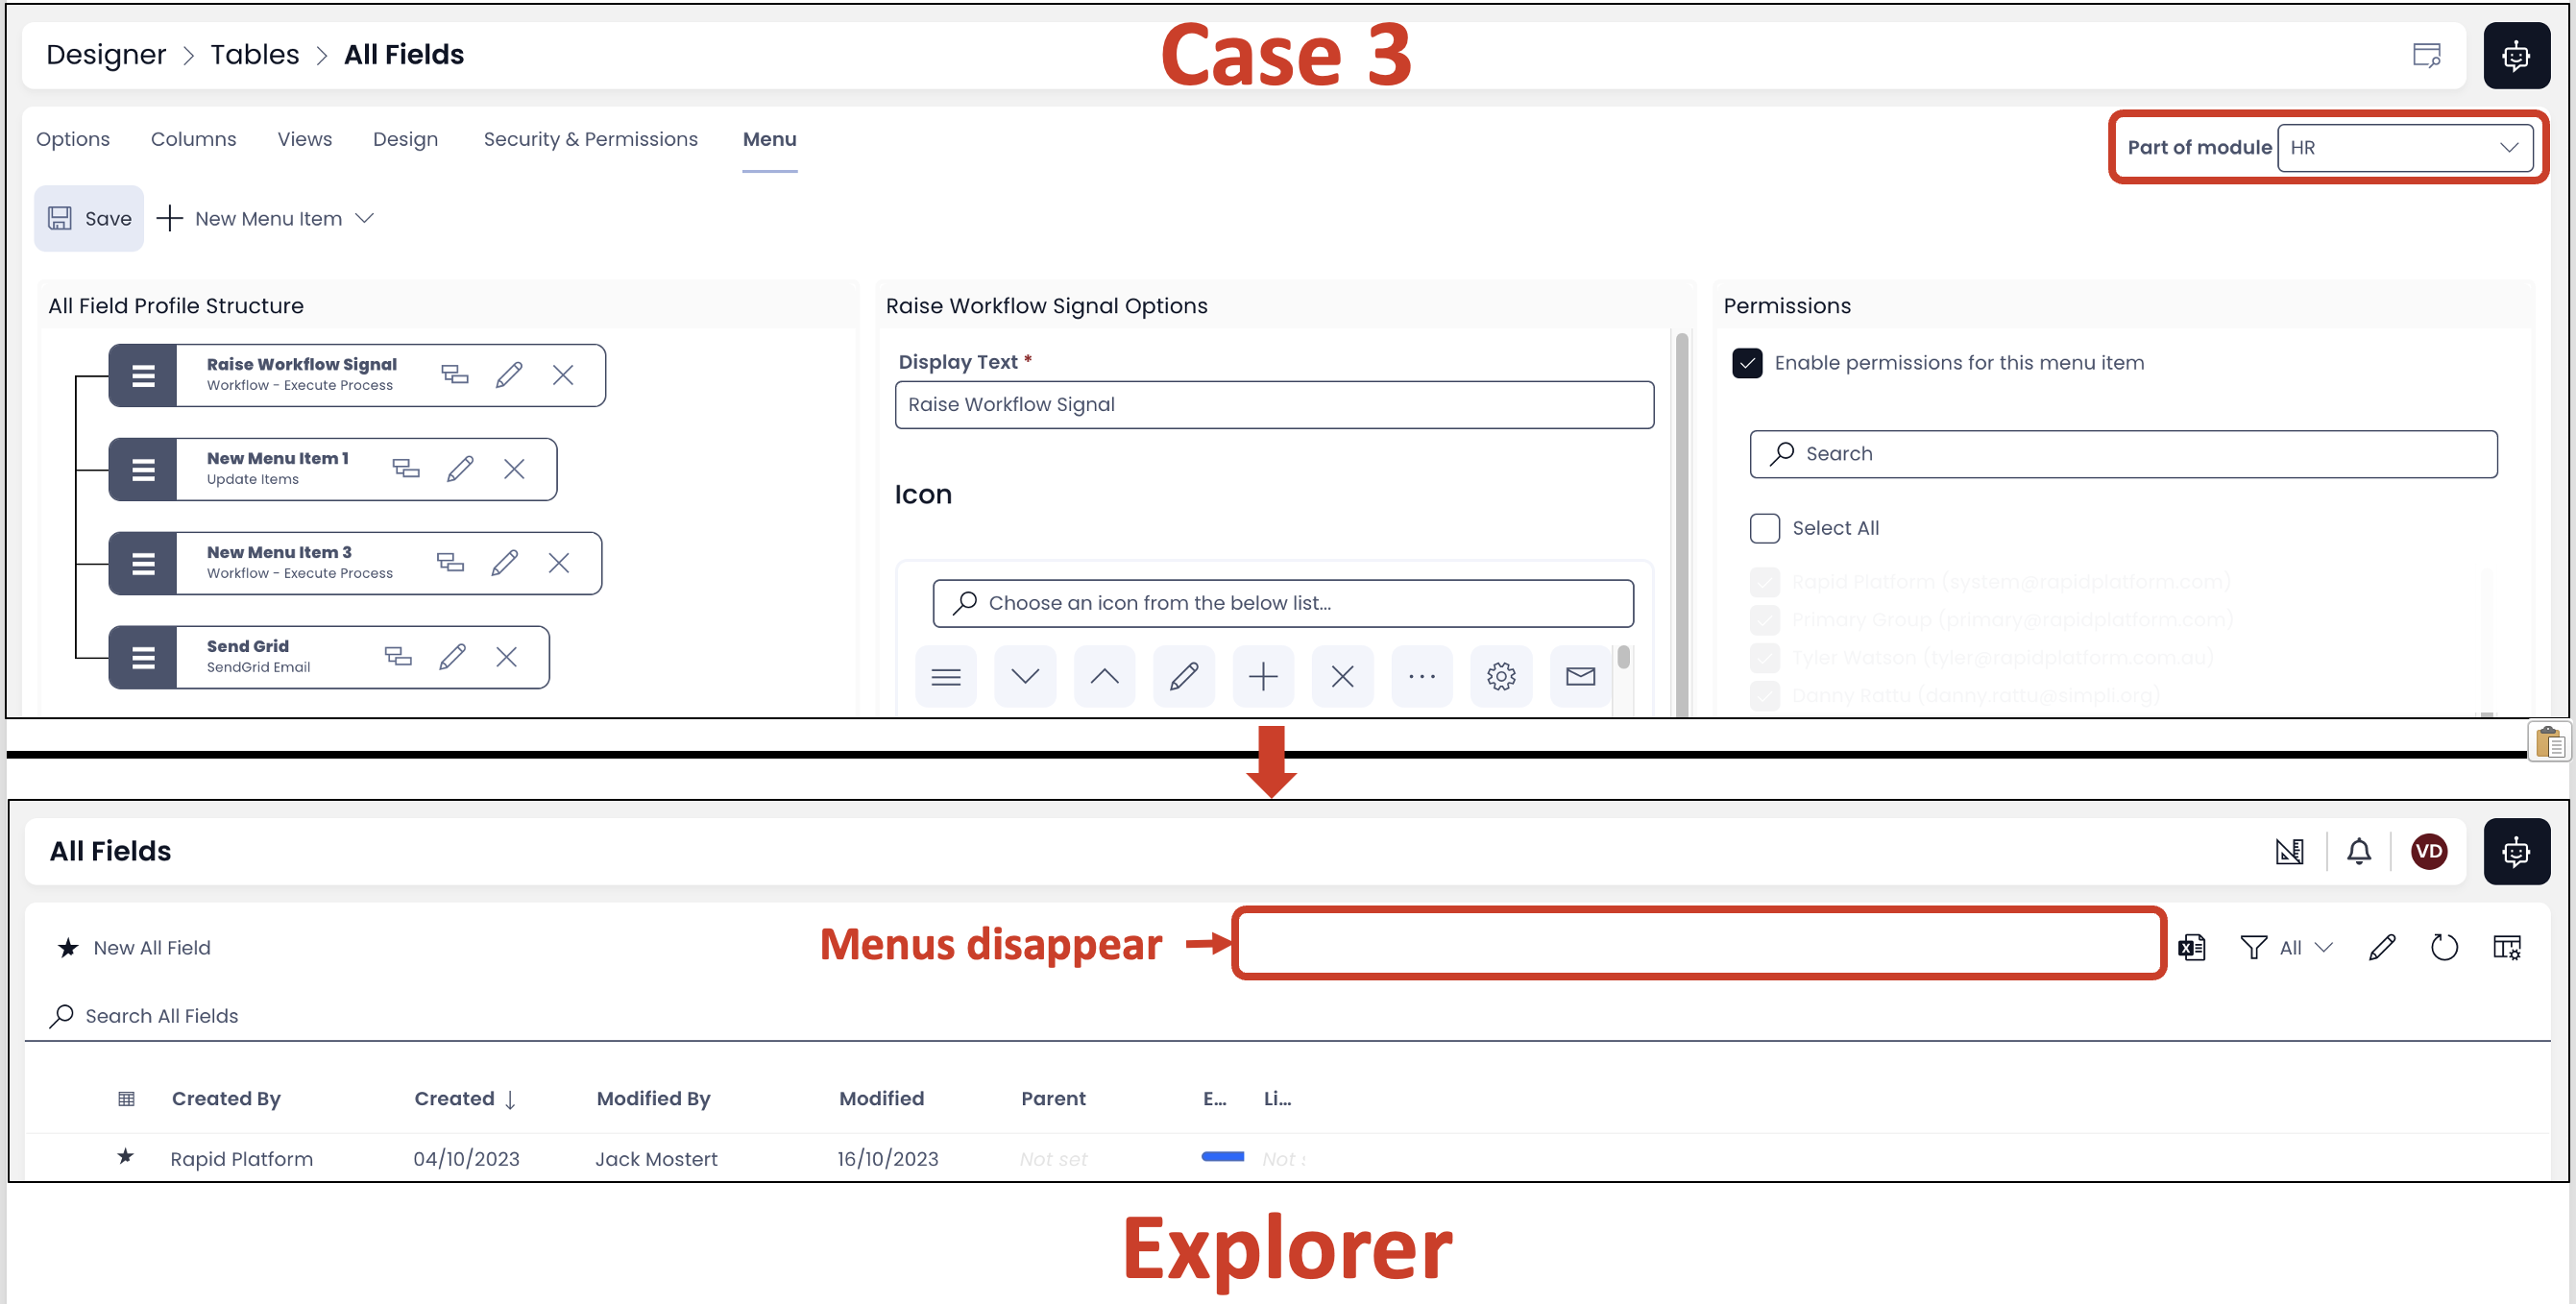
Case 3: The menu list is associated to HR module. Result - the menu items does not appear in the command bar (Explorer) as HR is in disabled state.
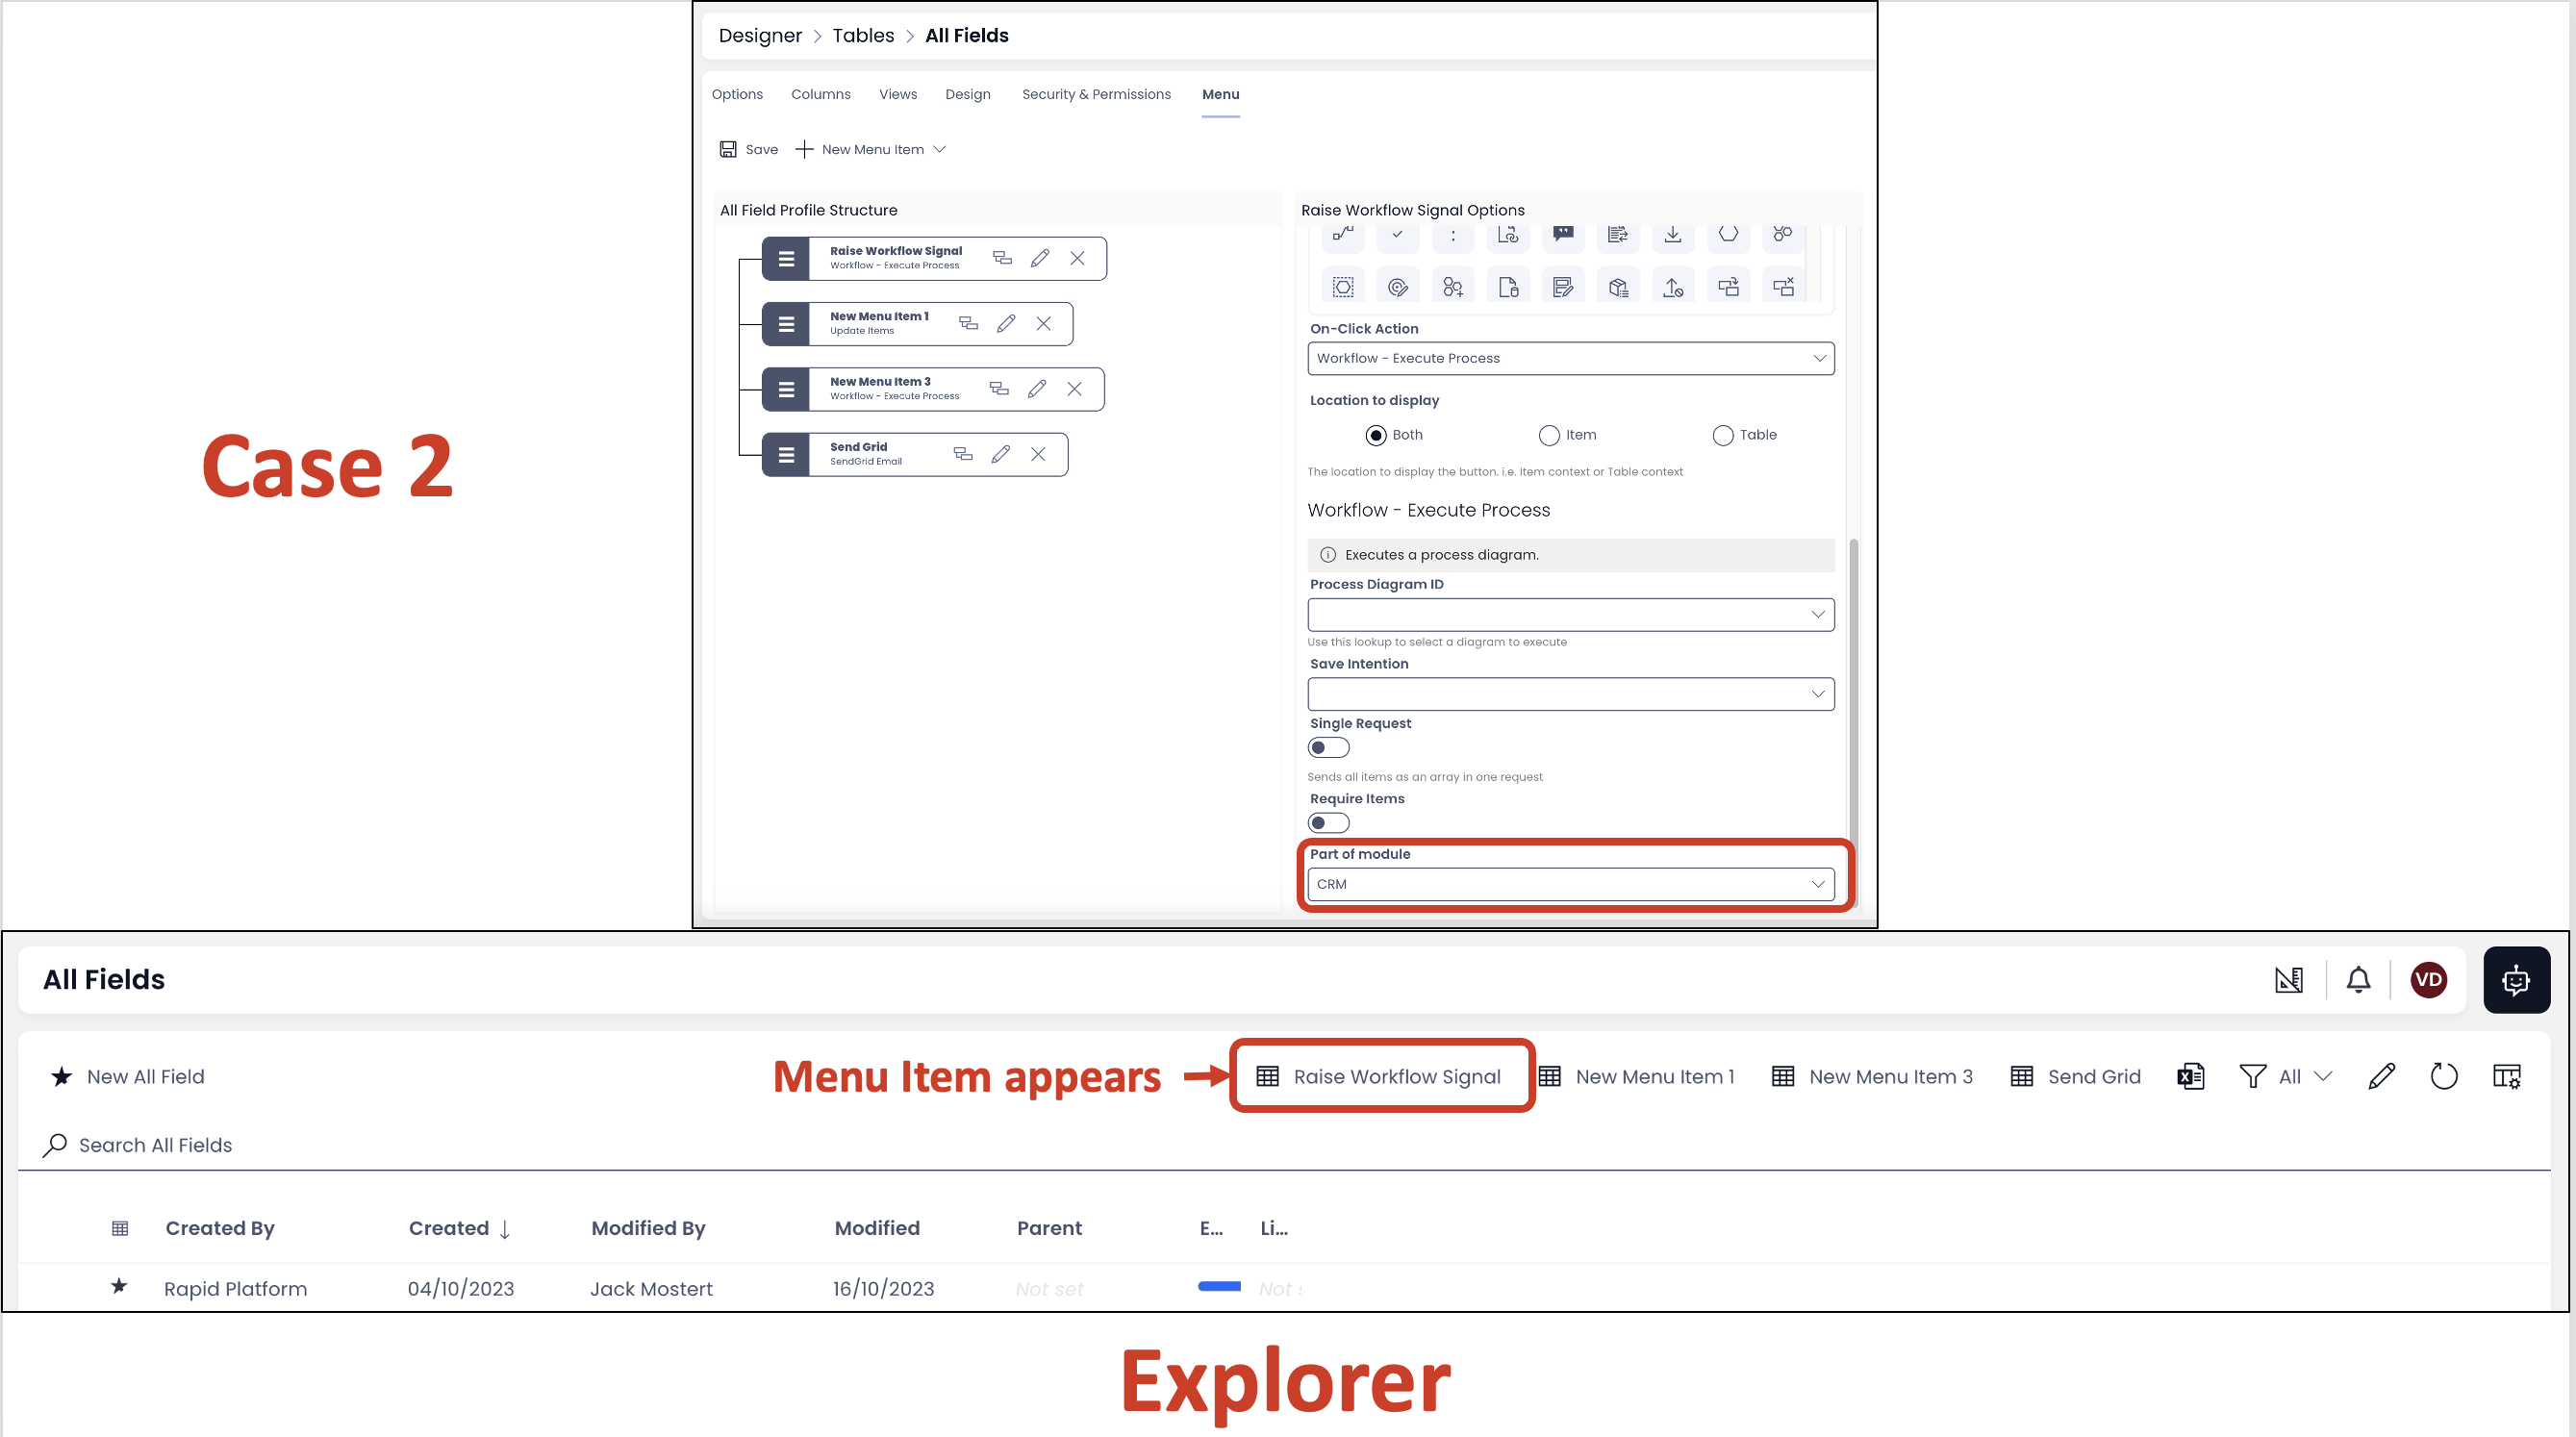
Menu item
Case 1: The menu item is not associated to any module.
Result - All menu item appears in the command bar (Explorer) as configured.
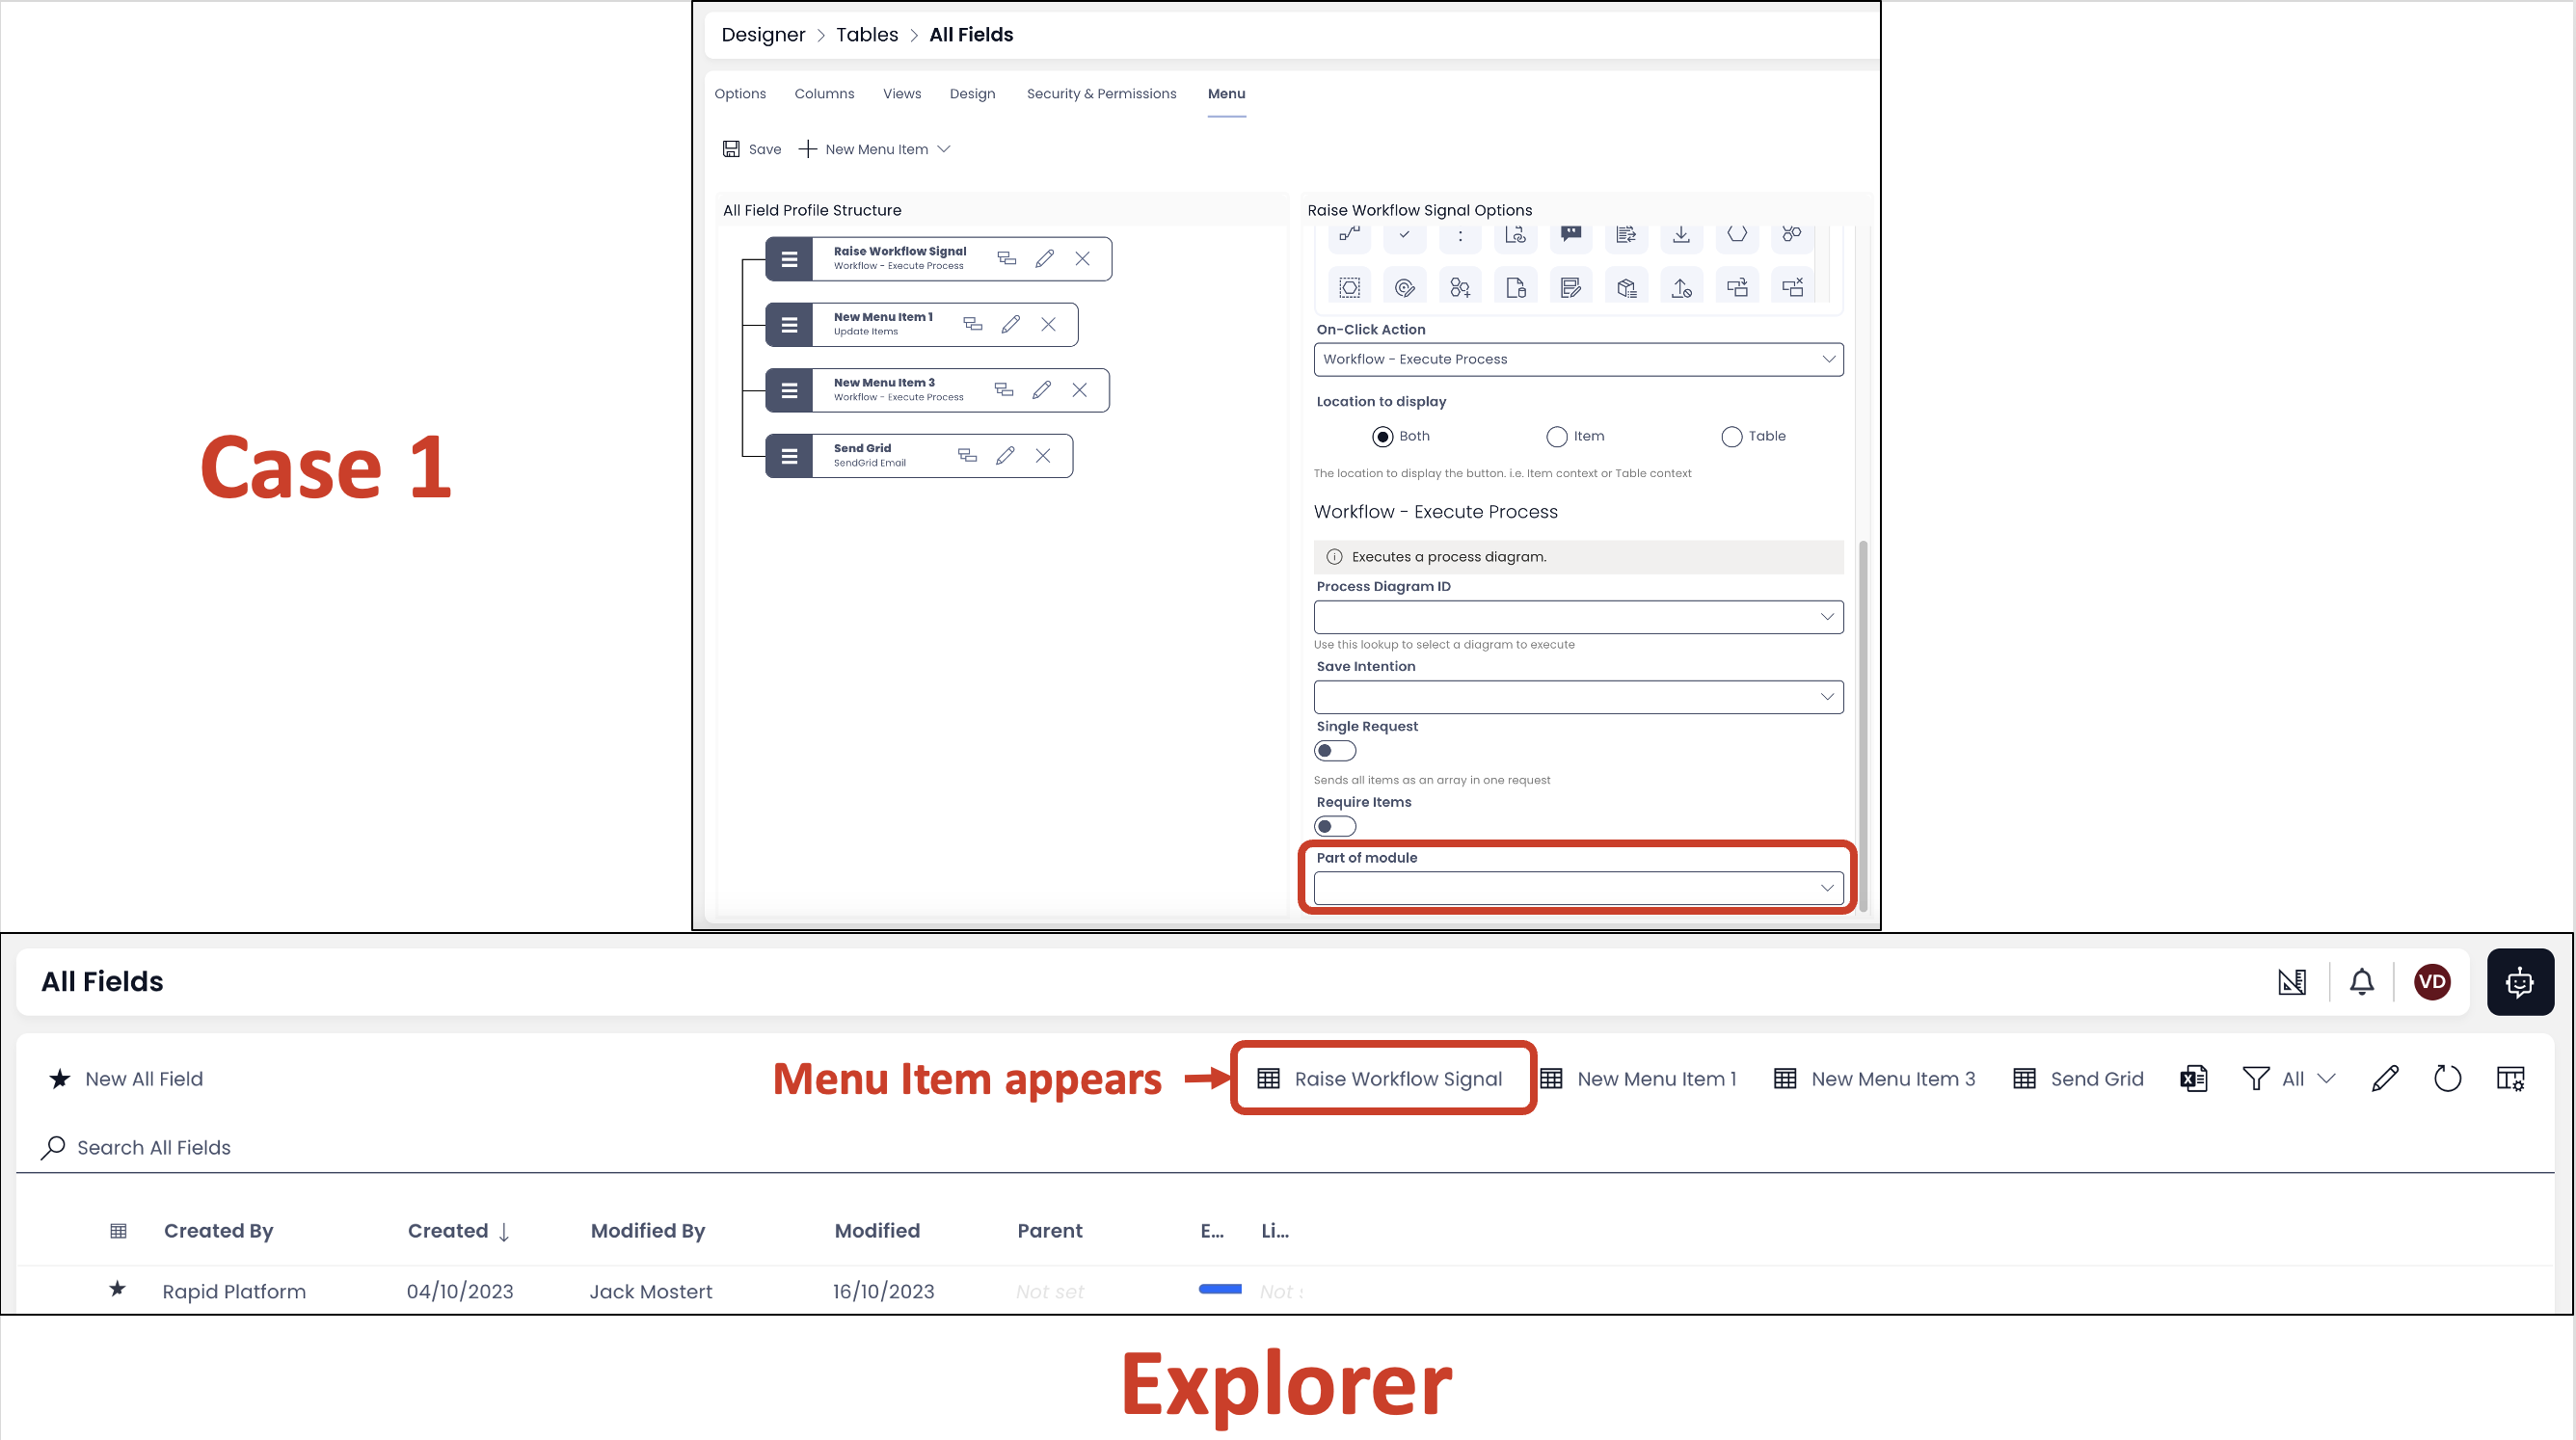
Case 2: The menu item is associated to CRM module.
Result - the menu item appears in the command bar (Explorer) as CRM is in enabled state.
Case 3: The menu item is associated to HR module. Result - the menu item does not appear in the command bar (Explorer) as HR is in disabled state.

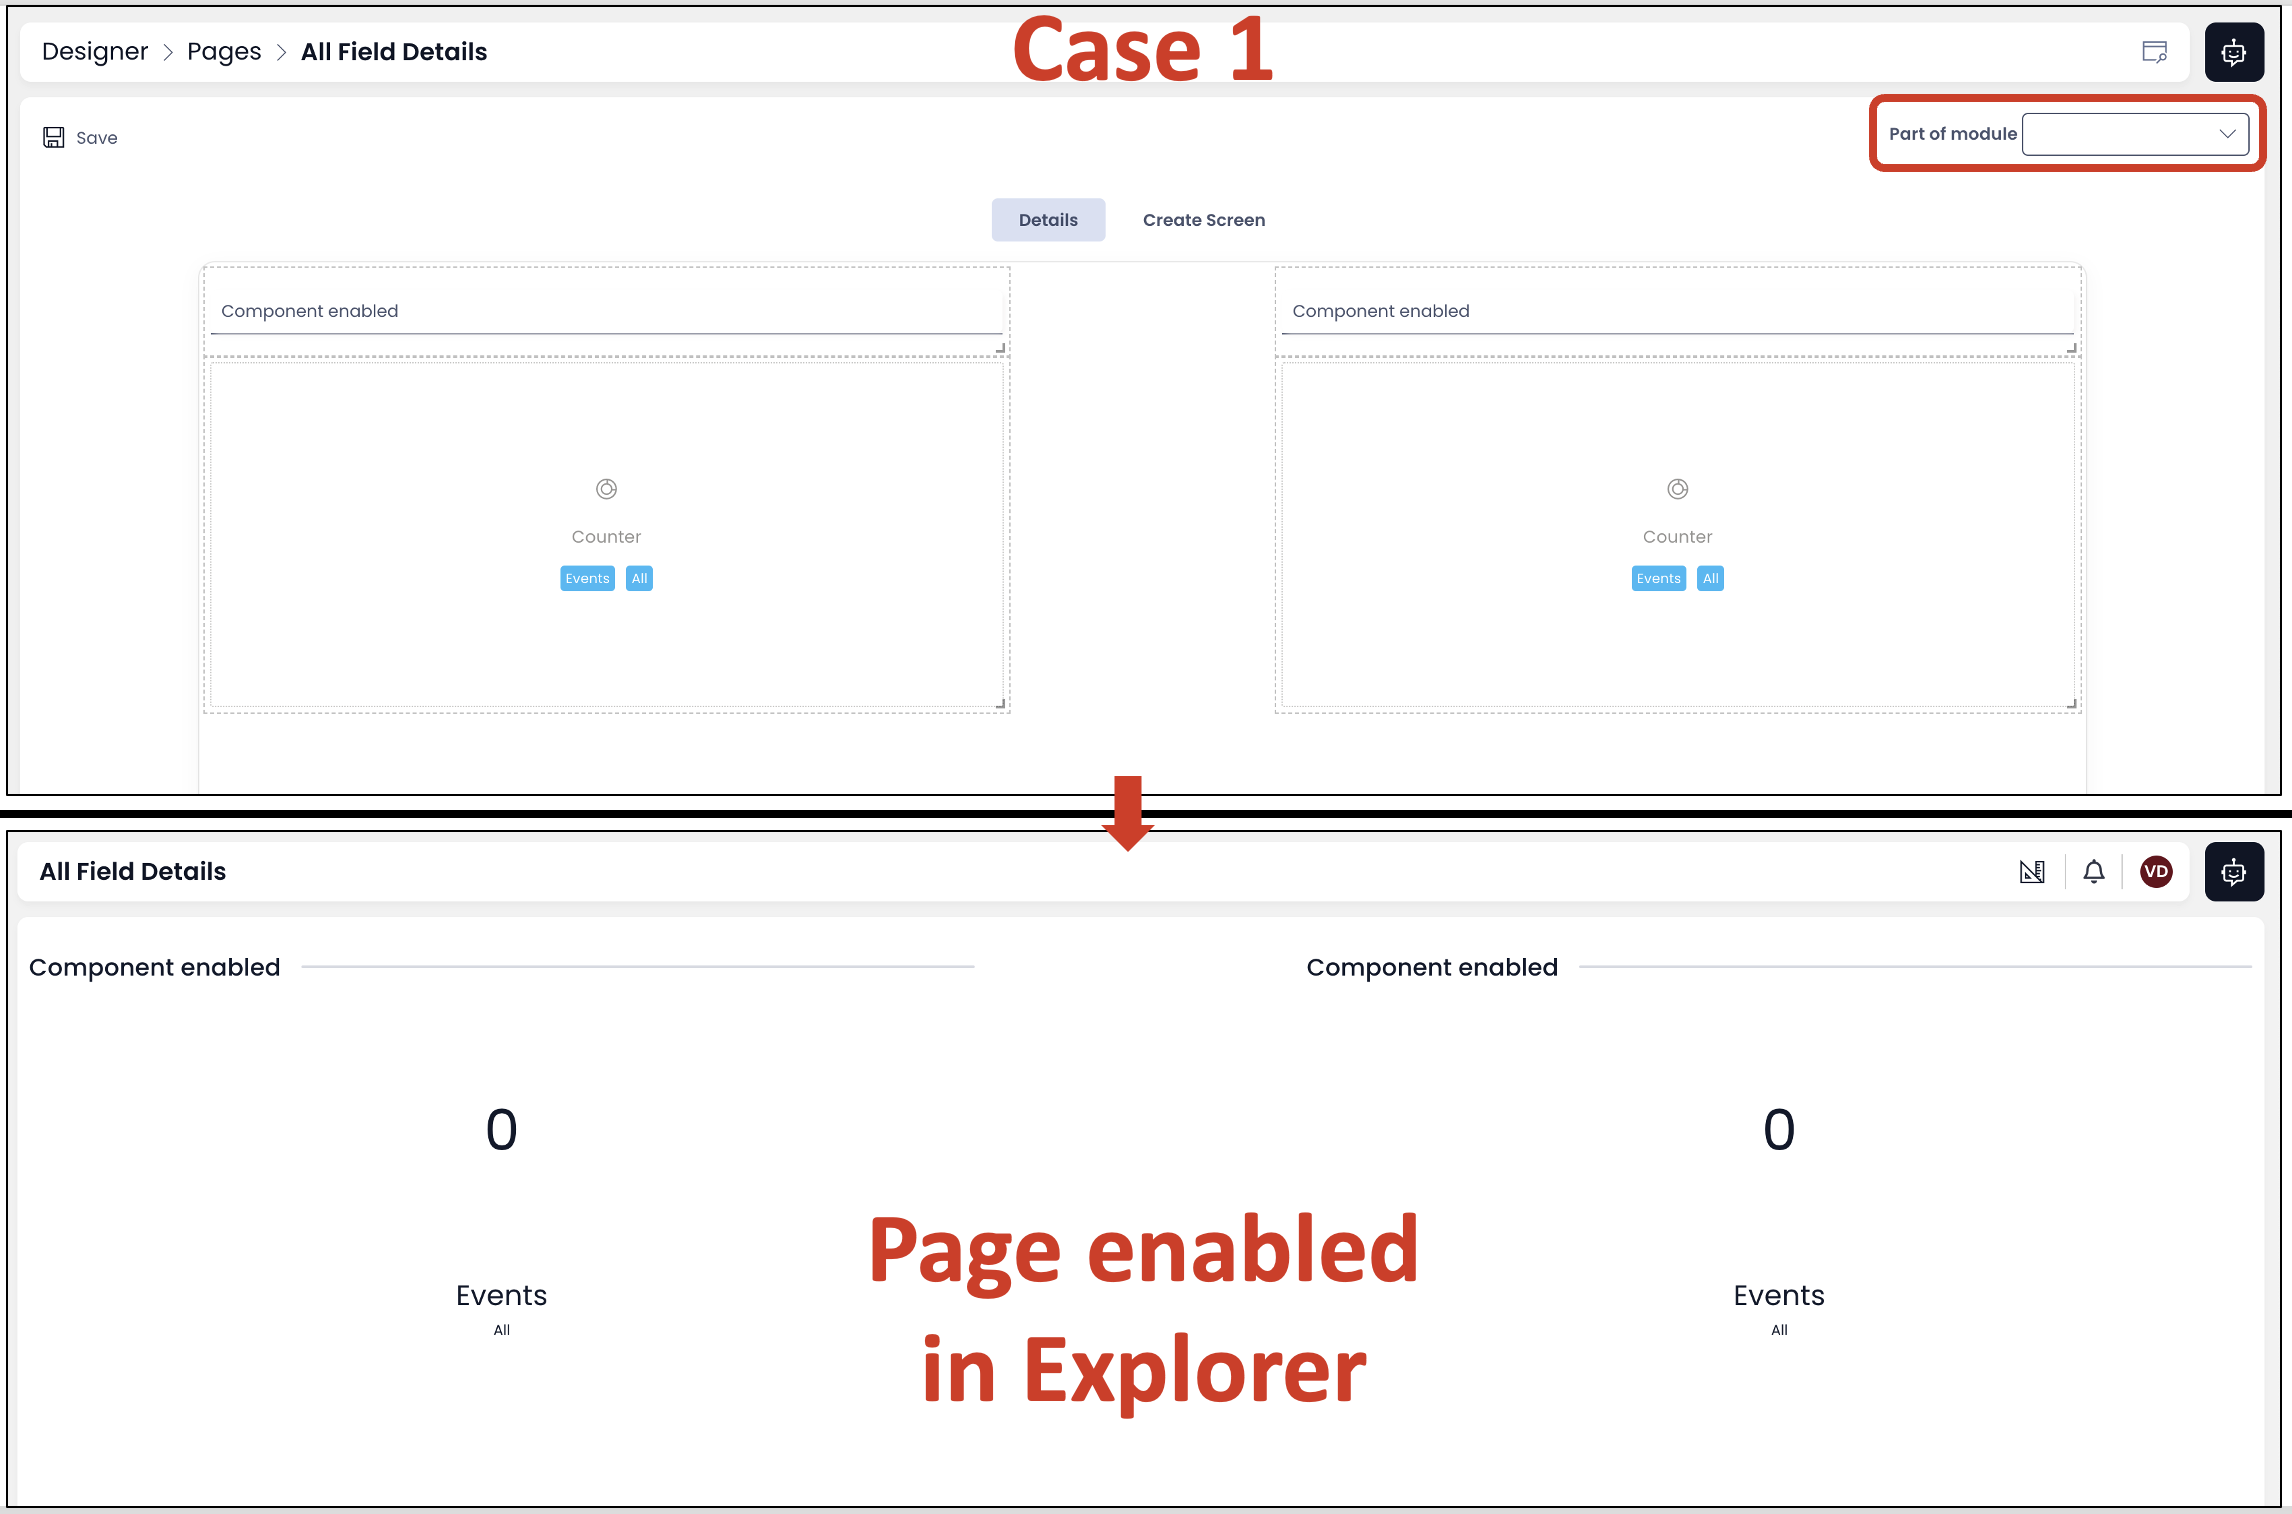
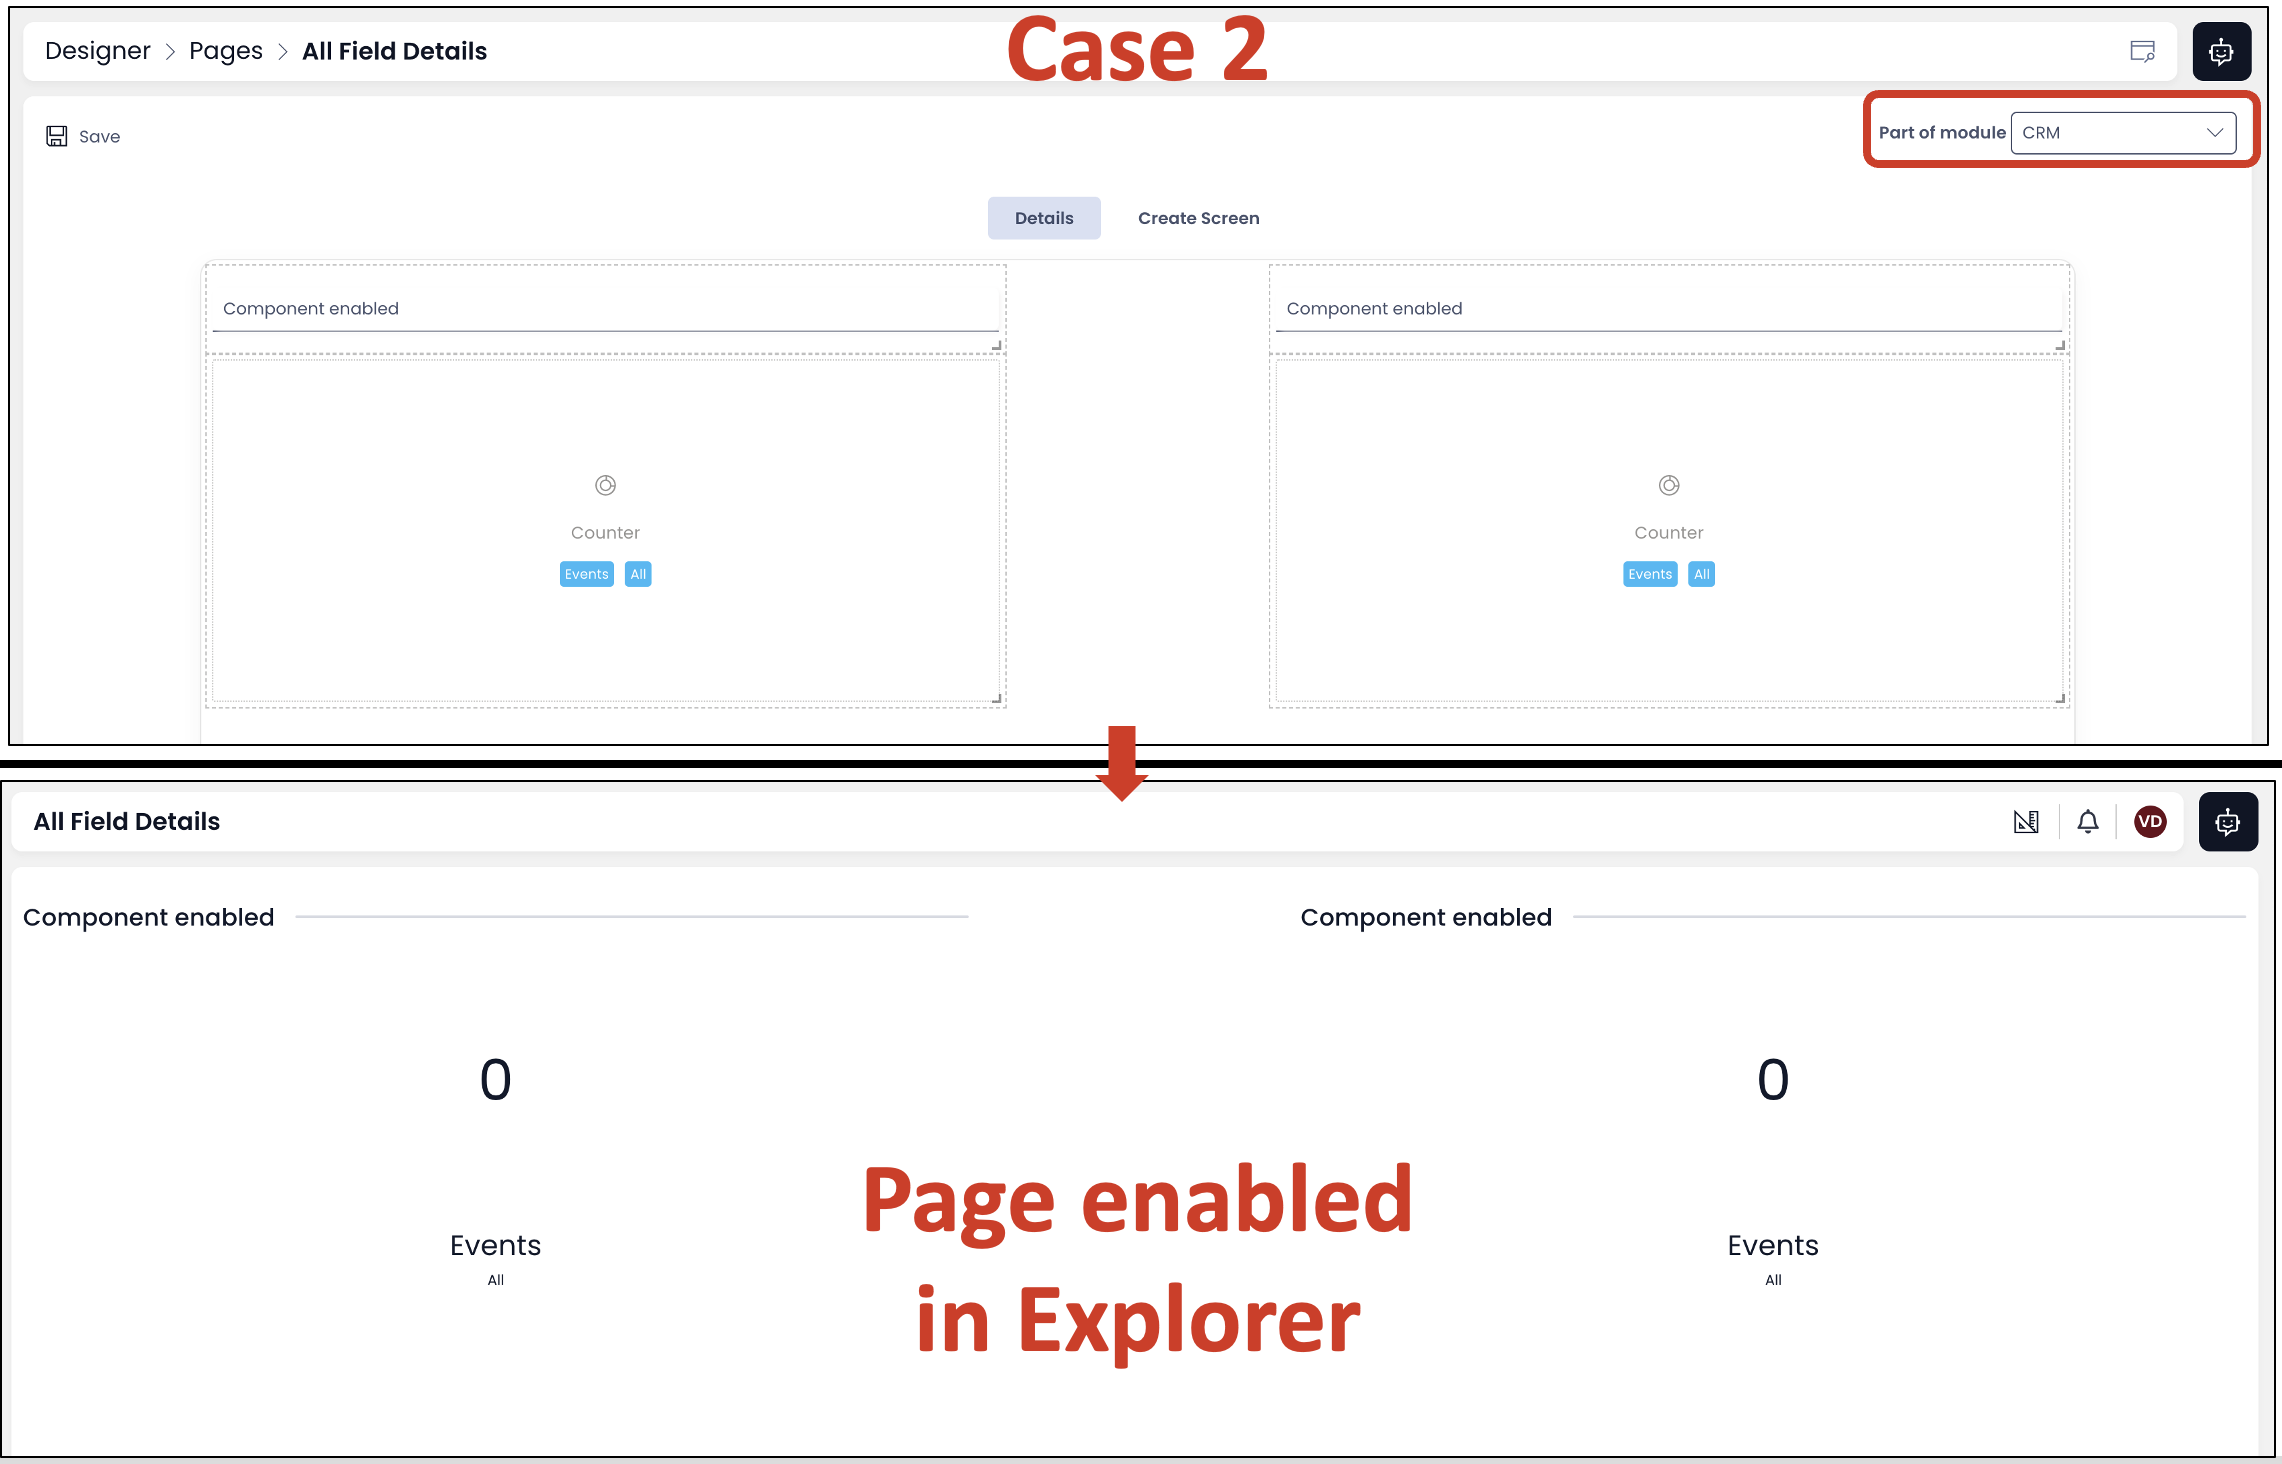
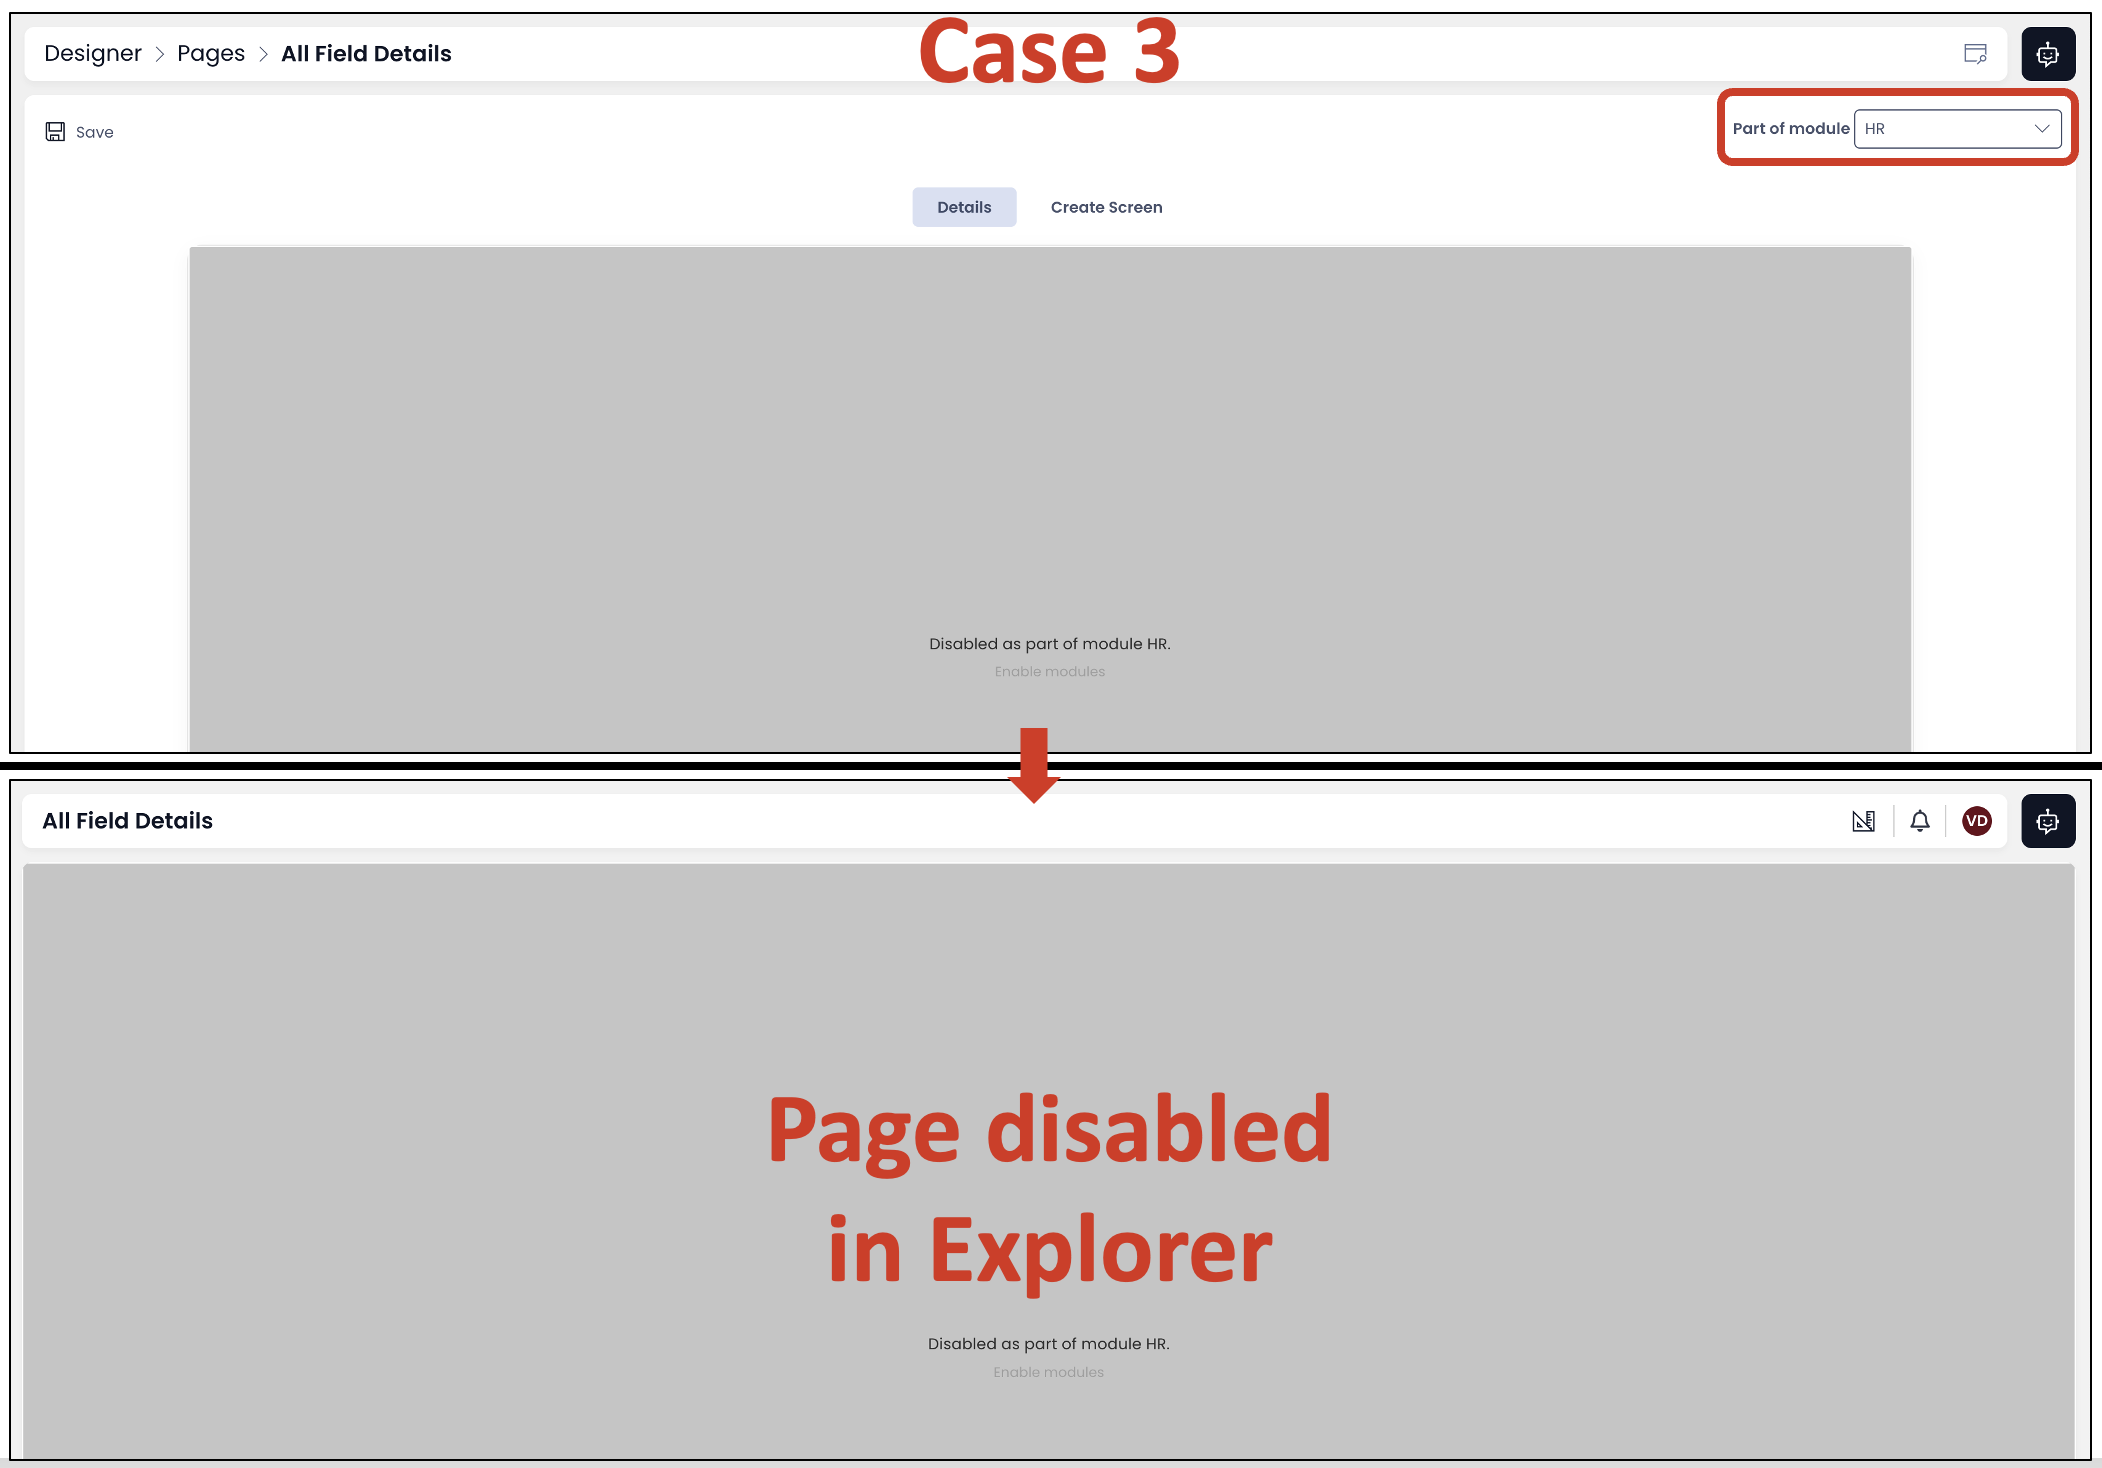
Page
Case 1: The page is not associated to any module.
Result - Page displays as configured in Explorer.
Case 2: The page is associated to CRM module.
Result - The page displays as CRM is in enabled state.
Case 3: The page is associated to HR module. Result - The page is disabled as HR is in disabled state.
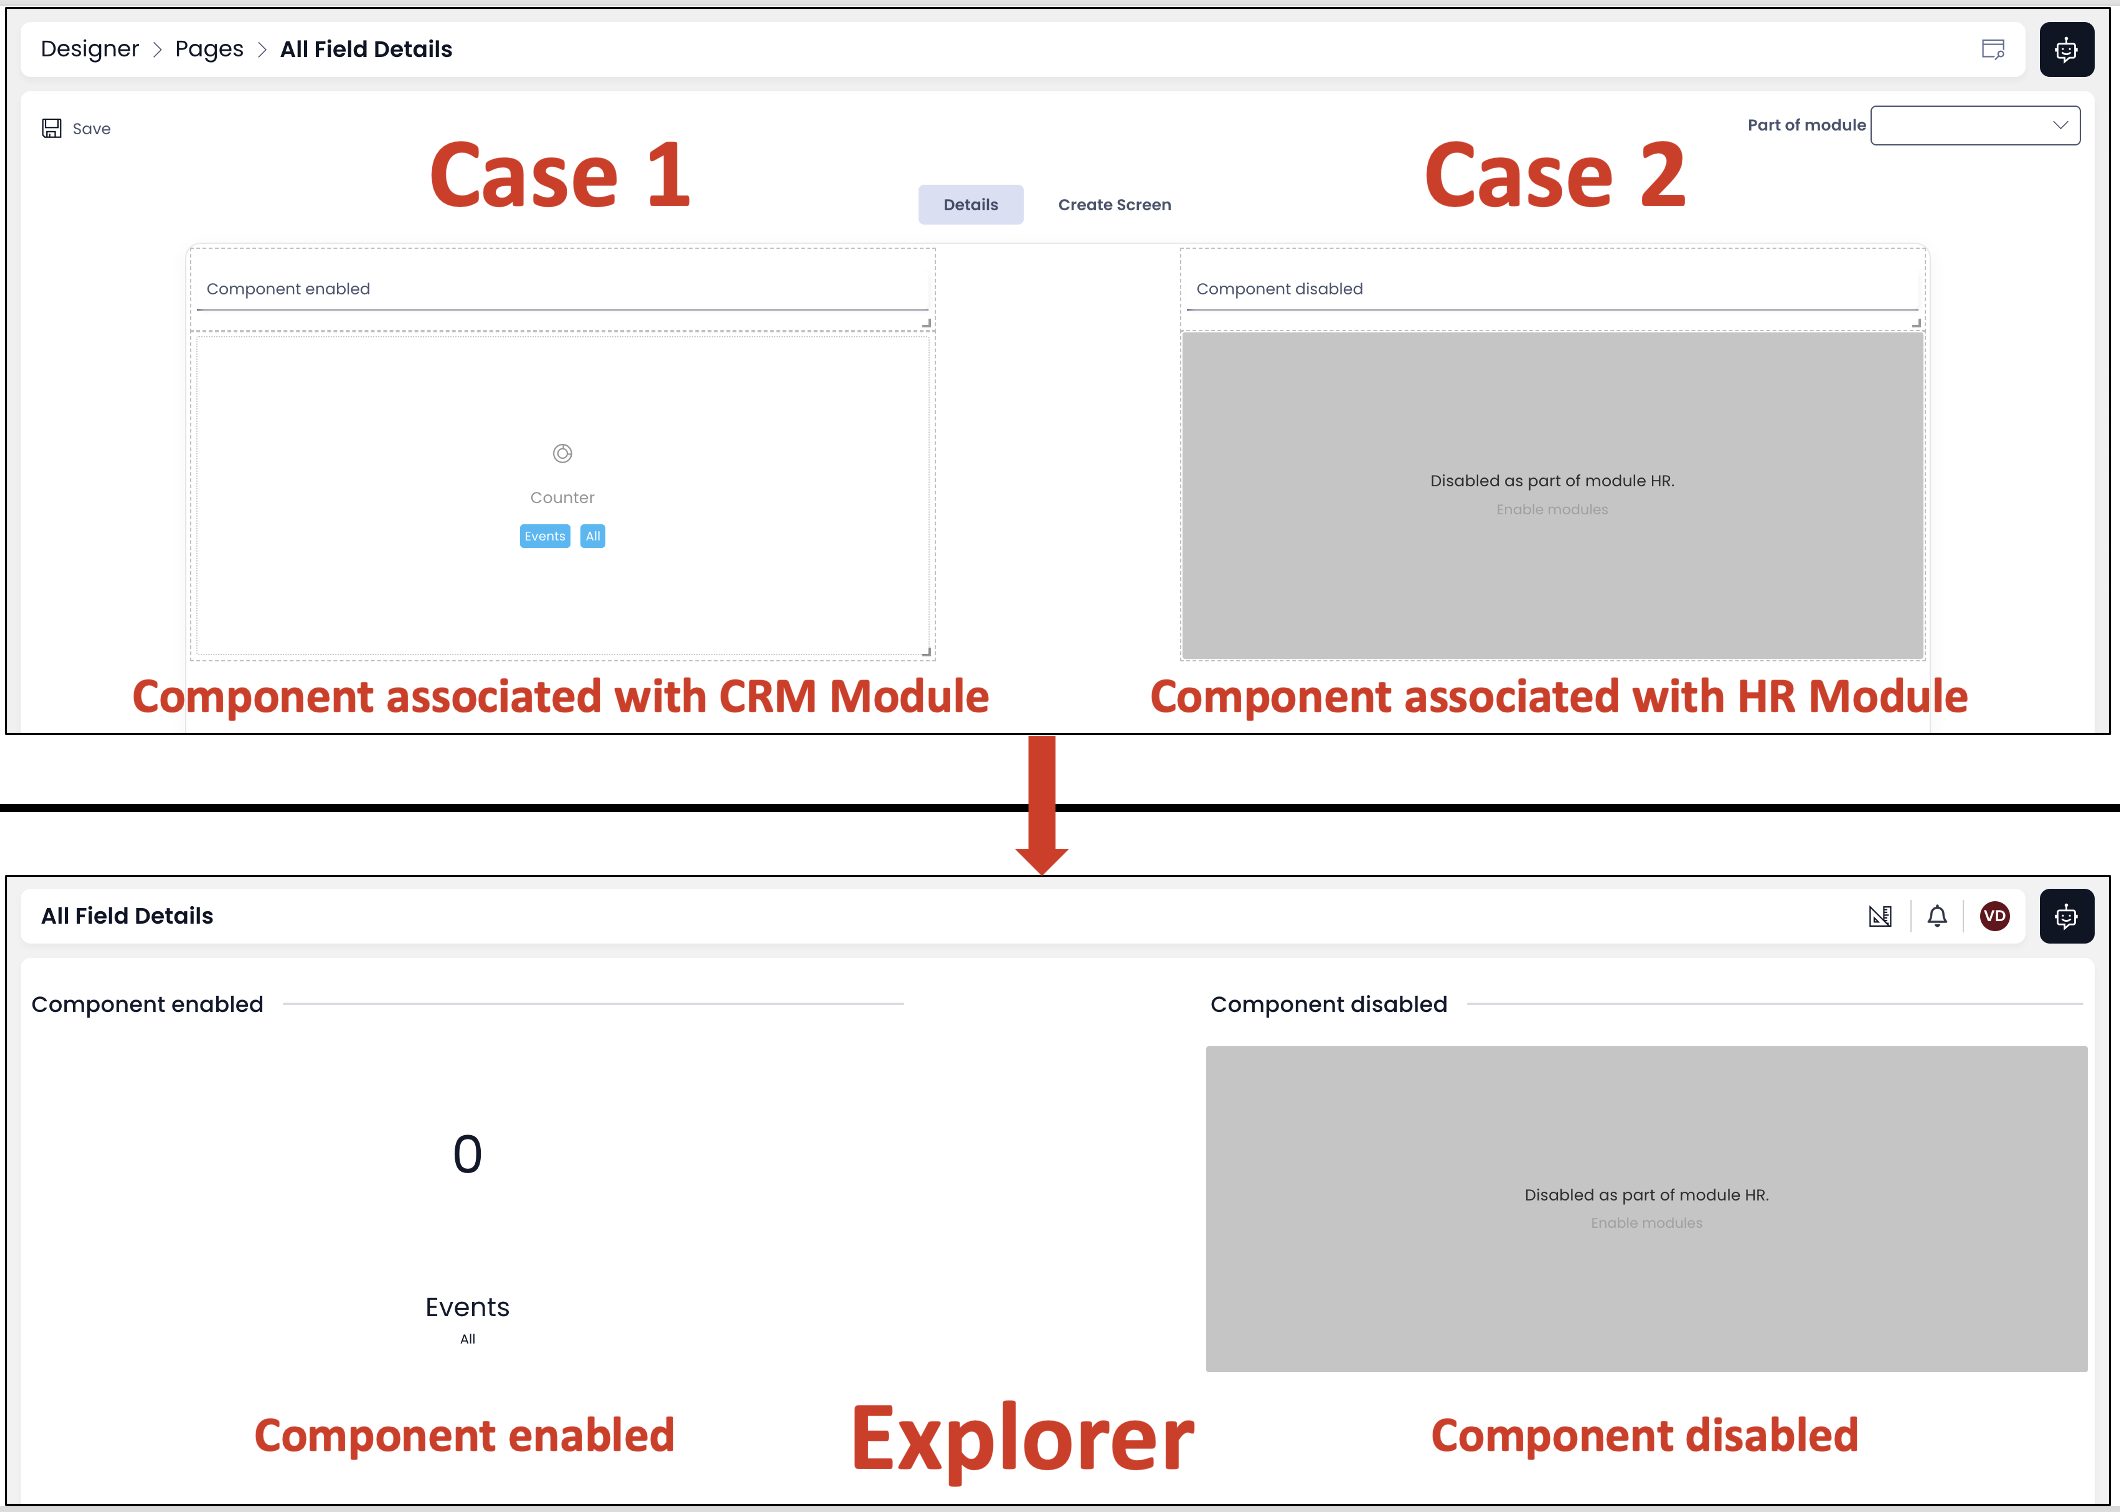
Component
Case 1: The component is associated to CRM module.
Result - The component displays as CRM is in enabled state.
Case 2: The component is associated to HR module. Result - The component is disabled as HR is in disabled state.