Items
First, let's navigate to the Employees table in Rapid Business.
-
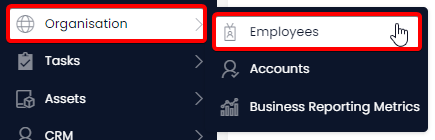
Navigate to the Assets page by clicking on Human Resources > Employees in the Explorer side bar. Alternatively, your site may contain an Organisation folder at the top of the Sidebar that also contains a link to the Employees page.
-
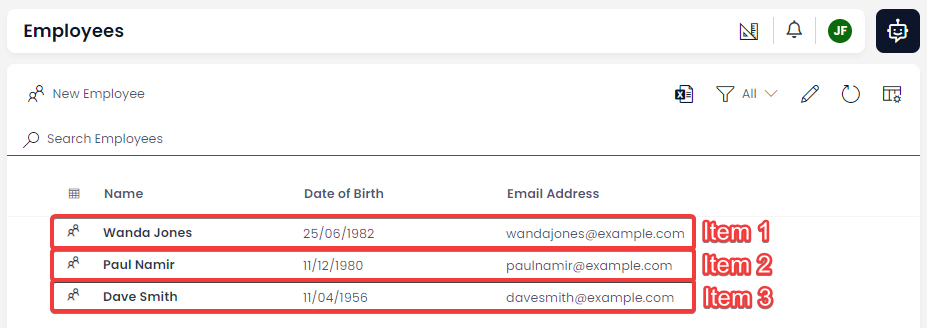
You will see the Employees table here. Your table may not contain any items yet, but we will discuss how to add items to a table in just a moment.
Creating Items
-
When viewing a table, you will be able to click the New X button, where X is the name of the item you will be creating. Since we are on the Employees table, we will be creating a new employee item.
-
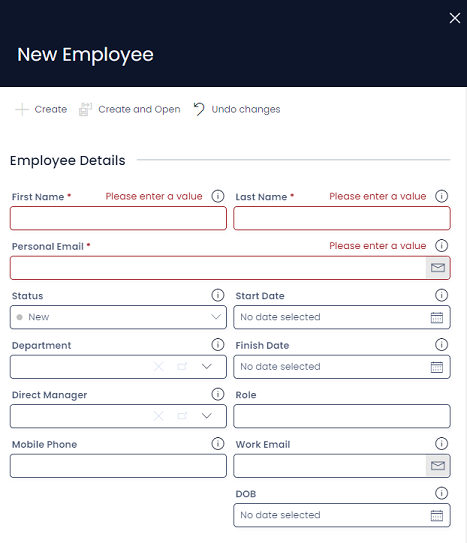
After you click on New Employee, a side panel will open where you can enter the relevant data for this new item. (To maintain good bookkeeping practices, it is recommended to enter as much information as possible).
-
Once you have entered your data, click on Create
Editing Items
There are several ways to open an item to view or edit it.
| Method | Example | Description |
|---|---|---|
| Clicking the Icon |  | We can click on the item's icon. This is a small image on the far left side of the item row. The icon will become underlined, and your mouse cursor will change to a hand to indicate that this is a hyperlink to another webpage. |
| Clicking the Title Column | We can also press the title column of the item. The title of an item is emboldened, and an underline will appear when your mouse hovers over it. | |
| Double-Clicking on the Row | Alternatively, you can double-click anywhere on an item's row, and the item will open. The item's row will become highlighted in light grey when your mouse hovers over it. |
Editing Fields on an Item's Page
Note in the screenshot below that once we open an item, the item's data is no longer arranged as columns. This is called the Item Page, and it is the main method for users to edit data on an item.
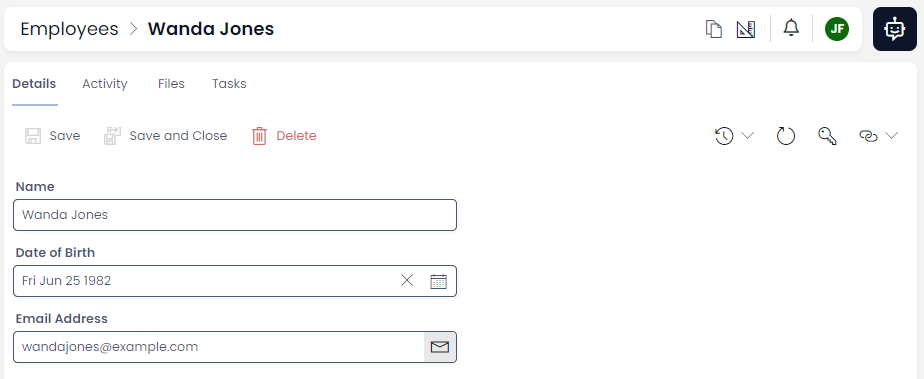
You will notice that the Columns we created (Name, DOB, and Email) have changed appearance. These boxes, where data can be typed or entered, are called Fields. All columns created by your system administrator can appear as a Field.
This is also where any fields that may have been hidden from view in the table can be viewed and edited.
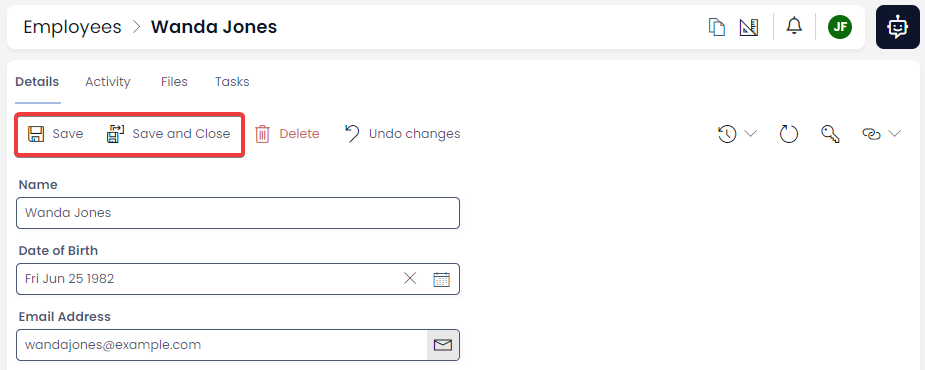
Saving Changes
Any changes made to an item will need to be saved before they will take effect. To save the changes to an item, press the Save button, or the Save and Close button in the Command Bar.
Your system administrator can also ensure that certain menu actions will prompt you to save your changes before you are navigated to a different page.
Deleting Items
Avoiding Deleting Where Possible
Often, you should avoid deleting items. For example, if you had a employee leave the company, it might be tempting to delete their item from the Employees table. However, this can cause problems:
- Other items (such as the projects the employee was working on) might be linked to that employee via Lookup Fields, or Linked Items. Those projects will now have no employee assigned to them.
- If payroll needs to contact a past employee, this will be difficult if their item is deleted.
Instead of deleting an item, you could ask your System Administrator to ensure that the relevant item contains a Status column. Here, you can set the item from Active to Inactive.
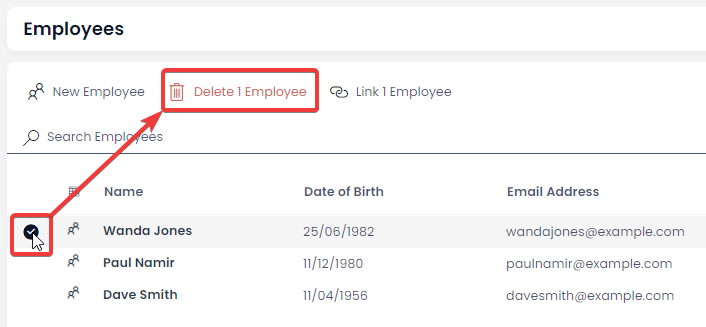
Deleting Items via Tables
-
Select the item or items that you wish to delete
-
In the Command Bar, note that the red button labelled Delete X has appeared.
-
Press Delete.
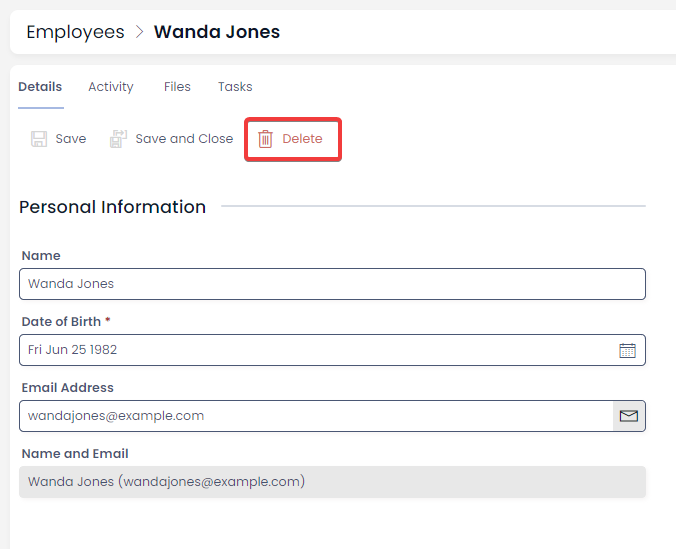
Deleting Items via Pages
-
Open the item
-
In the Command Bar, note that the red button labelled Delete is present.
Linking Items Together
It is possible to link an item to other items. For example, instead of typing in the name of our employee's manager, it would be better if we could link this employee item to another employee who is their direct manager.
There are several methods for doing this, but for today we will just look at one method: the lookup field.

We can click on the Direct Manager lookup field to change this employee's manager, or we can delete any data in this field, so this employee no longer has a manager.
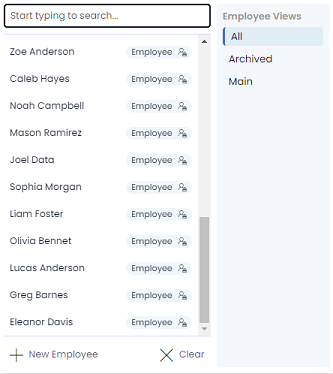
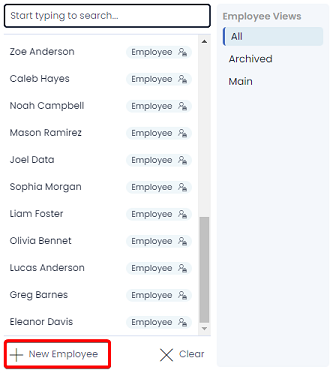
Notice that this lookup panel which opens is just a simplified way of displaying the employee table? I can search for an employee, select them, and then the field will display that employee's name here.

On the right-hand side, you can see the table views which allow us to filter our data, and the search bar to search for a particular employee.
So, the lookup component is like a tunnel or a portal into another table, and we can connect two items on different tables using this component.
What if I haven’t created the Employee yet, and I need to link to them? Well, the lookup field allows us to create new items by clicking on the field, and then pressing “New Employee”.
Finally, I can also click this “go to” button, which will take me to the item page for the manager.

Further Reading
- There is exhaustive documentation on items and how they work in the User Manual